
Nantucket Tank Top Free Crochet Pattern
/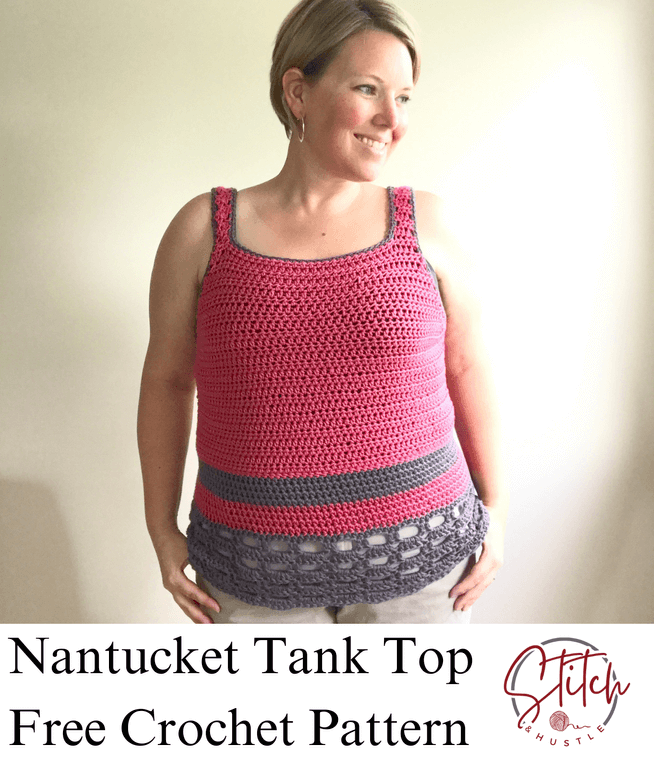
Get ready for summer fun with our newest free crochet pattern - the Nantucket Tank Top! With fun color details and a sweet lace panel, you’ll meet the season in style.
Read MoreGet ready for summer fun with our newest free crochet pattern - the Nantucket Tank Top! With fun color details and a sweet lace panel, you’ll meet the season in style.
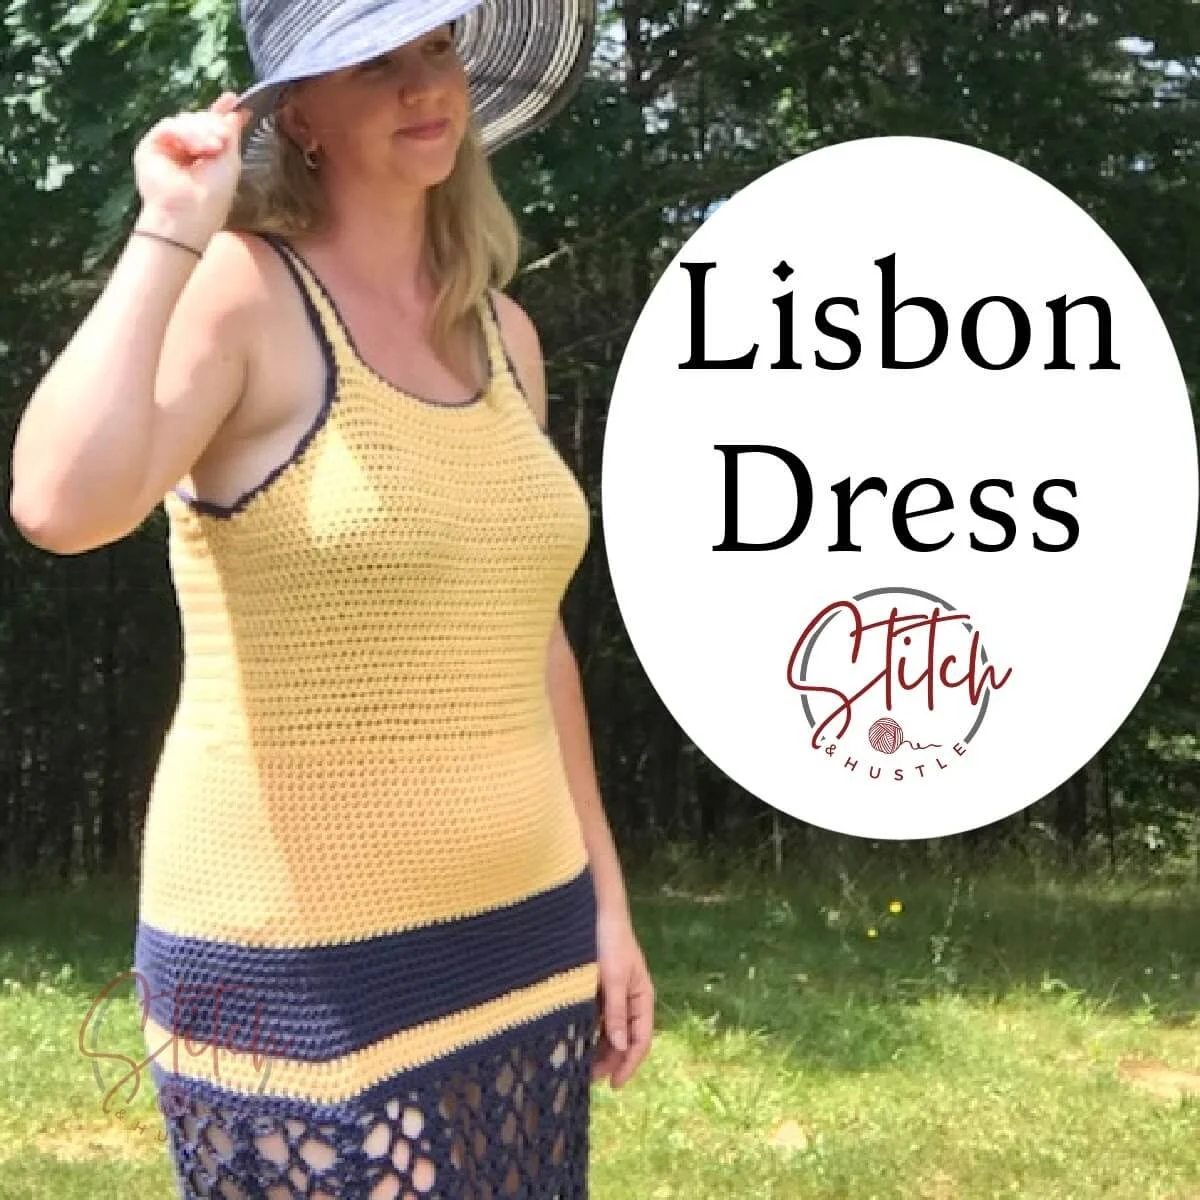
Read MoreIf you’ve been on the hunt for the perfect summer crochet project, let me introduce you to the Lisbon Sun Dress Free Crochet Pattern! It’s our newest free crochet pattern that’s super cute, easy to wear, and just breezy enough for those hot summer days.
Read MoreWrap yourself in the squishy loops of the cluster stitch with our newest free crochet pattern.
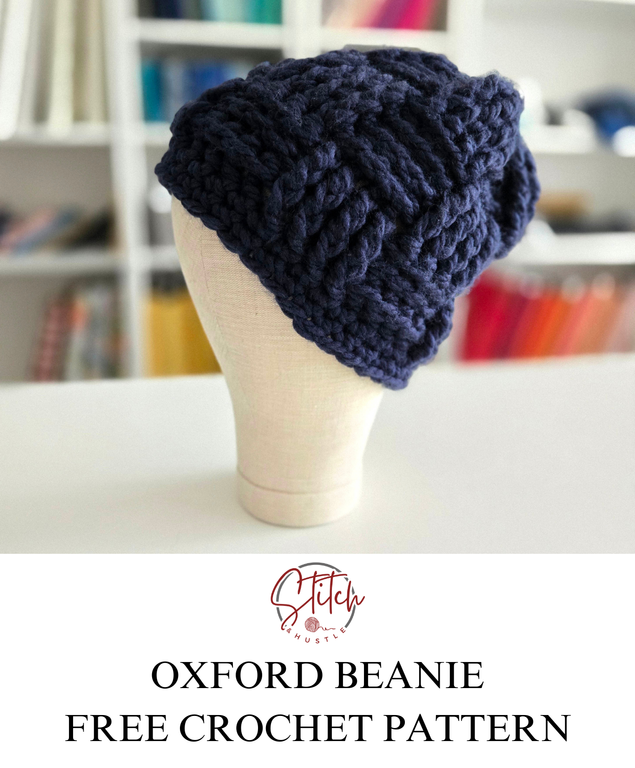
Read MoreMeet your new favorite chunky beanie! The Oxford Chunky Basketweave Beanie free crochet pattern is here with a beautiful texture that will come together in a flash. Get ready to make a bunch of these beauties!
Read MoreIt’s here - one of my favorite cotton patterns - the Obi Cardigan. It’s perfect for those in-between weather days when it’s not quite cold but still a little chilly. PLUS, it’s super quick and easy to make! It pairs with any tank top well.
Let me tell you all about it!

Why You’ll Love the Obi Cardigan
-It’s Fast & Easy: Whether you’re a crochet pro or just starting out, this cardigan comes together super quickly.
-Fits All Shapes & Sizes: The Obi Cardigan is written for SIX sizes, so there can be one for everyone. It’s got a relaxed, comfy fit that’s just perfect for layering, no matter your shape.
-Cotton Yarn Magic: I used soft cotton yarn for this pattern - it’s lightweight, breathable, and works great for transitional weather. Not too heavy, not too light, just right!
-Simple Yet Stylish: The design is straightforward, but the puff stitch gives it a little extra texture and charm. It’s a versatile piece you can wear on casual days or dress it up when you need to.
This cardigan is just what you need when the weather can’t make up its mind. It’s warm enough to take the chill off in the mornings, but light enough to wear when the sun starts shining. Trust me, it’ll quickly become your go-to layering piece!
AND, the Obi Cardigan has a fantastic texture - the puff stitch! The puff stitch is one of those little things that adds a lot of punch to a project. It’s textured, squishy, and just looks so pretty! I love this stitch so much (check out the Townsville Top, Gables Wrap, Manko Puff Stitch Infinity Scarf, Helix Puff Stitch Beanie) and am so excited to share it with you in a cardigan!
Supply List:
Category #4 light worsted weight yarn (Wool And The Gang Shiny Happy Cotton in sample.)
Main Color: 1100 (1200, 1330, 1490, 1600, 1880) yds / 1006 (1098, 1217, 1363, 1464, 1720) m
Contrast Color: 135 (150, 170, 190, 210, 235) yds / 124 (138, 156, 174, 193, 215) m
Crochet Hook Size I / 5.5 mm
Tapestry needle to weave ends
Tape Measure
Fasteners or safety pins
Button of Choice

GAUGE: 4” sq = 7 sts x 8 rows in *PS stitch, ch1*
Size: Extra Small (Small, Medium, Large, 1X, 2X)
Finished Measurements:
Bust: 31.5 (34.5, 37.5, 41, 44.5, 48.5)" / 80 (87.63, 95.25, 104.14, 113.03, 123.19) cm
Stitches Used / Abbreviations:
fsc – foundation single crochet
sc - single crochet
dc – double crochet
PS – Puff Stitch
Puff Stitch (PS):
Wrap yarn over hook; insert hook into ch sp, wrap yarn over hook & pull through leaving 3 loops on hook
Wrap yarn over hook; insert hook into same ch sp, wrap yarn over hook & pull through leaving 5 loops on hook
Wrap yarn over hook and pull through ALL 5 loops to create the “puff” stitch
NOTES:
This pattern is written for Adult Woman Extra Small (Sizes Small, Medium, Large, 1X & 2X in parenthesis)
I used a button that fits the spacing between stitches. You can use any size button you like and may need to add a button loop.
This pattern is made in two panels for front, 1 back panel and two sleeves. 5 separate pieces.
BLOCK ALL PIECES BEFORE ASSEMBLY.

PATTERN
BACK PANEL – BEGIN WITH MAIN COLOR:
Band
Row 1: Fsc x 10 (alternate: ch 9, turn, ch 1, 9 sc across), turn.
Row 2: Ch 1, 9 x sc in back loop only.
Rows 3- 55 (61, 67, 73, 79, 85): Repeat Row 2
Do not cut yarn – you will go directly to work the body.
Body
Row 1: Ch 1 (acts as first sc), sc across placing 1 sc in the side of each row of band for a total of 55 (61, 67, 73, 79, 85) sc, turn.
Row 2: Ch 2 (acts as dc), *PS in next sc, ch 1, sk next sc,* Repeat from * to * to last 2 sc, PS, in next sc, dc in last sc, turn. 27 (30, 33, 36, 39, 42) PS.
Row 3: Ch 3 (acts as dc + ch 1), * PS in ch-1 sp, ch 1, skip PS* Repeat from * to* to last dc, dc in dc, turn. 26 (29, 32, 35, 38, 41) PS.
Rows 4-11: Repeat Rows 2-3, alternating.

Change to Contrast Color
Rows 12-16: Repeat Rows 2-3, alternating.
Change BACK to MAIN Color
Rows 17 - 22: Repeat Rows 3-2, alternating.
Shape Armholes
Row 23: Ch 3, skip next PS, * PS in ch-1 sp, ch 1, skip PS* Repeat from * to* to last ch 1 and PS, PS in ch-1, skip PS, dc in ch-3, turn. 26 (29, 32, 35, 38, 41) PS remain.
Rows 24-26 (26, 26, 28, 30, 30): Ch 3, skip next PS, * PS in ch-1 sp, ch 1, skip PS* Repeat from * to* to last ch 1 and PS, PS in ch-1, skip PS, dc in dc, turn. 23 (26, 29, 30, 31, 34) PS remain, 48 (54, 60, 62, 64, 70) total sts.
4 (4, 4, 6, 8, 8) sts decreased at each armhole.
Rows 27 (27, 27, 29, 31, 31)-36 (37, 38, 38, 39, 40): Repeat Rows 2-3 of Body (Work even in PS pattern)
Fasten off.

FRONT - MAKE TWO PANELS:
Band – Begin with Main Color
Row 1: Fsc x 10 (alternate: ch 9, turn, ch 1, 9 sc across), turn.
Row 2: Ch 1, 9 x sc in back loop only.
Rows 3 - 29 (31, 35, 37, 41, 43): Repeat Repeat Row 2
Do not cut yarn – you will go directly to work the body.
Body
Row 1: Ch 1 (acts as first sc), sc across placing 1 sc in the side of each row of band for a total of 29 (31, 35, 37, 41, 43) sc, turn.
Row 2: Ch 2 (acts as dc), skip first sc, *PS in next sc, ch 1, sk next sc,* Repeat from * to * to last sc, dc in last sc, turn. 14 (15, 17, 18, 20, 21) PS.
Row 3: Ch 2 (acts as dc), * PS in ch-1 sp, ch 1, skip PS* Repeat from * to* to last dc, dc in dc, turn. 13 (14, 16, 17, 19, 20) PS.
Rows 4-11: Repeat Rows 2-3, alternating.

Change to Contrast Color
Rows 12-16: Repeat Rows 2-3, alternating.
Change BACK to Main Color
Rows 17 - 22: Repeat Rows 3-2, alternating.
Shape Armholes & Begin Shape Neck:
Row 23: Ch 3, skip next PS, * PS in ch-1 sp, ch 1, skip PS* Repeat from * to* to last ch 1 and PS, PS in ch-1, skip PS, dc in ch-3, turn. 13 (14, 16, 17, 19, 20) PS
Rows 24-26 (26, 26, 28, 30, 30): Ch 3, skip next PS, * PS in ch-1 sp, ch 1, skip PS* Repeat from * to* to last ch 1 and PS, PS in ch-1, skip PS, dc in dc, turn. 4 (4, 4, 6, 8, 8) sts decreased at both armhole and neck edges.
Armhole Shaping is complete; continue Shaping Neck.
Row 27 (27, 27, 29, 31, 31): Ch 3, sk next PS, * PS in ch-1 sp, ch 1, skip PS* Repeat from * to * to ch-3, dc in ch-3, turn. 1 st decreased at neck edge.
Row 28 (28, 28, 30, 32, 32): Ch 2, * PS in ch-1 sp, ch 1, skip PS * Repeat from * to * to last ch-1 and PS, PS in ch-1 sp, skip last PS, dc in ch-3, turn. 1 st decreased at neck edge.
Rows 29 (29, 29, 31, 33, 33) - 32 (32, 32, 34, 36, 36): Repeat last 2 rows, alternating.
Rows 33 (33, 33, 33, 37, 37) - 36 (37, 38, 38, 39, 40): Repeat Rows 2-3 of Body (Work even in PS pattern)
Fasten off.

SLEEVE – MAKE TWO
SLEEVE NOTES:
You will begin working in the round and NOT turning but joining your rows
At ROW 21 you will NOT join and begin to decrease and turn after each row. Pattern written for 3⁄4 sleeve length with note for full length.
Cuff
Row 1: Fsc x 10 (alternate: ch 9, turn, ch 1, 9 sc across), turn.
Row 2: Ch 1, 9 x sc in back loop only.
Rows 3-30 (30, 32, 34, 34, 36): Repeat Row 2.
Do not cut yarn – you will go directly to work the body.
Sleeve Body
Round 1: Ch 1 (acts as first sc), sc across placing 1 sc in the side of each row of band for a total of 30 (30, 32, 34, 34, 36) sc,
Round 2: Ch 2, PS in same, ch 1, skip first sc, *PS in next sc, ch 1, skip next sc,* Repeat from * to * to end sl st to top of first PS. 15 (15, 16, 17, 17, 18) PS.
Round 3: Sl St over to ch 1, [PS, ch 1, PS] in same * PS in ch-1 sp, ch 1, skip PS* Repeat from * to* to end then PS, ch in last. 17 (17, 18, 19, 19, 20) PS.
Rounds 4-5: Rep Round 2.
Round 6: Rep Round 3 increase. 19 (19, 20, 21, 21, 22) PS.
Rounds 7-8: Rep Round 2.
Round 9: Rep Round 3 increase. 21 (21, 22, 23, 23, 24) PS.
Large (1X, 2X) Sizes Only:
Rounds 10-12: Repeat Rounds 4-6. 25 (25, 26) PS.
1X (2X) Size Only:
Rounds 13-15: Repeat Rounds 4-6. 27 (28) PS.

All Sizes:
21 (21, 22, 25, 27, 28) PS.
Rounds 10 (10, 10, 13, 16, 16)-20: Repeat Round 2.
*NOTE: This pattern is written for 3⁄4 sleeves. For full sleeve, continue to repeat Round 2 here 8 more times or to desired length before shaping cap*
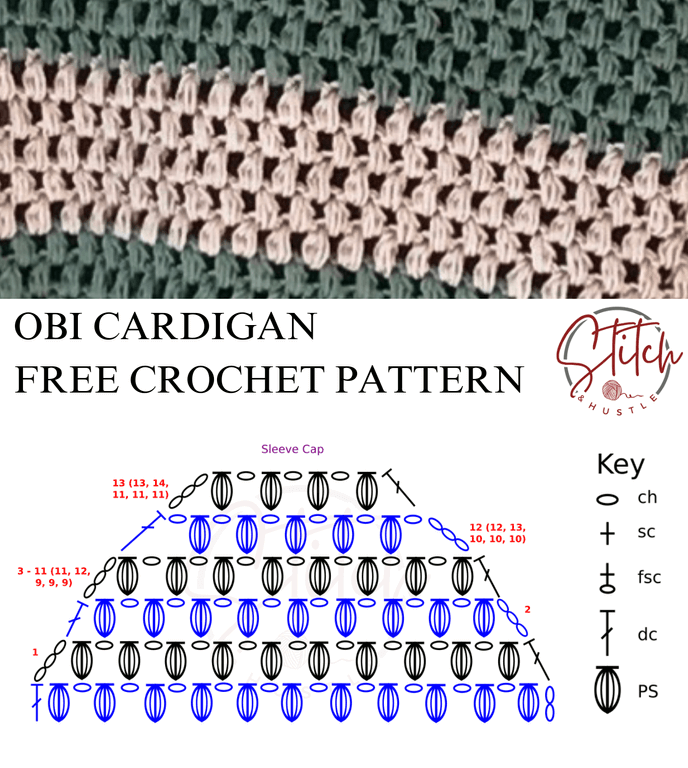
Shape Sleeve Cap
Row 1: Ch 3, sk next PS, * PS in ch-1 sp, ch 1, skip PS* Repeat from * to* to last ch 1 and PS, PS in ch-1, sk PS, dc in last, turn. 20 (20, 21, 24, 26, 27) PS remain, 2 sts decreased.
Row 2: Ch 3, skip next PS, * PS in ch-1 sp, ch 1, skip PS* Repeat from * to* to last ch 1 and PS, PS in ch-1, skip PS, dc in dc, turn. 19 (19, 20, 23, 25, 26) PS remain, 2 sts decreased.
Rows 3-11 (11, 12, 9, 9, 9): Repeat row 22 (decreasing 1 PS/2 sts each row). 10 (10, 10, 16, 18, 19) PS remain.
Row 12 (12, 13, 10, 10, 10): Ch 4, skip [PS, ch 1, PS], * PS in ch-1 sp, ch 1, skip PS * Repeat from * to * to last 2 PS, skip [PS, ch 1, PS], dc in ch-3, turn. 7 (7, 7, 13, 15, 16) PS remain, 4 sts decreased.
Row 13 (13, 14, 11, 11, 11): Ch 3, skip ch 1 and PS, * PS in ch-1 sp, ch 1, skip PS * Repeat from * to * to last PS, skip last PS and ch 1 sp, dc in ch-3, turn. 4 sts decreased.
Rows 14 (14, 15, 12, 12, 12) – 14 (15, 16, 16, 17, 18): Repeat last 2 rounds until 5 sts remain.
Fasten off.
BLOCK ALL OF YOUR PIECES BEFORE ASSEMBLY
ASSEMBLY: ***Same for ALL sizes***
BODY ASSEMBLY:
Marry your back panel to front panels INSIDE OUT
Using your stitch marker or fastener, pin the panels together at Row 1 of Armhole Shaping Beginning at bottom ribbing, connect the panels with either mattress stitch or sc up the seam When you get to fastener, fasten off.


SLEEVES ASSEMBLY:
Using your fasteners, attach your sleeve on the RIGHT SIDE to the body.
Working on the inside of the garment, beginning at bottom center of armhole, attach sleeve by either whip stitch or sc around
Turn right side out and affix your button of choice to the top of the front panel just before the neck decrease.
If you’ve been on the hunt for the perfect summer crochet project, let me introduce you to the Lisbon Sun Dress Free Crochet Pattern! It’s our newest free crochet pattern that’s super cute, easy to wear, and just breezy enough for those hot summer days.
Hey, crochet friends! I’ve got something exciting to share today just as we head into warmer weather - the Obi Tank Top pattern! It’s a super cute, super quick project that’s perfect for the warmer months. If you’re looking for a comfy, stylish piece to add to your spring and summer wardrobe, this one’s for you!

- It works up fast: This is a great pattern if you want a finished make in a flash. We’re using DK weight yarn, which is lightweight and works up quickly and gives you great drape. Before you know it, you’ll have a brand-new tank ready to wear!
- Wide Straps (Goodbye, Bra Strap Woes!): One of the things I love most about this top is the wide straps. Not only do they give the tank a flattering, comfy fit but they also hide your bra straps! (No more tugging at your top to make sure your straps aren’t showing.)
- Perfect for Spring & Summer: Made with breathable cotton yarn, this tank is ideal for the warmer weather. Whether you’re out running errands, hanging out with friends, or just enjoying the sunshine, this tank will keep you cool and cute.
- Free Pattern, Y’all!: I want everyone to be able to make this, so I’m offering the Obi Tank Top pattern for free! It’s beginner-friendly, and I’ve made sure the instructions are clear and easy to follow, so even if you’re new to crochet, you’ll have no problem.
AND, the Obi Tank Top has a fantastic texture - the puff stitch! The puff stitch is one of those little things that adds a lot of punch to a project. It’s textured, squishy, and just looks so pretty! I love this stitch so much (check out the Townsville Top, Gables Wrap, Manko Puff Stitch Infinity Scarf, Helix Puff Stitch Beanie).
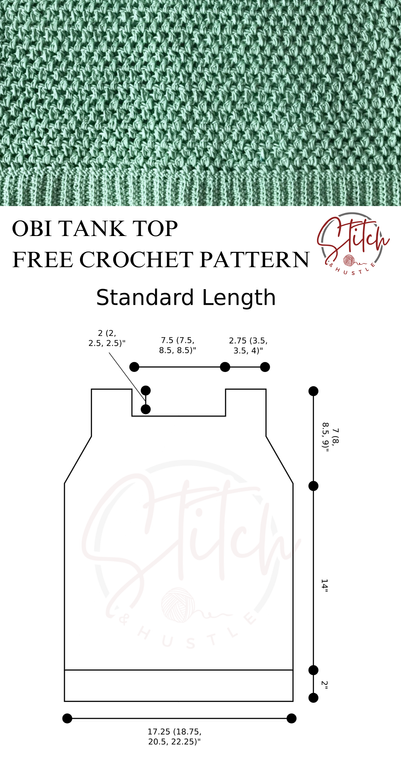
AND the pattern is written for two lengths, cropped and standard. So you can make the Obi Tank Top into the perfect warm-weather closet staple for YOU!
Supply List:
Category #3 DK weight Yarn (Wool And The Gang Shiny Happy Cotton in Sample. KnitPicks CotLin also recommended.)
Crop length: 700 (775, 870, 970) yds / 640 (709, 796, 887) m
Standard length: 880 (970, 1090, 1210) yds / 805 (887, 997, 1107) m
Crochet Hook Size I / 5.5 mm
Tapestry needle to weave ends
Tape Measure
Fasteners or safety pins
GAUGE: 4”sq = 7 sts x 8 rows in *PS stitch, ch1*
Sizes: Small (Medium, Large, 1X)
Finished Measurements: Bust: 34.5 (37.5, 41, 44.5)” / 87.63 (95.25, 104.14, 113.03) cm
Stitches Used / Abbreviations:
fsc – foundation single crochet
sc - single crochet
dc – double crochet
PS – Puff Stitch
Puff Stitch (PS):
Wrap yarn over hook; insert hook into ch sp, wrap yarn over hook & pull through leaving 3 loops on hook
Wrap yarn over hook; insert hook into same ch sp, wrap yarn over hook & pull through leaving 5 loops on hook
Wrap yarn over hook and pull through ALL 5 loops to create the “puff” stitch
NOTES:
This pattern is written for Adult Woman Small. (Sizes Medium, Large &1X in parenthesis)
This pattern is written for “cropped” style. Standard version option noted.
To make this for a specific “fitted” size you will want to measure the width you want for the waist then make your initial ribbing to be one inch LESS than that measurement. You may require more yarn.
This pattern is made in two panels, front & back.
Block BEFORE assembly

PATTERN
MAKE TWO PANELS:
Band
Row 1: Fsc x 10 (alternate: ch 9, turn, ch 1, 9 sc across), turn.
Row 2: Ch 1, 9 x sc in back loop only.
Rows 3-60 (66, 72, 78): Repeat Row 2.
Do not cut yarn – you will go directly to work the body.
Body
Row 1: Ch 1 (acts as first sc), sc across placing 1 sc in the side of each row of band for a total of 60 (66, 72, 78) sc, turn.
Row 2: Ch 2 (acts as dc), skip first sc, *PS in next sc, ch 1, sk next sc,* Repeat from * to * to last sc, dc in last sc, turn. 29 (32, 35, 38) PS.
Row 3: Ch 2 (acts as dc), * PS in ch-1 sp, ch 1, skip PS* Repeat from * to* to last dc, dc in dc, turn.
Rows 4-18: Repeat Row 3.
*** NOTE: For Standard style add 8 rows here before going on ***
Shape Armholes
Row 1: Ch 3, sk next ch-1 and PS, * PS in ch-1 sp, ch 1, skip PS* Repeat from * to* to last dc, dc in dc, turn. 28 (31, 34, 37) PS remain.
Rows 2-7 (8, 9, 10): Ch 3, sk next ch-1 and PS, * PS in ch-1 sp, ch 1, skip PS* Repeat from * to* to beg ch-3, dc in top of ch 3, turn. 22 (25, 28, 31) PS remain
Row8 (9,10,11): Ch2(actsasdc),*PSinch-1sp,ch1,skipPS*Repeatfrom*to*tobegch-3,dcintopofch-3, turn.
Rows 9 (10, 11, 12)-10 (12, 12, 13): Ch 2 (acts as dc), * PS in ch-1 sp, ch 1, skip PS* Repeat from * to* to last dc, dc in dc, turn.

First Strap
Row 1: Ch 2, * PS in ch-1 sp, ch 1, skip PS* Repeat from * to* 3 (4, 4, 5) more times, dc into next ch-1 sp, turn. 4 (5, 5, 6) PS.
Rows 2-4 (4, 6, 6): Ch 2 (acts as dc), * PS in ch-1 sp, ch 1, skip PS* Repeat from * to* to last dc, dc in dc, turn.
Row 5 (5, 7, 7): Ch 1, sc in each st
Fasten off.
Second Strap
Re-attach yarn and Work Rows 1-5 (5, 7, 7) as for First Strap. At the end of last row, turn.
Then sc in each st across top of strap, 2 sc in corner st, sc down side of strap working approx 2 sc in the side of each row, sc across neckline and back up First Strap and across top of First Strap. Fasten off.

BLOCK BEFORE ASSEMBLY
ASSEMBLY: ***Same for ALL sizes***
Marry your two panels INSIDE OUT
Using your stitch marker or fastener, pin the panels together at Row 1 of Armhole Shaping beginning at bottom ribbing, connect the panels with sc up the seam
when you get to fastener, fasten off.
Whip stitch the straps together across the top sc row
TURN RIGHT SIDE OUT – weave in all ends
We are back with another amazing square for the Moogly Blanket CAL
Read MoreThe Stunning Capelet is great for every level of crocheter. It has subtle shaping and beautiful flow. It is worked up in a single piece so there is no seaming! What is super fun is how you can customize this and add more rows to the body for a longer poncho or cape.
Read MorePlease give a sunny welcome to our newest warm-weather free crochet pattern, the Coastal Tee! This unique and stylish tee boasts a combination of a boat neckline and fun wide sleeves blended with a fitted torso.
Read MoreLooking for a loose-on-gauge crochet project that’s good quirky fun and is also perfect for your next shawl along? We’re bringing you our Dragon County Shawl free crochet pattern to check those boxes!
Read MoreYour cold-weather outfits are MADE with our newest free crochet pattern, the Bella Oversized Cowl. Quick as a flash to work up, you’ll be showing off your new accessory in no time flat.
Read MoreSuper bulky yarn for the win! Our newest free crochet hat pattern will have your head snuggly in no time.
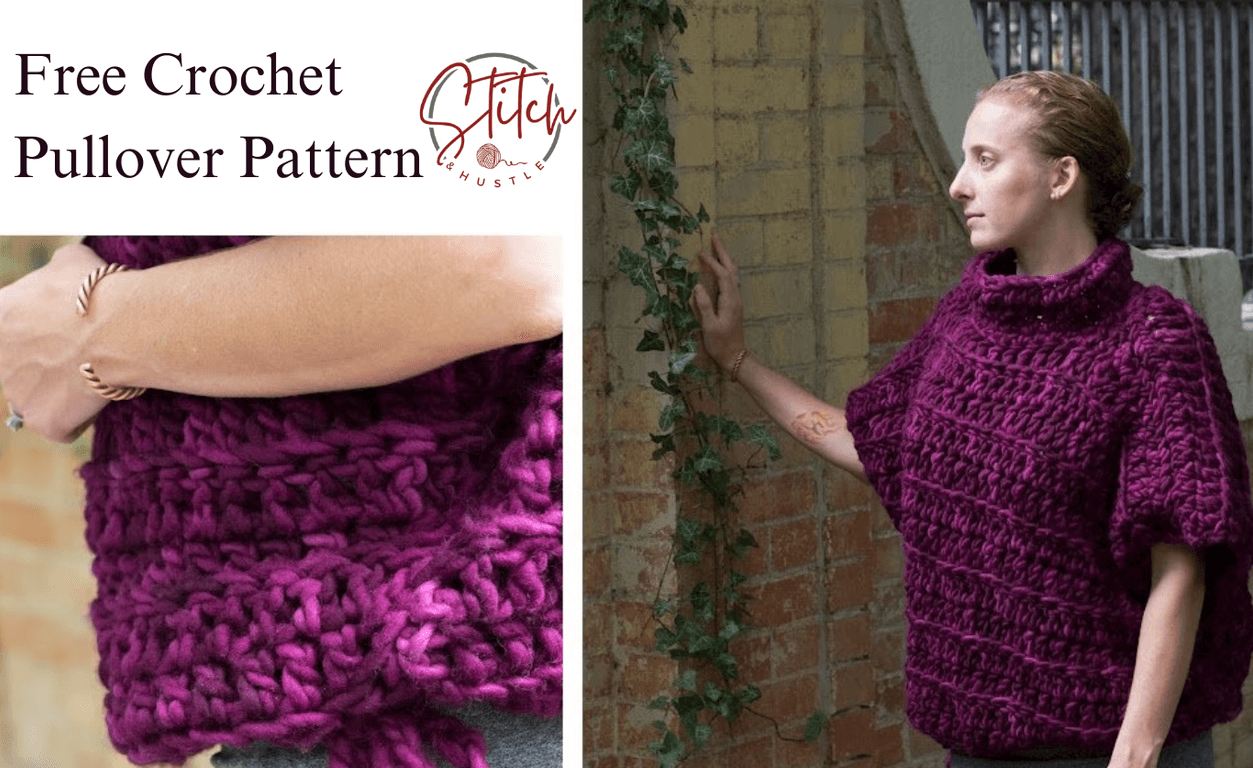
Read MoreWelcome to the world of effortless style and cozy comfort! Seriously - that is what you get with the Stella Pullover Poncho Free Crochet Pattern.
Whether a seasoned pro or a complete beginner, this chunky poncho pattern is the perfect project for you as we hit cozy season.

This Stella Pullover Poncho Free Crochet Pattern is designed with simplicity in mind, making it an ideal project for beginners. The chunky yarn works up quickly, allowing you to see your progress in no time.
The oversized fit adds a bit of ease and coziness, making this poncho a perfect addition to your wardrobe. Whether you're lounging at home, heading out for a casual day, or even dressing it up for an evening out, this poncho has you covered—literally!
The Cinch bottom of the Stella Pullover Poncho Free Crochet Pattern keeps it from being boxy and bulky and allows you to have full movement while wearing it.

There's nothing quite like wrapping yourself in a handmade piece that not only looks stylish but also keeps you warm and snug on those chilly days. So let’s get started.
Supply List:
435 (522, 609, 696) yd Category #6 Super Bulky yarn. (Original yarn used for sample has been discontinued. I recommend KnitPicks Tuff Puff, Alla Prima, or Fluff of the Andes as replacements.)
Crochet Hook Size Q / 15mm
Tapestry needle to weave ends
Tape Measure
Fasteners or safety pins
Gauge: 4 inch sq = 5 dc stitches x 3 rows
Sizes: Extra Small (SM/ Med, L/XL, 2X/3X)
Finished Measurements: Across Chest 20.75 (24, 27.25, 30.5)" See Notes below.
Stitches Used / Abbreviations:
fsc-foundation single crochet
ch -chain
sc -single crochet
dc-double crochet
hdc –half double crochet
sl st –slip stitch
NOTES:
Be sure to measure and to check your gauge and adjust hook size as needed.
This oversized pullover is intended to fit with up to 10-12” of positive ease.
MAKE 2 IDENTICAL PANELS:
ROW 1: fsc x 26 (30, 34, 38)
This will give you a finished width of 20.75 (24, 27.25, 30.5)"-be sure to measure and to check your gauge Here is a link to tutorial http://www.designz.shibaguyz.com/blog/technique-tuesday-foundation-single-crochet
Alternatively if you do not know fsc:
-ch x 26 (30, 34, 38)then turn
-ch 1, x 25 (29, 33, 37)xscall the way across / Total for row is x 26 (30, 34, 38)sc (incl. ch 1)
For L/XL: Next row: ch 2 and turn, then 33x dc across in back loop only for total of 34dc (incl ch 2)then continue to pattern
For 2X/3X: Next two rows: ch 2 and turn, then 37x dc across in back loop only for total of 38dc (incl ch 2 )then continue to pattern
ROW 2: ch 2 & turn, then 25 (29, 33, 37)x dc across for total of 26(30, 34, 38) dc (incl ch 2)
ROW 3: ch 2 & turn, then 25 (29, 33, 37)x dc across in back loop only for total of 26 (30, 34, 38) dc (incl ch 2)
ROWS 4-5: Repeat Rows 2 & 3
ROW 6: ch 2 & turn, then 1 dc in same dc, 2 dc in next dc, 1 dc in each dc to last 2 dc, 2 dc in last 2 dc for a total of 30 (34, 38, 42)dc (incl ch 2)
ROW 7: ch 2 & turn, then dc across in back loop only for total of 30 (34, 38, 42)dc (incl ch 2)
ROW 8: ch 2 & turn, then 1 dc in same dc, 2 dc in next dc, 1 dc in each dc to last 2 dc, 2 dc in last 2 dc for a total of 34 (38, 42, 46)dc (incl ch 2)
ROW 9: ch 2 & turn, then dc across in back loop only for total of 34 (38, 42, 46)dc (incl ch 2)
ROW 10: ch 2 & turn, then 1 dc in same dc, 2 dc in next dc, 1 dc in each dc to last 2 dc, 2 dc in last 2 dc for a total of 38 (42, 46, 50)dc (incl ch 2)
ROW 11: ch 2 & turn, then 1 dc in same, then dc across in back loop only, 2x dc in last for total of 40 (44, 48, 52)dc (incl ch 2)
ROW 12: ch 2 & turn, then dc across for total of 40 (44, 48, 52) dc (incl ch 2)
ROW 13: ch 2 & turn, then dc across in back loop only for total of 40 (44, 48, 50) dc (incl ch 2)
ROWS 14–15: Repeat Rows 12-13 ***for L/XL & 2X/3X repeat rows 12 & 3 two times***
ROW 16: ch 2 & turn, hdc in next 14 (16, 18, 20) dc, sl st in next 10 dc, hdc in last 15 (17, 19, 21) dc (this creates the slight neck yoke)
Fasten off.

ASSEMBLY:
***Same for ALL sizes***
Marry your two panels INSIDE OUT (right sides facing each other).
Whip stitch the panels together starting at the corner to the neck yoke. Stop when you get to the slip stitches.
Repeat on other side & fasten off.
Whip stitch up the sides marrying your panels. Stop at the last increase row (Row 11) creating the “open arm.”
Repeat on other side & fasten off.
TURN RIGHT SIDE OUT
NECK:
Starting in the back (this is where you decide a front & back side of your garment), attach yarn at center point:
Round1: ch 1 (does not count as a stitch), sc around and create 2x sc at the point where the two panels come together on each side for a total of 22 (26, 30) sc, sl st to top of ch 1
Round 2: ch 2, (counts as hdc), hdc in each sc around, sl st to top of beg ch 2 for a total of 22 (26, 30) hdc
Rounds 3–6: ch 2, (counts as hdc), hdc in each hdc around, sl st to top of beg ch 2 for a total of 22 (26, 30) hdc
Fasten off
Fasten Off.
Weave in all ends

Please welcome the West Chicago Crochet Shawl Free Crochet Pattern!
This graceful crescent shawl checks SO MANY boxes - it is perfect for those scrumptious minis, remnants from past projects, mini skien advents or impulse buys from the local yarn store. Our newest patterns are here to rescue and revitalize those lonely yarns! The West Chicago Crochet Shawl is meticulously crafted for one main color of yarn complemented by 9 small amounts of different colors. It’s a splendid way to watch varied hues come alive, intertwining to create an accessory that’s as unique as its maker. Plus, who can resist the allure of a picot trim adding that touch of sweetness to the finished piece?
With bands of color radiating out from the center, let the West Chicago Crochet Shawl showcase your color mixing style!

AND this shawl is a perfect for a Shawlalong! There is a matching West Chicago Knit Shawl pattern so everyone can join in together. Beyond just crafting, there’s a special kind of magic when hands move in harmony, hooks move in unison, and crafters come together.
We strongly encourage you to embrace these patterns as a communal project.

Supply List:
Primary Color:1 Full Skein Movers & Makers Wicker Park Sock, 433 Yards per skein
Contrast: 9 mini skeins Fingering Weight, 80 Yards per mini skein / See Reference List
US 8/ 5 mm crochet hook
Large needle to weave ends
Tape Measure
2 Stitch Markers
Stitches Used / Abbreviations:
fsc – foundation single crochet
ch – chain loop
sc – single crochet
hdc – half double crochet
st(s) – stitch(es)
sk - skip
NOTES:
If you notice your fabric begin to “curl” up and round then you are likely doing your beginning ch 2 of each row too tightly In this case do a ch 3 instead to start each row.
Gauge is not extremely important for this pattern. The most important thing is to have a fabric that you like.
Make note that you will be working double stranded for the bulk of the pattern, unless noted otherwise. You will not change hook size even when working single stranded.
This shawl should be blocked aggressively.
COLOR SEQUENCE REFERENCE LIST:
Primary Color A: Movers & Makers Wicker Park Sock / Flat Iron Gray / 100 g / 433 Yards
Color B: Movers & Makers Wicker Park Sock Big Star / 20 g / 86 yards
Color C: Lavender Lune Yarn / 80/20 Fingering / Feelin' Leafy / 20g / 80yds
Color D: Movers & Makers Wicker Park Sock/ Bongo Blue / 20 g / 86 yards
Color E: Asylum Fibers / Twisted Sock Mini / Siren Song, 20g, 80 yards
Color F: Marianated Yarns / Venti - Practicality 75/25 / Indigo Bunting / 20 g / 93 yards
Color G: M1 Yarns Lean Machine Fingering / You Had Me At Merlot / 20 g / 80 yards
Color H: Queenie Crochet / 2-ply sock yarn / Moxie / 20g/ 80 yards
Color I: KraeO / Little Sister fingering/ Rose Gold/ 20g/ 98 yds
Color J: Jilly & Kiddles / Fancy Sock Mini / La Corrida de Toros / 20 g / 87 yds

BEGIN USING PRIMARY COLOR A AND COLOR B DOUBLE STRANDED:
ROW 1: fsc 12, then ch 1, Turn 90 degrees to work back across the base side of the fhdc row.
ROW 2 (RS): ch 2 (not act as st); [3 sc] in last st of previous row, 2 sc in each st across to last st, [3 sc] in last st / 26 sts
ROW 3 (WS): ch 2 (not act as st); [2 sc] in last st of previous row, [2 sc] in next st, sc across to last 2 sts, [2 sc] in last 2 sts / 30 sts. Turn.
ROW 4: ch2 (not act as st), 2 hdc in last st of previous row, 2 hdc next st, in each sc across to last 2 sts, 2 hdc in last 2 sts, Turn. 34 sts
ROW 5: ch2 (not act as st), 3sc in last st of previous row, sc in each sc across to last st, 3sc in last sc, Turn. 38 sts.
ROWS 6 – 7: Repeat Rows 4, 5 alternating 46 sts at end of Row 7
USING COLOR B SINGLE STRANDED
ROW 8: Repeat Row 4. 50 sts
ROW 9: ch 2 (does not act as st), 3sc in last st of previous row, sc in each of next 6 sts, * 2sc in next st, sc in each of next 6 sts*; repeat * to * across, 3sc in last sc, Turn. 60 sts
ROW 10: Repeat Row 4 64 sts
USING PRIMARY COLOR A AND COLOR B DOUBLE STRANDED:
ROW 11: Repeat Row 5 68 sts
ROW 12: Repeat Row 4 72 sts
Fasten Off Color B.
PRIMARY COLOR A SINGLE STRANDED:
ROW 13: Repeat Row 4 76 sts
PRIMARY COLOR A AND COLOR C DOUBLE STRANDED:
ROW 14: Repeat Row 4 80 sts
ROW 15: Repeat Row 5 84 sts
COLOR C SINGLE STRANDED:
ROW 16: Repeat Row 4 88 sts
ROW 17: Repeat Row 5 92 sts.
ROW 18: ch 2 (does not act as st), 3hdc in last st of previous row, hdc in each of next 8 sts, * 2 hdc in next st, hdc in each of next 8 sts*; repeat * to * across, 3 hdc in last st, (inc. 14 sts) 106 sts
PRIMARY COLOR A AND COLOR C DOUBLE STRANDED:
ROW 19: Repeat Row 5 110 sts.
ROW 20: Repeat Row 4. 114 sts

PRIMARY COLOR A SINGLE STRANDED:
ROW 21: Repeat Row 4. 118 sts
PRIMARY COLOR A AND COLOR D DOUBLE STRANDED:
ROW 22: Repeat Row 4. 122 sts
COLOR D SINGLE STRANDED:
ROW 23: Repeat Row 5. 126 sts
ROW 24: Repeat Row 4. 130 sts
PRIMARY COLOR A AND COLOR D DOUBLE STRANDED:
ROW 25: ch 2 (does not act as st), 2 hdc in last st of previous row, hdc in next 3 sts, 2 hdc in next st; hdc in each of next 7 sts, * 2 hdc in next st, hdc in each of next 7 sts*; repeat * to * to last 5 sts, 2 hdc in next st, hdc in next 3 sts, 2 hdc in last st 150 sts total
PRIMARY COLOR A SINGLE STRANDED
ROW 26: Repeat Row 4.
PRIMARY COLOR A AND COLOR E DOUBLE STRANDED
ROW 27: Repeat Row 4.
COLOR E SINGLE STRANDED
ROWS 28 - 29: Repeat Row 4.
PRIMARY COLOR A AND COLOR E DOUBLE STRANDED
ROW 30: Repeat Row 4.
PRIMARY COLOR A SINGLE STRANDED
ROW 31: Repeat Row 4.
PRIMARY COLOR A AND COLOR F DOUBLE STRANDED
ROW 32: Repeat Row 4.
COLOR F SINGLE STRANDED:
ROWS 33-34: Repeat Row 4.

PRIMARY COLOR A AND COLOR F DOUBLE STRANDED:
ROW 35: Repeat Row 4.
PRIMARY COLOR A SINGLE STRANDED
ROW 36: Repeat Row 4.
PRIMARY COLOR A AND COLOR G DOUBLE STRANDED
ROW 36: Repeat Row 5.
COLOR G SINGLE STRANDED
ROW 37: Repeat Row 4.
PRIMARY COLOR A AND COLOR G DOUBLE STRANDED
ROW 38: Repeat Row 5.
PRIMARY COLOR A SINGLE STRANDED
ROW 39: Repeat Row 5
PRIMARY COLOR A AND COLOR H DOUBLE STRANDED
ROW 40: Repeat Row 5

COLOR H SINGLE STRANDED
ROWS 41 – 42: Repeat Row 4.
COLOR H AND COLOR I DOUBLE STRANDED
ROW 43: Repeat Row 5
COLOR I SINGLE STRANDED
ROW 44: Repeat Row 4.
COLOR I AND COLOR J DOUBLE STRANDED
ROW 45: Repeat Row 5
COLOR J SINGLE STRANDED
ROW 45: Repeat Row 4.
ROW 46: Repeat Row 5.
OR OPTIONAL PICOT TRIM ROW:
Ch 3, sc in top of last st of last row, *ch 3, sl st into 1st ch, skip st, sc in next 5 sts*, repeat * to * to end, hdc in sc st.
BLOCK YOUR SHAWL – THIS SHAWL IS SERVED BEST WITH AGGRESSIVE WET BLOCKING
Weave in all ends.
ENJOY!!!!

With texture for days, beautiful drape, and loads of versatility, you’ll love our new Hope Shrug free crochet pattern!
Read MoreThe Sanctuary Crochet Shawl melds simplicity with sophistication in boho-inspired style. Specifically tailored for the beginner, this design guarantees a stylish outcome with minimal fuss in creation.
Read MoreI’m so happy to share my newest free crochet pattern with you - the Landscape Tee! This project is yet another pattern created in collaboration with Handspun Hope and features their beautiful Handspun Hope DK yarn. (You can read more about the collaboration here. Other patterns in the collection can be found here. There’s even a free knitting pattern here!)
The Landscape Tee free crochet pattern includes instructions for NINE sizes and features a fresh, modern silhouette. I love how much movement the wide sleeves allow. Talk about comfort! Short sleeves make it a warm-weather staple but a change in fiber choice would adapt it to be a fun wardrobe addition for cooler months as well.

The Landscape Tee has a few intermediate crochet techniques. Which makes it the perfect opportunity for beginners to stretch their skills! And short sleeves mean you are off Sleeve Island in a jiffy.
Let’s fill the world with more handmade beauty. Happy crocheting!

Skill Level: Intermediate
Materials:
Handspun Hope DK – Approx 173 Yards Per Skein (Shown in Onion Skin & Logwood)
Color A: 260 (290, 340, 400, 430, 490, 530, 590, 630) yards
Color B: 300 (345, 405, 470, 515, 585, 630, 705, 755) yards
US J / 6 mm crochet hook
Fasteners (for assembly)
Tapestry needle to weave ends
Fasteners or safety pins
Gauge:
11 sts x 7 rows in alternating hdc & dc rows = 4” sq.
Sizes:
XS (S, M, L, 1X, 2X, 3X, 4X, 5X), shown in S Size
Finished Bust:
33.5 (37.75, 42.25, 46.5, 51, 55.25, 59.75, 64, 68.25)”

Abbreviations:
fsc – foundation half double crochet
ch – chain loop
sc – single crochet
hdc – half double crochet
dc – double crochet
sl st – slip stitch
st(s) – stitch (es)
RS – Right Side
WS – Wrong Side
This pattern is written for Adult Woman size XS. Sizes (S, M, L, 1X, 2X, 3X, 4X, 5X) in parentheses
Block BEFORE assembly.
The two main panels are joined at the shoulders and sides, as shown on the schematic, using the mattress stitch method then sleeves are added.
Note: Handspun Hope yarn is hand-spun and hand dyed by skilled craftspeople in Rwanda. Like all handspun yarn, yardage and thickness may vary slightly from skein to skein. We recommend that you alternate skeins while working this project.

MAKE 2 PANELS
BEGIN WITH COLOR A
BAND:
Row 1: fsc x10 *** (alternate: ch 9, turn, ch 1, 9x sc across) ***
Row 2 and on: turn, ch 1 (does not act as a st), 10x sc in back loop only
Rows 3-46 (52, 58, 64, 70, 76, 82, 88, 94): Rep Row 2.
DO NOT CUT YARN – you will go directly to work the body
Row 1 (RS): Ch 1 (does not act as a st), 46 (52, 58, 64, 70, 76, 82, 88, 94) sc across
CHANGE TO COLOR B
Row 2 (WS): Ch 2 (acts as first st), 45 (51, 57, 63, 69, 75, 81, 87, 93) dc across, Turn.
Row 3 (RS): Ch 1 (does not act as a st), 46 (52, 58, 64, 70, 76, 82, 88, 94) hdc across, Turn. Rows 4-15 (15, 17, 17, 17, 19, 19, 19, 19): Repeat Rows 2 & 3.
CHANGE TO COLOR A
Row 16 (16, 18, 18, 18, 20, 20, 20, 20) (WS): Ch 2 (acts as first st), 45 (51, 57, 63, 69, 75, 81, 87, 93) dc across, Turn.
Row17(17,19,19,19,21,21,21,21)(RS): Ch1(doesnotactasast),46(52,58,64,70,76,82,88,94) hdc across, Turn.
Row 18 (18, 20, 20, 20, 22, 22, 22, 22) (WS): Ch 2 (acts as first st), 45 (51, 57, 63, 69, 75, 81, 87, 93) dc across, Turn.

CHANGE TO COLOR B
Rows 19 (19, 21, 21, 21, 23, 23, 23, 23)-30 (30, 32, 34, 34, 36, 36, 38, 38): Repeat Rows 2 & 3.
CHANGE TO COLOR A
Row 31 (31, 33, 35, 35, 37, 37, 39, 39) (RS): Ch 2 (acts as first st), 45 (51, 57, 63, 69, 75, 81, 87, 93) dc across, Turn.
Row 32 (32, 34, 36, 36, 38, 38, 40, 40) (WS): Ch 1 (does not act as a st), 12 (15, 18, 20, 23, 26, 28, 31, 34) hdc, 22 (22, 22, 24, 24, 24, 26, 26, 26) sc, 12 (15, 18, 20, 23, 26, 28, 31, 34) hdc across, Turn.
Row 33 (33, 35, 37, 37, 39, 39, 41, 41) (RS): Ch 2 (acts as first st), 11 (14, 17, 19, 22, 25, 27, 30, 33) dc, 22 (22, 22, 24, 24, 24, 26, 26, 26) sc, 12 (15, 18, 20, 23, 26, 28, 31, 34) dc across, Turn.
BLOCK BOTH PANELS BEFORE ASSEMBLY

ASSEMBLY – SAME FOR ALL SIZES
Marry the tops of your panels together with WS facing.
Shoulder Seams:
Using the Mattress Stitch Method, seam together approx. 12 (15, 18, 20, 23, 26, 28, 31, 34) sts beginning at outside corner of shoulder and working toward neck opening. Fasten off.
Repeat for other shoulder, leaving center 22 (22, 22, 24, 24, 24, 26, 26, 26) sts unworked for neck opening.
Side Seams / Creating Armholes:
Using the Mattress Stitch Method, seam together beg. at bottom edge and working toward shoulder, leaving approx. 8.5 (9, 9.5, 10, 10.5, 11, 11.5, 12, 12.5)” for armhole opening. Fasten off.
Repeat for other side seam.
TURN RIGHT SIDE OUT FOR SLEEVES.
Note: The Sleeves are worked sideways and joined to the body at the end of every other row. AND ADDED AFTER ASSEMBLY
SLEEVES - COLOR A
Set Up Round (RS): begin at underarm, work approx 46 (50, 52, 56, 58, 60, 64, 66, 68) Sc evenly all the way around around entire armhole opening.
When you get to the opposite bottom corner, sl st to join round, then:
Row 1: F sc 11, turn.
Row 2: Ch 1(does not act as a st), 11 sc in back loop only, sl st to the NEXT sc on the set up round
Row 3: Sl st to the NEXT sc on the set up round, Turn, 11 sc in back loop only, Turn.
Alternate Rows 2 & 3 until you reach all the way around to Row 1, fasten off leaving a 12” tail.
Use Tail to join sides of sleeve ribbing. Repeat on other side.
Weave in all ends.

Dive into our beginner-friendly crochet Alaska Shrug pattern, perfect for cozy layering. Enjoy our free, easy crochet pattern complete with photo and diagram assembly details, and create a modern, stylish piece effortlessly.
Read MoreHey everyone! I’m super excited to share something with you today. Remember my Everest Beanie? Well, I’ve got a new twist on it that’s perfect for colder days. Say hello to the Chunky Everest Beanie free crochet pattern!
So I took our favorite worsted-weight Everest Beanie and bulked it up with chunky weight yarn. It’s thicker, cozier, and just perfect for those extra chilly days. It feels like a warm hug for your head, seriously! The way the texture of this beanie works, all those lovely loops join together to keep you warm.

Not only is this beanie super warm, but it also looks amazing. The texture? Oh, it’s something else! It adds that perfect stylish touch to any winter outfit. Whether you’re grabbing coffee or going for a walk in the park, this beanie’s got you covered - literally!
And guess what? Making this beanie is a breeze. Whether you’re just starting out with crochet or you’re a seasoned pro, you’ll find this pattern super easy and fun. It’s a great project for cozy nights in.

Supply List:
124 yds Category #5 Bulky Yarn (Yarn used in sample is discontinued. WeCrochet Brava Bulky or Swish Bulky would be good substitutes.) (to add Pom Pom you will need more yarn)
Crochet Hook Size L / 8mm
Stitch Marker
Large needle to weave ends
Gauge: 4 inch sq = 7 pattern stitches x 14 rows
Hat Size:
Completed measures: 19” band circumference / Height 10”
Fits Average Adult Size Head 21” – 23’
Stitches Used / Abbreviations:
fsc- foundation single crochet
ch - Chain
sc - Single Crochet
dc – Double Crochet

Pattern Notes:
Pattern has joined rows. You will ch 1 & turn for the body of the hat
BAND:
Row 1: fsc x7 *** (alternate: ch 7, turn, ch 1, 6x sc across) ***
Row 2 and on: turn, ch 1, 6x sc in back loop only
Rows 3 – 58: Repeat row 2 for average adult size head of 19” (or desired width)
When band is at desired width: Sl st to top of initial fsc from first row, then 7 sl st across to join the whole band to become a circle
DO NOT CUT YARN // Turn to now work the body
BODY:
Row 1: ch 1, sc all way around band for total 60 sc, then sl st to ch 1
(If you adjust for larger band, this will increase – must be multiple of 2 for pattern)
Row 2: ch 1, then dc in same sc of previous row then *skip one sc sp space and [1sc, 1 dc] in next sc space *; repeat * to * all the way across to end leaving 1 sc space left; skip 1 sc space then sl st to ch 1 to complete row, Then ch 1 and turn
Row 3: then dc in same, then *skip next dc, [1 sc, 1 dc] in next sc *; repeat * to * all the way across then sl st to ch 1 to complete row, Then ch 1 and turn

Rows 4 – 14: Repeat ROW 3 but do NOT turn at the and of Row 24 after ch 1
Row 15: ch 1, hdc all way around, sl st to top of ch 1 for total of 59 hdc + ch 2
Row 16: ch 1, sc in hdc, then [sc2tog] all way around and sl st to top of ch 1 **this row should be stitched loosely**
Row 17: ch 1, sc loosely all way around, sl st to top of Ch 1 to complete row for total 30 sc incl. ch 1
Cut yarn leaving approx. 3” tail
Turn hat inside out.
Using tapestry needle, weave lengthy tail across the top of the hat across, then diagonally, creating a star shape. Then pull tight like a drawstring
Turn hat right side out Using tail, seam up the hat peak
Fasten off and weave in ends.
Meet your new favorite chunky beanie! The Oxford Chunky Basketweave Beanie free crochet pattern is here with a beautiful texture that will come together in a flash. Get ready to make a bunch of these beauties!
Full of depth and texture, sink your hook into our Basketweave Hat free crochet pattern!
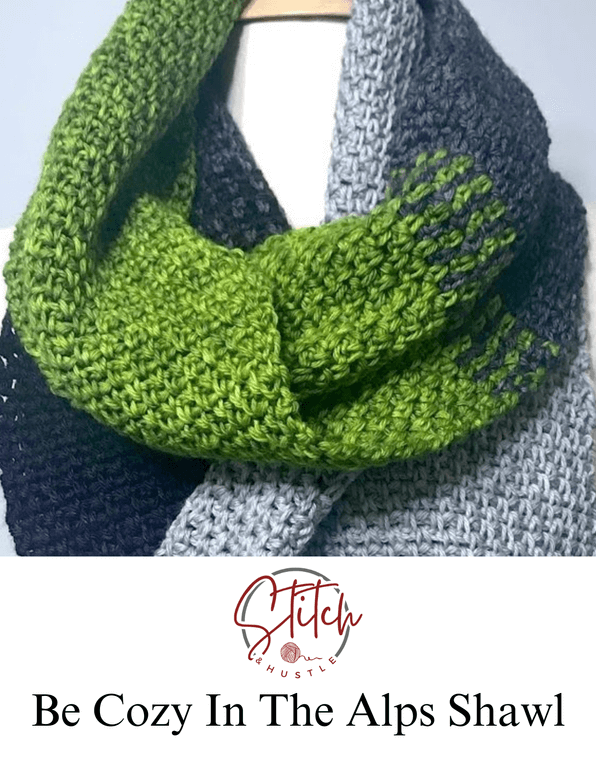
The Be Cozy In The Alps Scarf free crochet pattern is here to rev up your cold-weather wardrobe. True to name, the snug stitch of this pattern will keep those winds away.
Read MoreDISCLOSURES: As an Amazon Associate I earn from qualifying purchases. Posts may includes affiliate links. Read full blog disclosure here.


All photos, designs, and patterns are copyright of Stitch & Hustle unless otherwise noted. Please do not repost or claim content as your own. This site displays third party ads and contains affiliate links. Stitch & Hustle is a participant in the Amazon Services LLC Associates Program, an affiliate advertising program designed to provide a means for sites to earn advertising fees by advertising & linking to amazon.com. Read policies & disclosures here.
Thank you for visiting!
TERMS of SERVICE | PRIVACY | ACCESSIBILITY | TARGETED ADS STATEMENT | PRIVACY RIGHTS |
DO NOT SELL MY INFO | COOKIE POLICY
Stitch & Hustle © 2017 - 2025 ALL RIGHTS RESERVED.


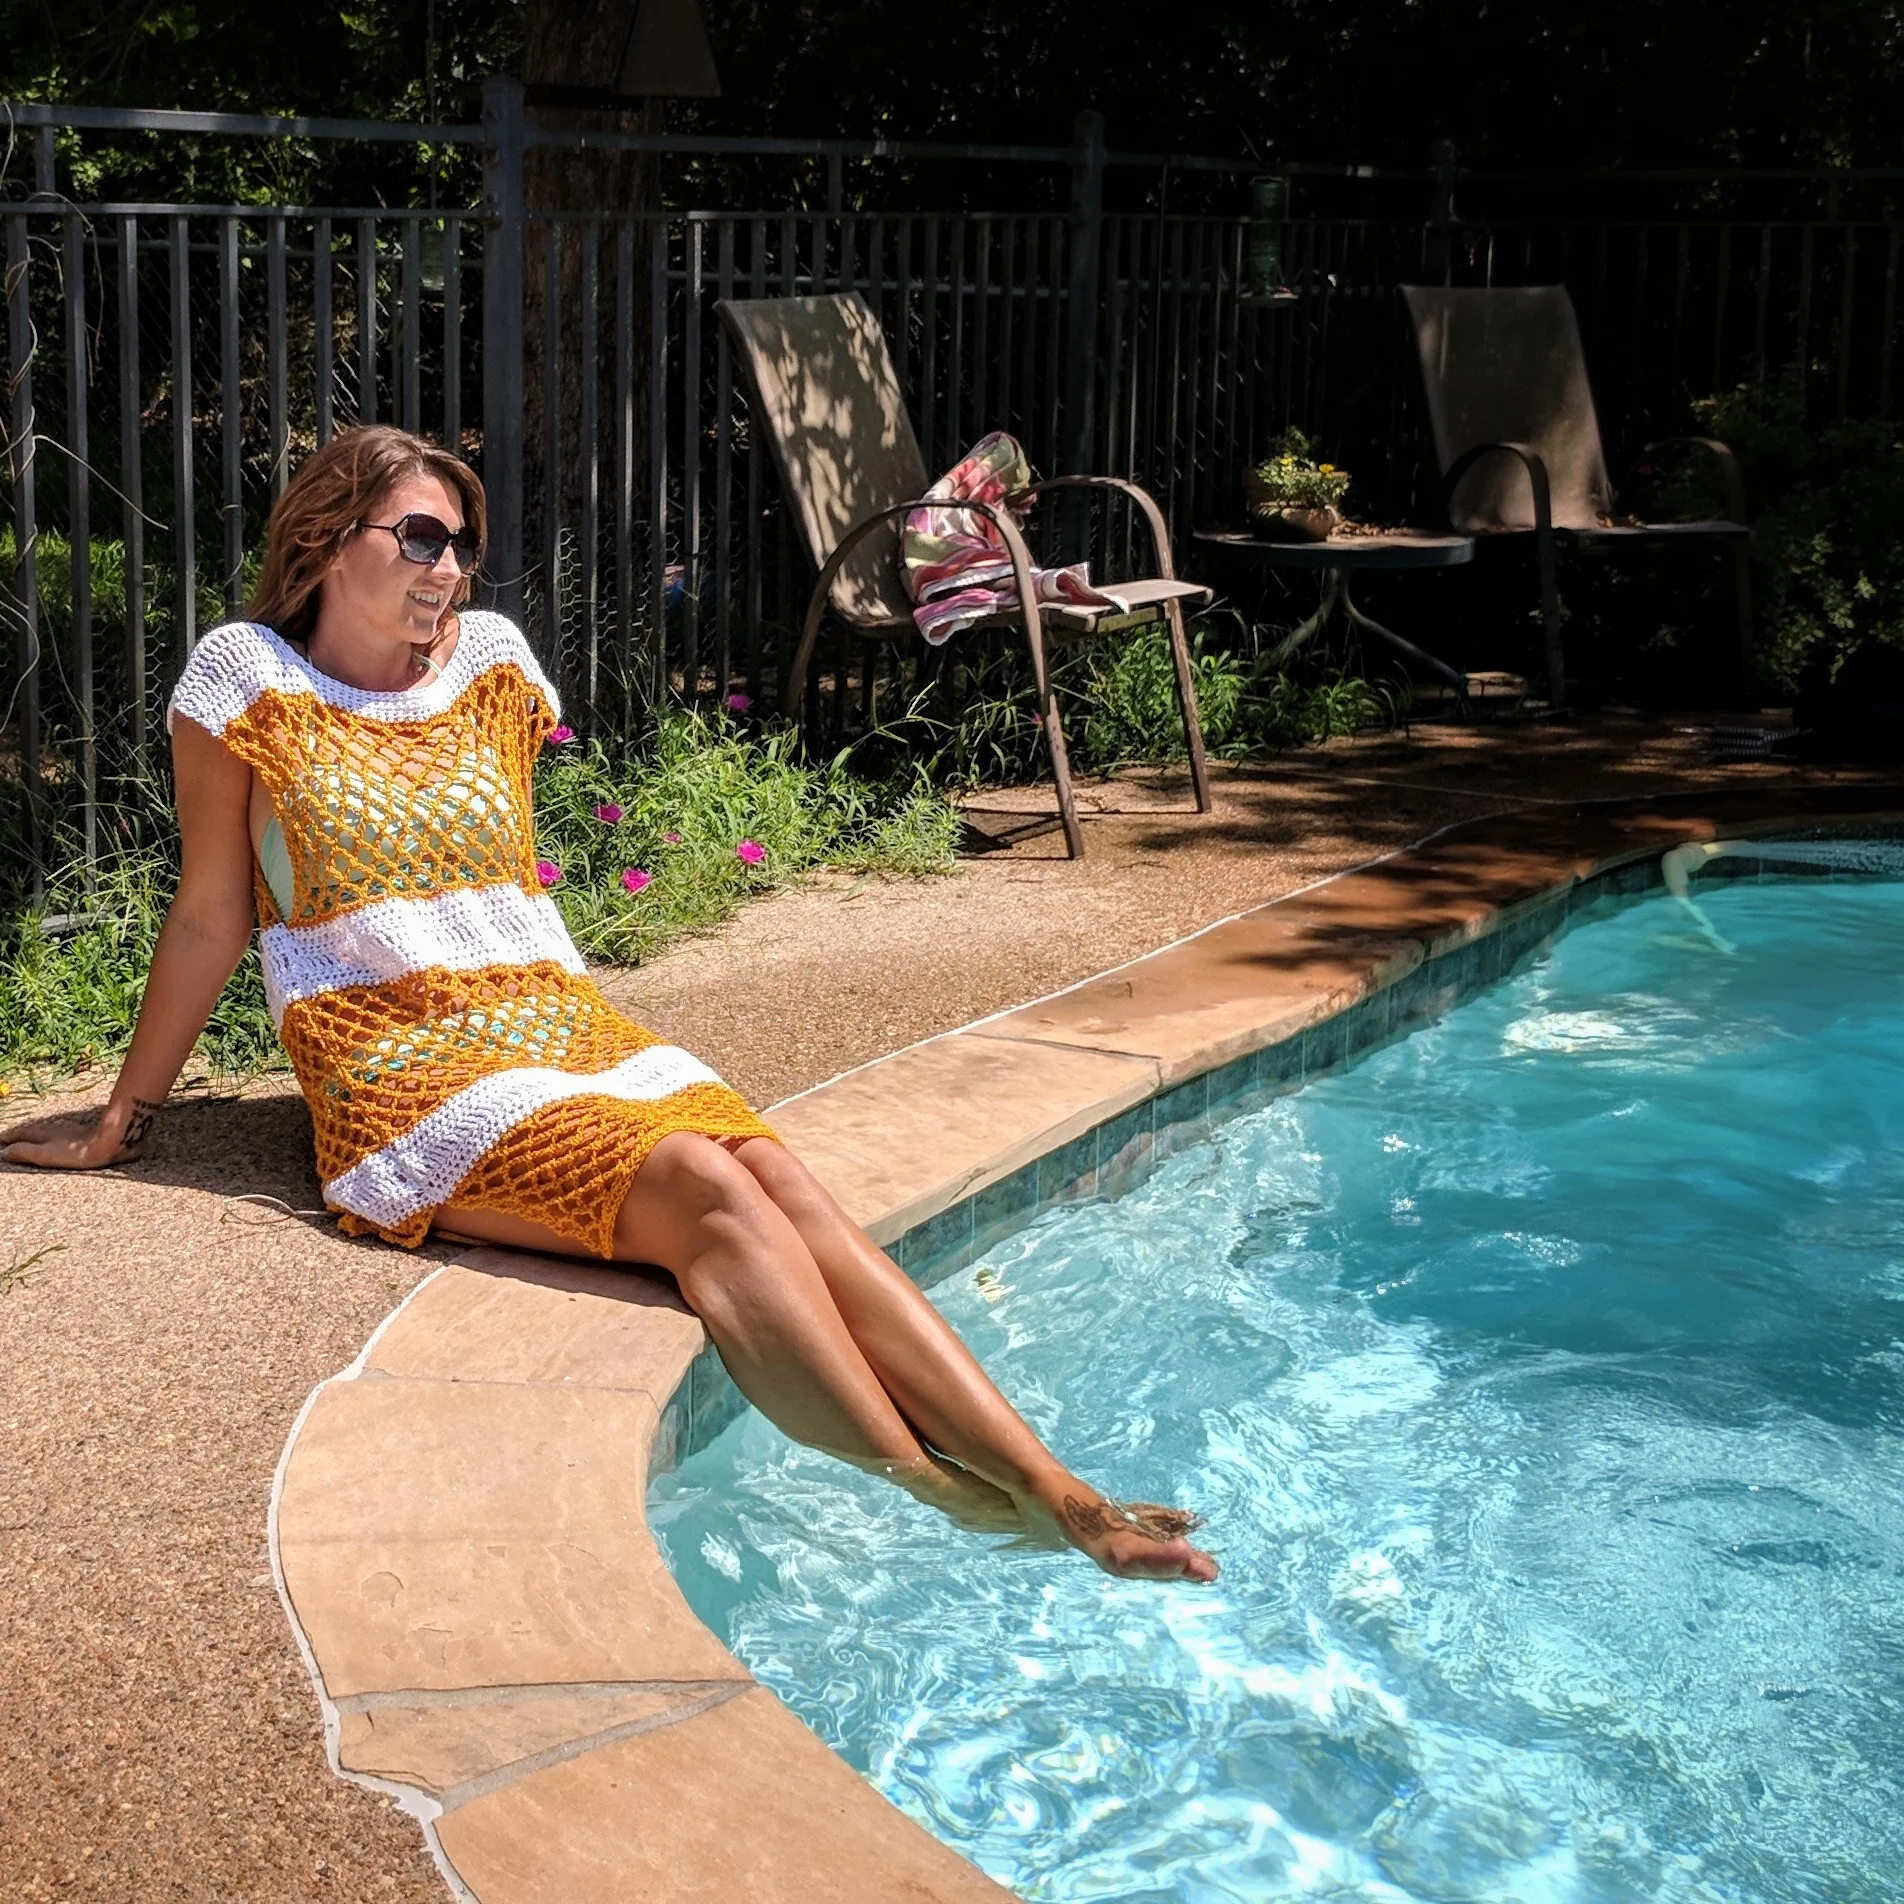


Get ready for summer fun with our newest free crochet pattern - the Nantucket Tank Top! With fun color details and a sweet lace panel, you’ll meet the season in style.