West Chicago Crochet Shawl Free Crochet Pattern

Please welcome the West Chicago Crochet Shawl Free Crochet Pattern!

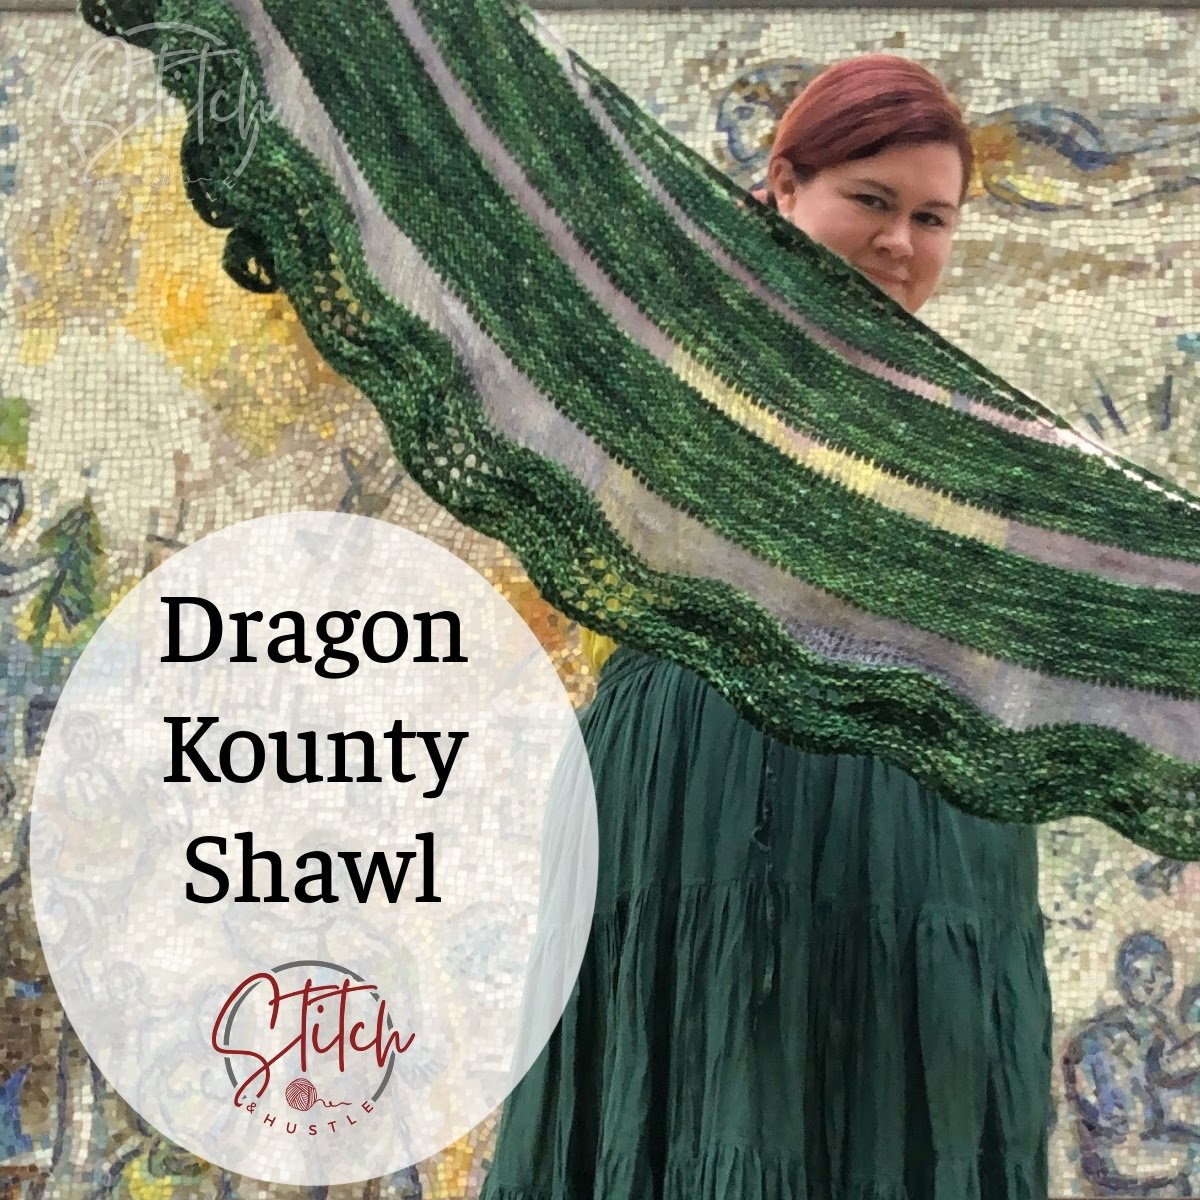
This graceful crescent shawl checks SO MANY boxes - it is perfect for those scrumptious minis, remnants from past projects, mini skien advents or impulse buys from the local yarn store. Our newest patterns are here to rescue and revitalize those lonely yarns! The West Chicago Crochet Shawl is meticulously crafted for one main color of yarn complemented by 9 small amounts of different colors. It’s a splendid way to watch varied hues come alive, intertwining to create an accessory that’s as unique as its maker. Plus, who can resist the allure of a picot trim adding that touch of sweetness to the finished piece?

With bands of color radiating out from the center, let the West Chicago Crochet Shawl showcase your color mixing style!

The perfect mini skein crochet shawl pattern

AND this shawl is a perfect for a Shawlalong! There is a matching West Chicago Knit Shawl pattern so everyone can join in together. Beyond just crafting, there’s a special kind of magic when hands move in harmony, hooks move in unison, and crafters come together.

We strongly encourage you to embrace these patterns as a communal project.

How To Make The Crochet Crescent Shawl

Supply List:
Primary Color:1 Full Skein Movers & Makers Wicker Park Sock, 433 Yards per skein
Contrast: 9 mini skeins Fingering Weight, 80 Yards per mini skein / See Reference List
US 8/ 5 mm crochet hook
Large needle to weave ends
Tape Measure
2 Stitch Markers

Stitches Used / Abbreviations:
fsc – foundation single crochet
ch – chain loop
sc – single crochet
hdc – half double crochet
st(s) – stitch(es)
sk - skip

NOTES:
If you notice your fabric begin to “curl” up and round then you are likely doing your beginning ch 2 of each row too tightly In this case do a ch 3 instead to start each row.
Gauge is not extremely important for this pattern. The most important thing is to have a fabric that you like.
Make note that you will be working double stranded for the bulk of the pattern, unless noted otherwise. You will not change hook size even when working single stranded.
This shawl should be blocked aggressively.

COLOR SEQUENCE REFERENCE LIST:
Primary Color A: Movers & Makers Wicker Park Sock / Flat Iron Gray / 100 g / 433 Yards
Color B: Movers & Makers Wicker Park Sock Big Star / 20 g / 86 yards
Color C: Lavender Lune Yarn / 80/20 Fingering / Feelin' Leafy / 20g / 80yds
Color D: Movers & Makers Wicker Park Sock/ Bongo Blue / 20 g / 86 yards
Color E: Asylum Fibers / Twisted Sock Mini / Siren Song, 20g, 80 yards
Color F: Marianated Yarns / Venti - Practicality 75/25 / Indigo Bunting / 20 g / 93 yards
Color G: M1 Yarns Lean Machine Fingering / You Had Me At Merlot / 20 g / 80 yards
Color H: Queenie Crochet / 2-ply sock yarn / Moxie / 20g/ 80 yards
Color I: KraeO / Little Sister fingering/ Rose Gold/ 20g/ 98 yds
Color J: Jilly & Kiddles / Fancy Sock Mini / La Corrida de Toros / 20 g / 87 yds

BEGIN USING PRIMARY COLOR A AND COLOR B DOUBLE STRANDED:
ROW 1:
fsc 12, then ch 1, Turn 90 degrees to work back across the base side of the fhdc row.
ROW 2 (RS): ch 2 (not act as st); [3 sc] in last st of previous row, 2 sc in each st across to last st, [3 sc] in last st / 26 sts
ROW 3 (WS): ch 2 (not act as st); [2 sc] in last st of previous row, [2 sc] in next st, sc across to last 2 sts, [2 sc] in last 2 sts / 30 sts. Turn.
ROW 4: ch2 (not act as st), 2 hdc in last st of previous row, 2 hdc next st, in each sc across to last 2 sts, 2 hdc in last 2 sts, Turn. 34 sts
ROW 5: ch2 (not act as st), 3sc in last st of previous row, sc in each sc across to last st, 3sc in last sc, Turn. 38 sts.
ROWS 6 – 7: Repeat Rows 4, 5 alternating 46 sts at end of Row 7

USING COLOR B SINGLE STRANDED
ROW 8:
Repeat Row 4. 50 sts
ROW 9: ch 2 (does not act as st), 3sc in last st of previous row, sc in each of next 6 sts, * 2sc in next st, sc in each of next 6 sts*; repeat * to * across, 3sc in last sc, Turn. 60 sts
ROW 10: Repeat Row 4 64 sts

USING PRIMARY COLOR A AND COLOR B DOUBLE STRANDED:
ROW 11:
Repeat Row 5 68 sts
ROW 12: Repeat Row 4 72 sts
Fasten Off Color B.

PRIMARY COLOR A SINGLE STRANDED:
ROW 13:
Repeat Row 4 76 sts

PRIMARY COLOR A AND COLOR C DOUBLE STRANDED:
ROW 14:
Repeat Row 4 80 sts
ROW 15: Repeat Row 5 84 sts

COLOR C SINGLE STRANDED:
ROW 16:
Repeat Row 4 88 sts
ROW 17: Repeat Row 5 92 sts.
ROW 18: ch 2 (does not act as st), 3hdc in last st of previous row, hdc in each of next 8 sts, * 2 hdc in next st, hdc in each of next 8 sts*; repeat * to * across, 3 hdc in last st, (inc. 14 sts) 106 sts

PRIMARY COLOR A AND COLOR C DOUBLE STRANDED:
ROW 19:
Repeat Row 5 110 sts.
ROW 20: Repeat Row 4. 114 sts

PRIMARY COLOR A SINGLE STRANDED:
ROW 21:
Repeat Row 4. 118 sts

PRIMARY COLOR A AND COLOR D DOUBLE STRANDED:
ROW 22:
Repeat Row 4. 122 sts

COLOR D SINGLE STRANDED:
ROW 23:
Repeat Row 5. 126 sts
ROW 24: Repeat Row 4. 130 sts

PRIMARY COLOR A AND COLOR D DOUBLE STRANDED:
ROW 25:
ch 2 (does not act as st), 2 hdc in last st of previous row, hdc in next 3 sts, 2 hdc in next st; hdc in each of next 7 sts, * 2 hdc in next st, hdc in each of next 7 sts*; repeat * to * to last 5 sts, 2 hdc in next st, hdc in next 3 sts, 2 hdc in last st 150 sts total

PRIMARY COLOR A SINGLE STRANDED
ROW 26:
Repeat Row 4.

PRIMARY COLOR A AND COLOR E DOUBLE STRANDED
ROW 27:
Repeat Row 4.

COLOR E SINGLE STRANDED
ROWS 28 - 29:
Repeat Row 4.

PRIMARY COLOR A AND COLOR E DOUBLE STRANDED
ROW 30:
Repeat Row 4.

PRIMARY COLOR A SINGLE STRANDED
ROW 31
: Repeat Row 4.

PRIMARY COLOR A AND COLOR F DOUBLE STRANDED
ROW 32:
Repeat Row 4.

COLOR F SINGLE STRANDED:
ROWS 33-34:
Repeat Row 4.

PRIMARY COLOR A AND COLOR F DOUBLE STRANDED:
ROW 35:
Repeat Row 4.

PRIMARY COLOR A SINGLE STRANDED
ROW 36:
Repeat Row 4.

PRIMARY COLOR A AND COLOR G DOUBLE STRANDED
ROW 36:
Repeat Row 5.

COLOR G SINGLE STRANDED
ROW 37:
Repeat Row 4.

PRIMARY COLOR A AND COLOR G DOUBLE STRANDED
ROW 38:
Repeat Row 5.

PRIMARY COLOR A SINGLE STRANDED
ROW 39:
Repeat Row 5

PRIMARY COLOR A AND COLOR H DOUBLE STRANDED
ROW 40:
Repeat Row 5

COLOR H SINGLE STRANDED
ROWS 41 – 42:
Repeat Row 4.

COLOR H AND COLOR I DOUBLE STRANDED
ROW 43:
Repeat Row 5

COLOR I SINGLE STRANDED
ROW 44:
Repeat Row 4.

COLOR I AND COLOR J DOUBLE STRANDED
ROW 45:
Repeat Row 5

COLOR J SINGLE STRANDED
ROW 45:
Repeat Row 4.
ROW 46: Repeat Row 5.

OR OPTIONAL PICOT TRIM ROW:
Ch 3, sc in top of last st of last row, *ch 3, sl st into 1st ch, skip st, sc in next 5 sts*, repeat * to * to end, hdc in sc st.

BLOCK YOUR SHAWL – THIS SHAWL IS SERVED BEST WITH AGGRESSIVE WET BLOCKING

Weave in all ends.

ENJOY!!!!

Sanctuary Knit Shawl Free Knitting Pattern

Sanctuary Knit Shawl Free Knitting Pattern

For those stitchers looking to meld simplicity with sophistication, we introduce our latest boho-inspired shawl pattern, the Sanctuary Knit Shawl. Specifically tailored for beginners, these designs guarantee a stylish outcome with minimal fuss in creation.

Read More

Landscape Tee Free Crochet Pattern

I’m so happy to share my newest free crochet pattern with you - the Landscape Tee! This project is yet another pattern created in collaboration with Handspun Hope and features their beautiful Handspun Hope DK yarn. (You can read more about the collaboration here. Other patterns in the collection can be found here. There’s even a free knitting pattern here!)

The Landscape Tee free crochet pattern includes instructions for NINE sizes and features a fresh, modern silhouette. I love how much movement the wide sleeves allow. Talk about comfort! Short sleeves make it a warm-weather staple but a change in fiber choice would adapt it to be a fun wardrobe addition for cooler months as well.

The Landscape Tee has a few intermediate crochet techniques. Which makes it the perfect opportunity for beginners to stretch their skills! And short sleeves mean you are off Sleeve Island in a jiffy.

Let’s fill the world with more handmade beauty. Happy crocheting!

Skill Level: Intermediate

Materials:
Handspun Hope DK – Approx 173 Yards Per Skein (Shown in Onion Skin & Logwood)
Color A: 260 (290, 340, 400, 430, 490, 530, 590, 630) yards
Color B: 300 (345, 405, 470, 515, 585, 630, 705, 755) yards

US J / 6 mm crochet hook
Fasteners (for assembly)
Tapestry needle to weave ends
Fasteners or safety pins

Gauge:
11 sts x 7 rows in alternating hdc & dc rows = 4” sq.

Sizes:
XS (S, M, L, 1X, 2X, 3X, 4X, 5X), shown in S Size

Finished Bust:
33.5 (37.75, 42.25, 46.5, 51, 55.25, 59.75, 64, 68.25)”

Abbreviations:
fsc – foundation half double crochet
ch – chain loop
sc – single crochet
hdc – half double crochet
dc – double crochet
sl st – slip stitch
st(s) – stitch (es)
RS – Right Side
WS – Wrong Side

This pattern is written for Adult Woman size XS. Sizes (S, M, L, 1X, 2X, 3X, 4X, 5X) in parentheses

Block BEFORE assembly.

The two main panels are joined at the shoulders and sides, as shown on the schematic, using the mattress stitch method then sleeves are added.

Note: Handspun Hope yarn is hand-spun and hand dyed by skilled craftspeople in Rwanda. Like all handspun yarn, yardage and thickness may vary slightly from skein to skein. We recommend that you alternate skeins while working this project.

MAKE 2 PANELS

BEGIN WITH COLOR A

BAND:
Row 1: fsc x10 *** (alternate: ch 9, turn, ch 1, 9x sc across) ***
Row 2 and on: turn, ch 1 (does not act as a st), 10x sc in back loop only
Rows 3-46 (52, 58, 64, 70, 76, 82, 88, 94): Rep Row 2.
DO NOT CUT YARN – you will go directly to work the body

Row 1 (RS): Ch 1 (does not act as a st), 46 (52, 58, 64, 70, 76, 82, 88, 94) sc across

CHANGE TO COLOR B

Row 2 (WS): Ch 2 (acts as first st), 45 (51, 57, 63, 69, 75, 81, 87, 93) dc across, Turn.
Row 3 (RS): Ch 1 (does not act as a st), 46 (52, 58, 64, 70, 76, 82, 88, 94) hdc across, Turn. Rows 4-15 (15, 17, 17, 17, 19, 19, 19, 19): Repeat Rows 2 & 3.

CHANGE TO COLOR A

Row 16 (16, 18, 18, 18, 20, 20, 20, 20) (WS): Ch 2 (acts as first st), 45 (51, 57, 63, 69, 75, 81, 87, 93) dc across, Turn.
Row17(17,19,19,19,21,21,21,21)(RS): Ch1(doesnotactasast),46(52,58,64,70,76,82,88,94) hdc across, Turn.

Row 18 (18, 20, 20, 20, 22, 22, 22, 22) (WS): Ch 2 (acts as first st), 45 (51, 57, 63, 69, 75, 81, 87, 93) dc across, Turn.

CHANGE TO COLOR B

Rows 19 (19, 21, 21, 21, 23, 23, 23, 23)-30 (30, 32, 34, 34, 36, 36, 38, 38): Repeat Rows 2 & 3.

CHANGE TO COLOR A

Row 31 (31, 33, 35, 35, 37, 37, 39, 39) (RS): Ch 2 (acts as first st), 45 (51, 57, 63, 69, 75, 81, 87, 93) dc across, Turn.
Row 32 (32, 34, 36, 36, 38, 38, 40, 40) (WS): Ch 1 (does not act as a st), 12 (15, 18, 20, 23, 26, 28, 31, 34) hdc, 22 (22, 22, 24, 24, 24, 26, 26, 26) sc, 12 (15, 18, 20, 23, 26, 28, 31, 34) hdc across, Turn.
Row 33 (33, 35, 37, 37, 39, 39, 41, 41) (RS): Ch 2 (acts as first st), 11 (14, 17, 19, 22, 25, 27, 30, 33) dc, 22 (22, 22, 24, 24, 24, 26, 26, 26) sc, 12 (15, 18, 20, 23, 26, 28, 31, 34) dc across, Turn.

BLOCK BOTH PANELS BEFORE ASSEMBLY

ASSEMBLY – SAME FOR ALL SIZES
Marry the tops of your panels together with WS facing.

Shoulder Seams:
Using the Mattress Stitch Method, seam together approx. 12 (15, 18, 20, 23, 26, 28, 31, 34) sts beginning at outside corner of shoulder and working toward neck opening. Fasten off.
Repeat for other shoulder, leaving center 22 (22, 22, 24, 24, 24, 26, 26, 26) sts unworked for neck opening.

Side Seams / Creating Armholes:
Using the Mattress Stitch Method, seam together beg. at bottom edge and working toward shoulder, leaving approx. 8.5 (9, 9.5, 10, 10.5, 11, 11.5, 12, 12.5)” for armhole opening. Fasten off.
Repeat for other side seam.

TURN RIGHT SIDE OUT FOR SLEEVES.

Note: The Sleeves are worked sideways and joined to the body at the end of every other row. AND ADDED AFTER ASSEMBLY

SLEEVES - COLOR A

Set Up Round (RS): begin at underarm, work approx 46 (50, 52, 56, 58, 60, 64, 66, 68) Sc evenly all the way around around entire armhole opening.

When you get to the opposite bottom corner, sl st to join round, then:

Row 1: F sc 11, turn.
Row 2: Ch 1(does not act as a st), 11 sc in back loop only, sl st to the NEXT sc on the set up round
Row 3: Sl st to the NEXT sc on the set up round, Turn, 11 sc in back loop only, Turn.
Alternate Rows 2 & 3 until you reach all the way around to Row 1, fasten off leaving a 12” tail.

Use Tail to join sides of sleeve ribbing. Repeat on other side.
Weave in all ends.

Basic AF Beanie Free Knitting Pattern

In partnership with Asylum Fibers and her amazing chunky yarn, we bring you this free classic knit beanie pattern. Perfect to whip up on the go and great for gifts for the whole family. Beginners and experienced knitters alike love our Basic AF Knit Beanie. You can make the brim as wide or trim as you like. Add slouch if you like. Truly versatile and the most perfect basic beginner knit beanie.

Classics are classic for a reason! This is one of those chunky knit hat patterns that looks good on everyone and somehow ends up on your needles over and over again. It’s perfect for stash-busting, gift-giving, or just making something warm while you binge your favorite show.

Seriously-if you’ve got some chunky yarn and a little time, this beginner-friendly beanie pattern is calling your name.

Supply List:
Asylum Fibers Bulky –1 skeins, each Approx 108 yards
US 13 / 9mm 16”circular needle & set of double pointed needles
Large needle to weave ends
Stitch Marker

Finished hat:
Brim Circumference 16.5” –stretches to fit 21 –23” average adult head
Beanie Length 7.5” Approx / Slouchy Length 14” Approx

Stitches Used / Abbreviations:
co –cast on (using long tail cast on method)
k –knit
p -purl
k2tog –knit two together decrease
st -stitch

Gauge: 4 inch sq = 12 stitches x 12 rows

NOTES: Gauge is not a huge factor for this pattern so do not worry to much if you are struggling to meet gauge. In fact - this is a great pattern to use to work on improving gauge and consistency.

You will be able to add slouch by adding rows.

PATTERN
Color A:

CO 56; Place marker and join to work in the round, being careful not to twist sts.

Round 1: [k1,p1] to end

Rounds 2-9: repeat Round 1
*** or repeat until desired brim width

Rounds 10-20: knit

If adding a color change, change to Color B here:
Rounds 21-34: Knit
***
Or until you reach desired hat body length

Begin crown decrease:

Round 1: [k5,k2tog] around –48 sts remain

Round 2: [k4,k2tog] around –40 sts remain

Round 3: [k3,k2tog] around –32 sts remain

Round 4: [k2,k2tog] around –24 sts remain

Round 5: [k2tog] around -12 sts remain

Round 6: [k2tog] around -6 sts remain

Using needle, weave in tail through the remaining 6 stitches to close up hat peak. Weave in ends using cast on tail to attach button or tag.

MORE FREE KNITTING PATTERNS FOR YOU

Chunky Everest Beanie Free Crochet Pattern

Hey everyone! I’m super excited to share something with you today. Remember my Everest Beanie? Well, I’ve got a new twist on it that’s perfect for colder days. Say hello to the Chunky Everest Beanie free crochet pattern!

So I took our favorite worsted-weight Everest Beanie and bulked it up with chunky weight yarn. It’s thicker, cozier, and just perfect for those extra chilly days. It feels like a warm hug for your head, seriously! The way the texture of this beanie works, all those lovely loops join together to keep you warm.

Not only is this beanie super warm, but it also looks amazing. The texture? Oh, it’s something else! It adds that perfect stylish touch to any winter outfit. Whether you’re grabbing coffee or going for a walk in the park, this beanie’s got you covered - literally!

And guess what? Making this beanie is a breeze. Whether you’re just starting out with crochet or you’re a seasoned pro, you’ll find this pattern super easy and fun. It’s a great project for cozy nights in.

Supply List:
124 yds Category #5 Bulky Yarn (Yarn used in sample is discontinued. WeCrochet Brava Bulky or Swish Bulky would be good substitutes.) (to add Pom Pom you will need more yarn)
Crochet Hook Size L / 8mm
Stitch Marker
Large needle to weave ends

Gauge: 4 inch sq = 7 pattern stitches x 14 rows

Hat Size:
Completed measures: 19” band circumference / Height 10”
Fits Average Adult Size Head 21” – 23’

Stitches Used / Abbreviations:
fsc- foundation single crochet
ch - Chain
sc - Single Crochet
dc – Double Crochet

Pattern Notes:
Pattern has joined rows. You will ch 1 & turn for the body of the hat
BAND:
Row 1: fsc x7 *** (alternate: ch 7, turn, ch 1, 6x sc across) ***
Row 2 and on: turn, ch 1, 6x sc in back loop only
Rows 3 – 58: Repeat row 2 for average adult size head of 19” (or desired width)
When band is at desired width: Sl st to top of initial fsc from first row, then 7 sl st across to join the whole band to become a circle
DO NOT CUT YARN // Turn to now work the body

BODY:
Row 1: ch 1, sc all way around band for total 60 sc, then sl st to ch 1
(If you adjust for larger band, this will increase – must be multiple of 2 for pattern)

Row 2: ch 1, then dc in same sc of previous row then *skip one sc sp space and [1sc, 1 dc] in next sc space *; repeat * to * all the way across to end leaving 1 sc space left; skip 1 sc space then sl st to ch 1 to complete row, Then ch 1 and turn

Row 3: then dc in same, then *skip next dc, [1 sc, 1 dc] in next sc *; repeat * to * all the way across then sl st to ch 1 to complete row, Then ch 1 and turn

Rows 4 – 14: Repeat ROW 3 but do NOT turn at the and of Row 24 after ch 1

Row 15: ch 1, hdc all way around, sl st to top of ch 1 for total of 59 hdc + ch 2

Row 16: ch 1, sc in hdc, then [sc2tog] all way around and sl st to top of ch 1 **this row should be stitched loosely**

Row 17: ch 1, sc loosely all way around, sl st to top of Ch 1 to complete row for total 30 sc incl. ch 1

Cut yarn leaving approx. 3” tail
Turn hat inside out.

Using tapestry needle, weave lengthy tail across the top of the hat across, then diagonally, creating a star shape. Then pull tight like a drawstring

Turn hat right side out Using tail, seam up the hat peak

Fasten off and weave in ends.

MORE FREE CROCHET PATTERNS

Mountaineer Cozy Free Crochet Pattern

Mountaineer Cozy Free Crochet Pattern

As the colder winds start to blow and the air gets crisper, there’s no better time to cast our newest free pattern. The Mountaineer Cozy will fend off the chilliest breezes in style.

Read More