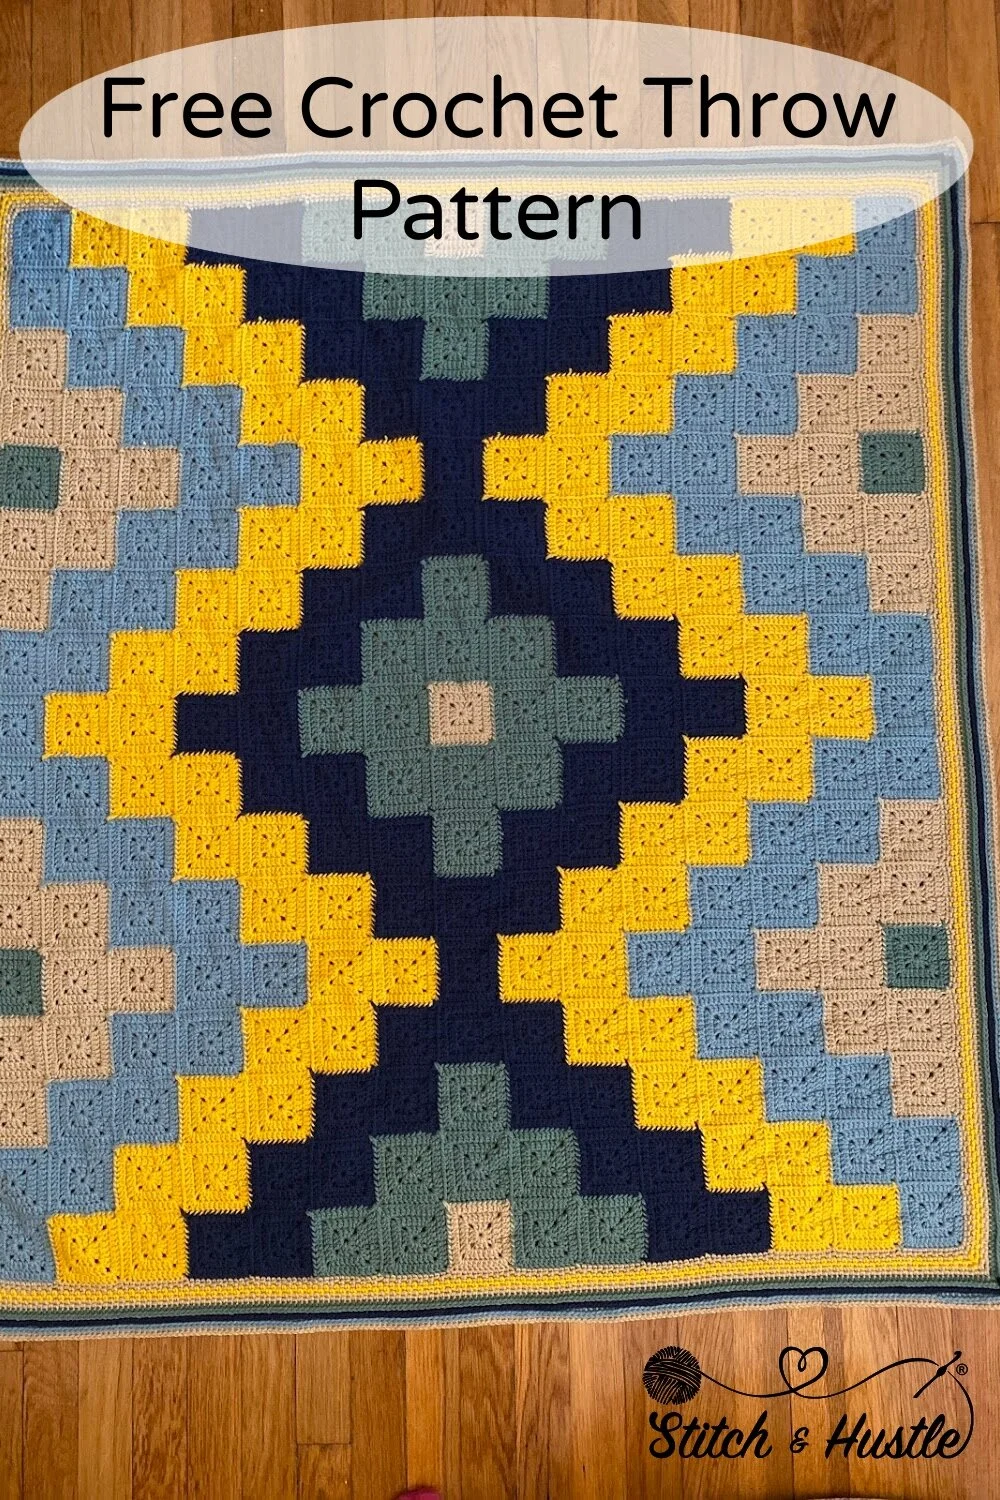
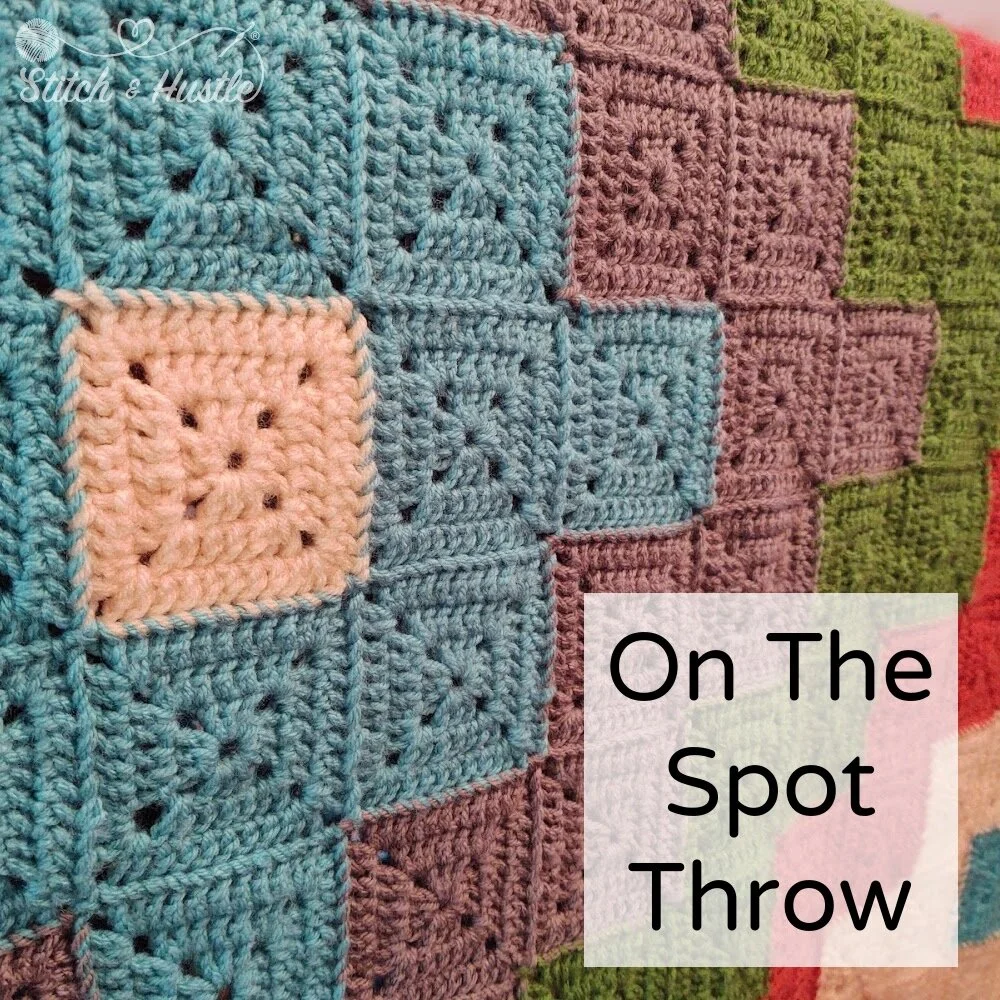
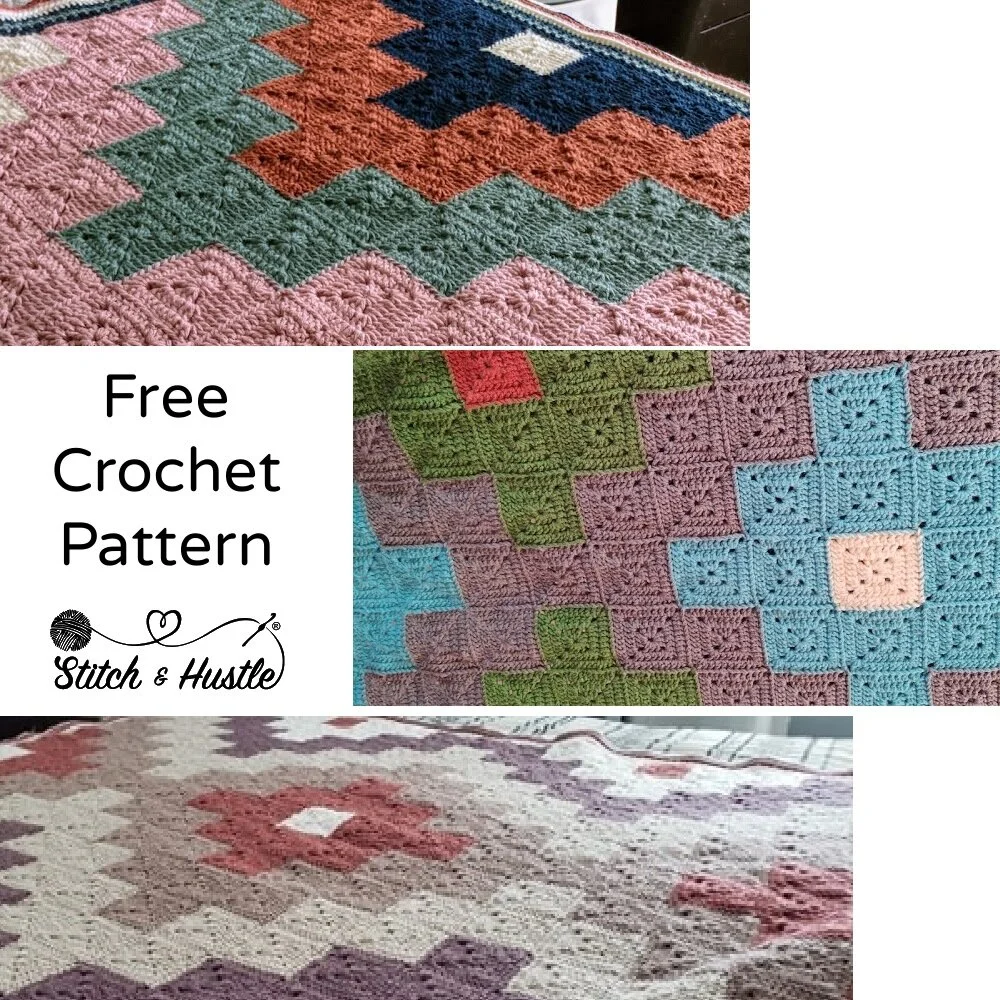
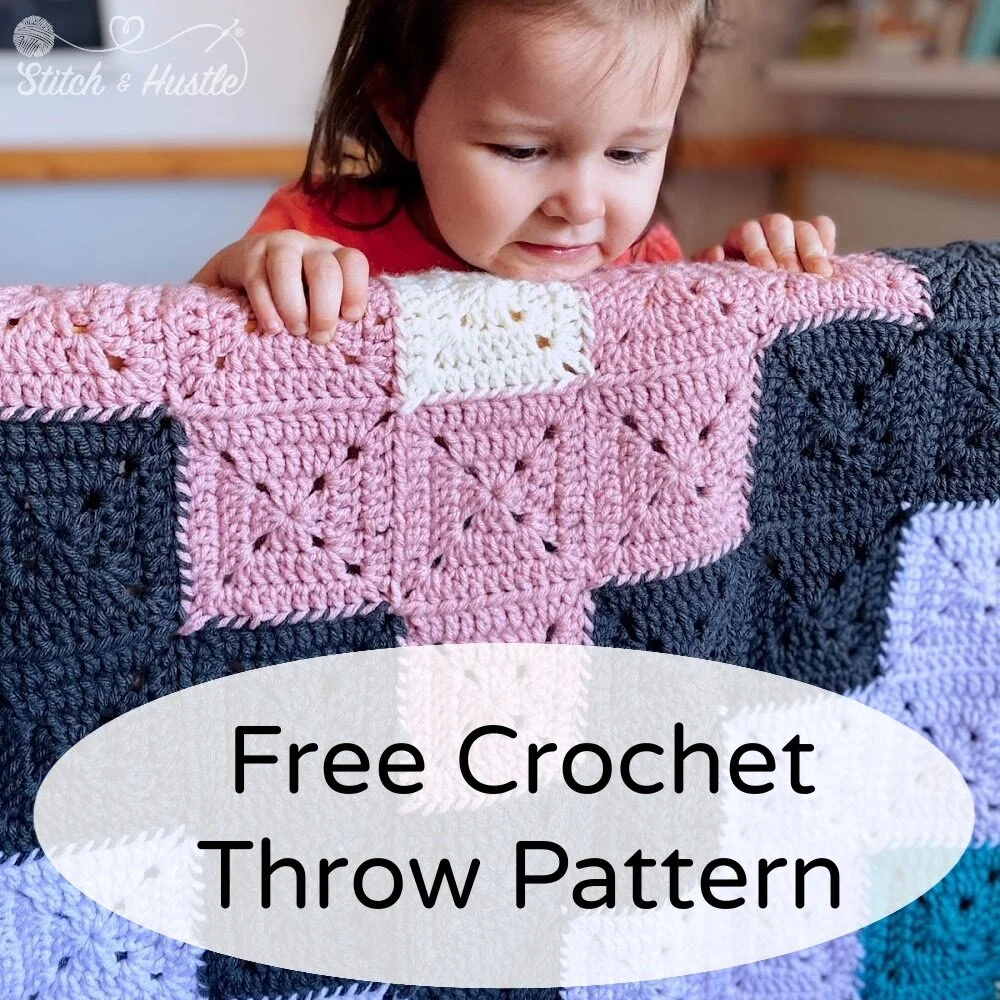
On The Spot Throw Free Crochet Pattern
/We love our guest designers here at Stitch and Hustle! Having the opportunity to feature designers who may be new to you is a joy and privilege. That’s why are so excited to bring you the On The Spot Throw Free Crochet Pattern from Morine of Morine’s Shop!
There is SO MUCH in the On The Spot Throw Free Crochet Pattern. From detailed process photographs to a chart to fill in for your own unique color scheme, it really is something you can sink your hook into and it is perfect for every level of crocheter - even adventurous beginners!
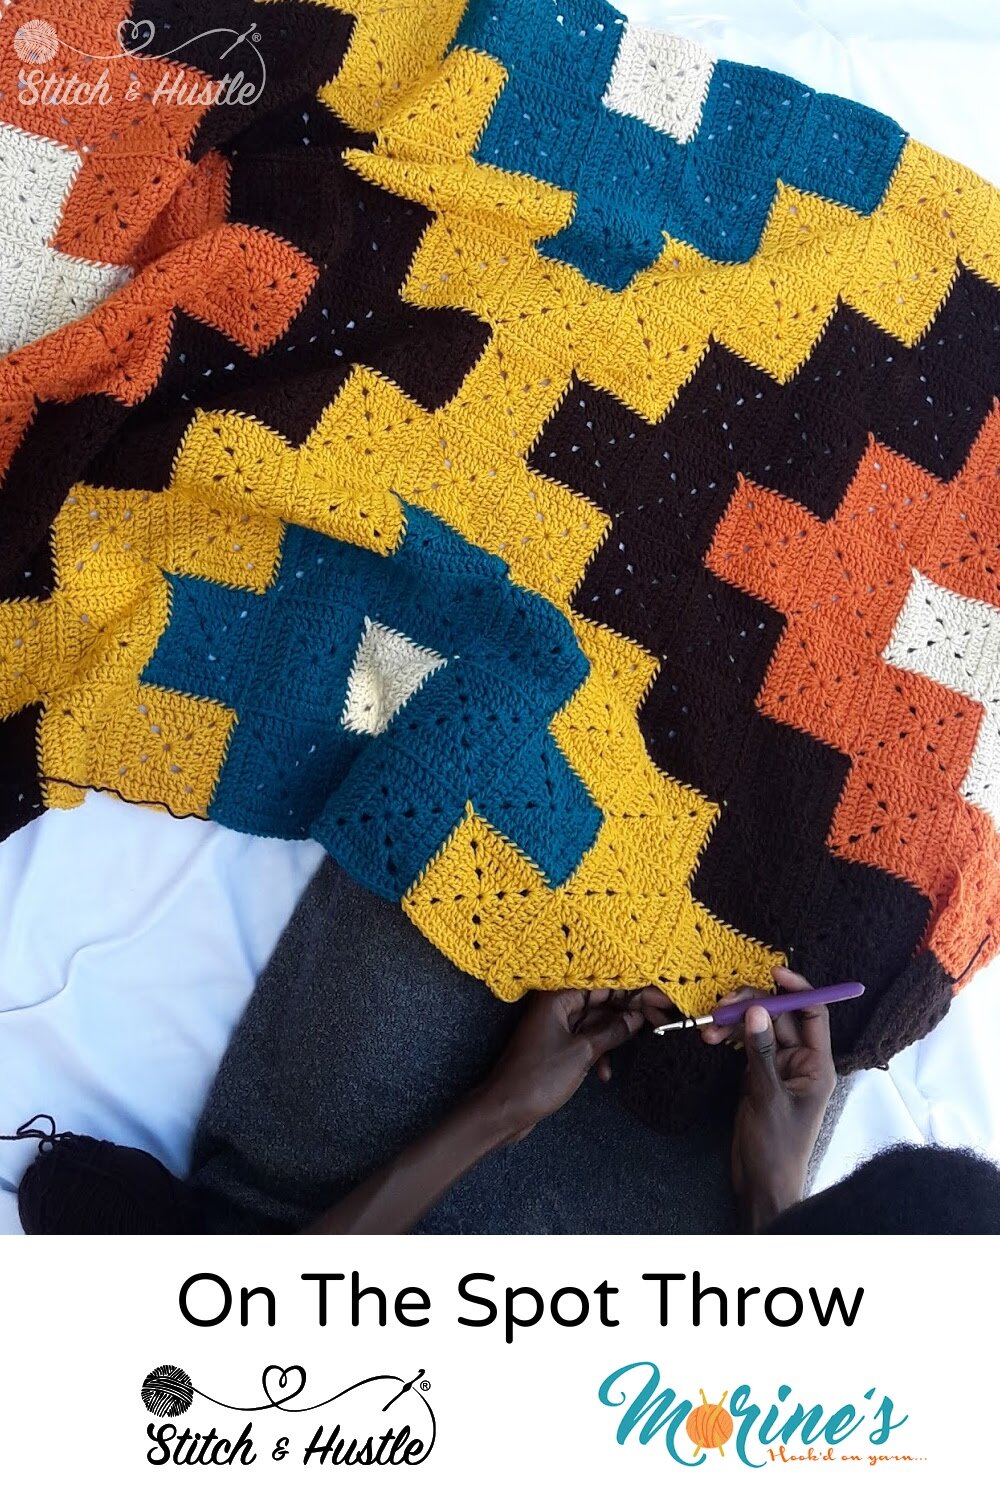
The On The Spot Throw Free Crochet Pattern blanket is an opportunity for you to have fun and really play with all the color combination possibilities. Packing a real graphic punch, this piece is an impressive, eye-catcher for sure and will become something you treasure.
Behind the scenes of bringing you the On The Spot Throw Free Crochet Pattern were a special group of testers who truly blew us away! They all made the pattern their own with unique color combinations and took gorgeous photos that really showcase the beauty of the pattern and their own talented work - helping you see all the possibilities unleashed with the On The Spot Throw Free Crochet Pattern.
So dive in and see what magical color combinations you can come up with for your very own On The Spot Throw!
SKILL LEVEL: Intermediate
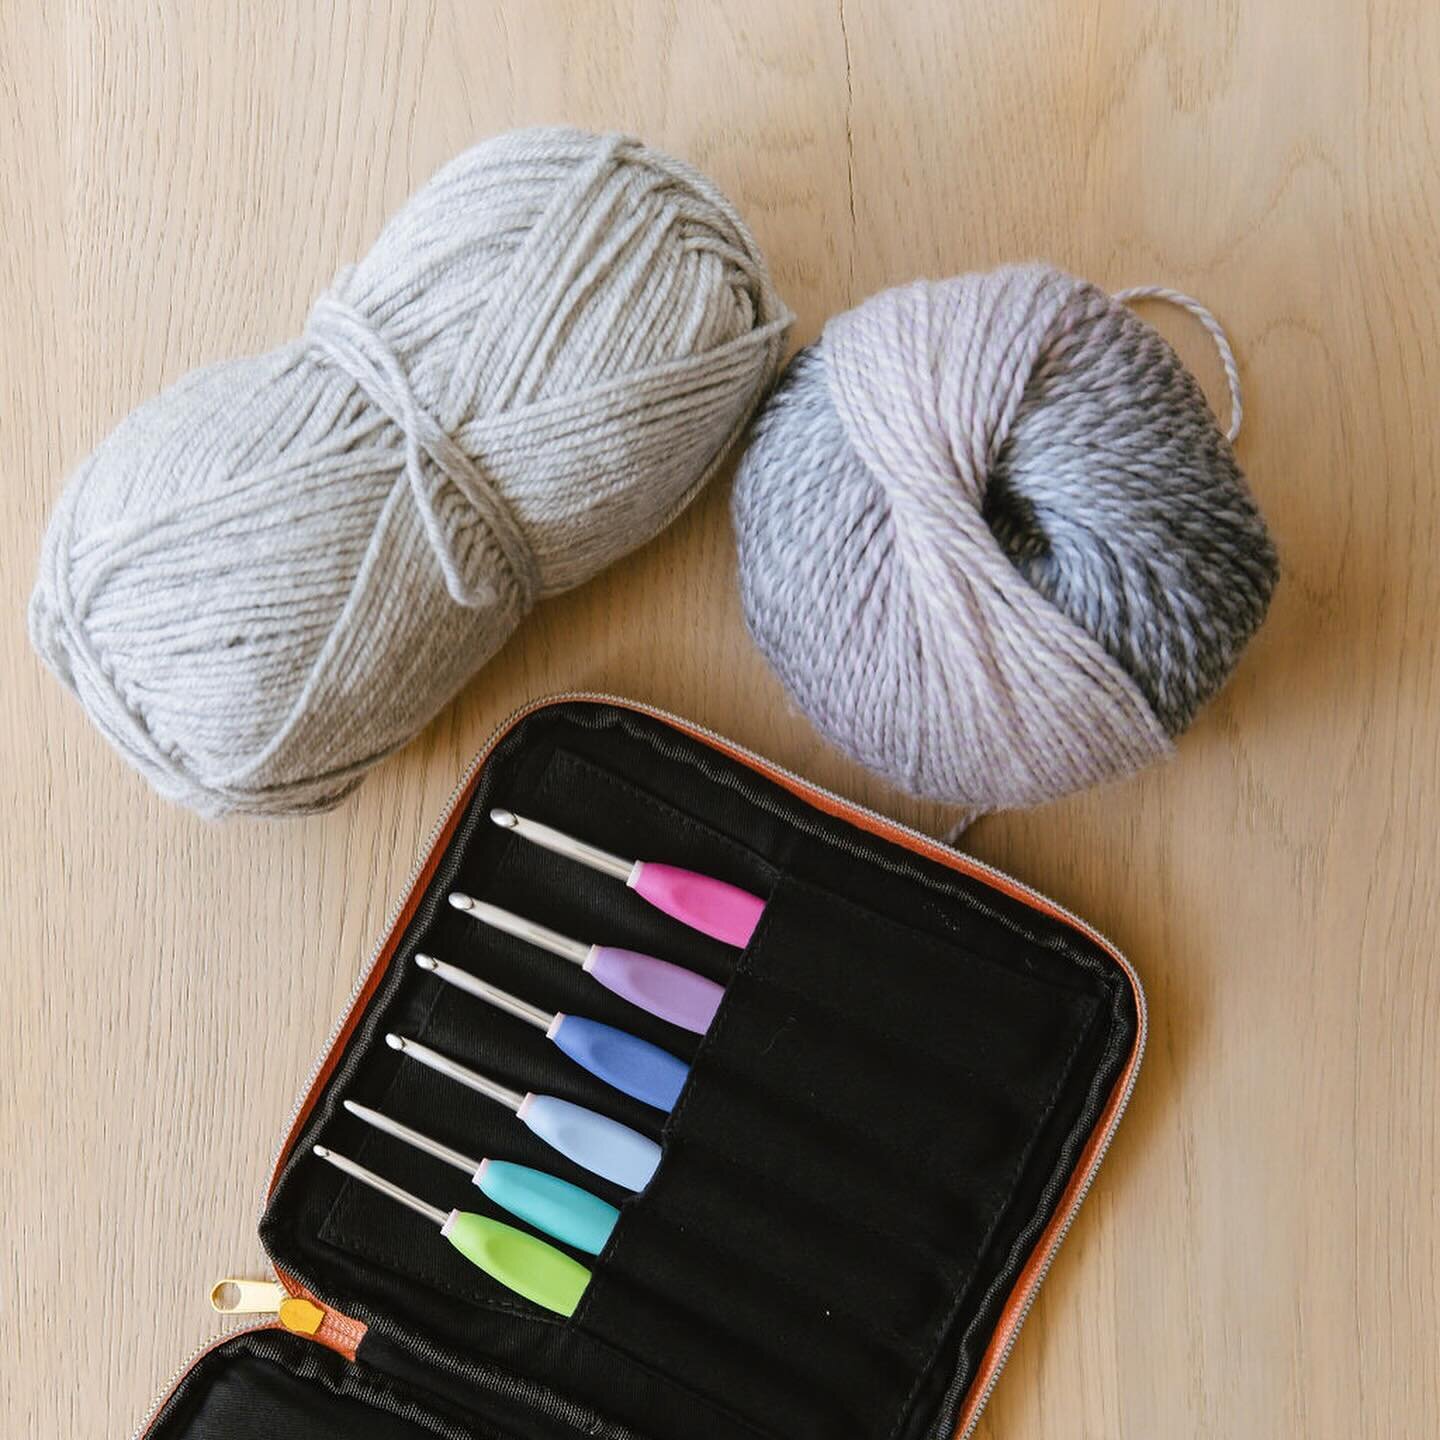
MATERIALS
Worsted weight yarn in following amounts/colors:
Color A (Dark Brown in original) 528 yd/483 m
Color B (Burnt Orange in original) 792 yd/725 m
Color C (Teal in original) 528 yd/483 m
Color D (Mustard in original) 792 yd/725 m
Color E (Cream in original) 660 yd/604 m
5mm/H crochet hook
Darning Needle
Scissors
SIZES: One complete granny square (3 rows) = 3.25” square
Final throw measurements = 51” x 57”/129.5 cm x 144.8 cm
GAUGE: 14 its x 7 rows in dc = 4” (with 5mm hook)
ABBREVIATIONS:
ch= chain
hdc=half double crochet
yo= yarn over
st(s)= stich(es)
dc=double crochet
sl st= slip stich
sc=single crochet
third loop=the loop found directly behind and below a hdc

PATTERN NOTES:
Read through the pattern from beginning to end before starting your work just to be sure you don’t have any questions that might cause frustration while working on the project.
Original throw was worked from top down, left to right in rows. One row was completed before moving on to the next row.
Gauge is included for your reference. As this is a throw pattern, achieving gauge is not critical.
The pattern is worked in solid granny squares that are sewn together as well as the option of squares that are joined together, using the join as you go (JAYG) method. Both tutorials are provided in the pattern below. You can, however, use whichever method you feel works best for you. A square count for each color is included in the pattern.
Ch 2 at the beginning of each round counts as 1 dc.
Apart from a worksheet with the colors I used, I’ve also provided a blank worksheet with the design outline. If you want to try out different color combinations, just print it out and color it in with your preferred color combinations.
This pattern is written using US crochet terms.

PATTERN
Solid Granny Square.
Using your 5mm crochet hook and yarn, ch 4, sl st join to 1st ch to form a ring.
Row 1: ch 2, 2 dc into ring, (ch 2, 3 dc into ring) 3 times, ch 2, sl st join into 2nd ch of beg ch 2. (12 dc and 4 ch-2 spaces)

Row 2: ch 2, dc in each of the next 2 dc, [(2 dc, ch 2, 2 dc) in corner space, dc in each of the next 3 dc] 3 times, (2 dc, ch 2, 2 dc) in last corner space, sl st join into 2nd ch of beg ch 2. (28 dc and 4 ch-2 spaces)

Row 3: ch 2, dc in each of the next 4 dc, [(2 dc, ch 2, 2 dc) in corner space, dc in each of the next 7 dc] 3 times, (2 dc, ch 2, 2 dc in last corner space, add 1 dc in each of the last 2 dc after corner, sl st join into 2nd ch of beg ch 2. (44 dc and 4 ch-2 spaces)

You will need a total of 68 squares in Color A, 62 squares in Color B, 32 squares in Color C, 58 squares in Color D and 35 squares in Color E.


Row 3: Pull through loop join-as-you-go method.
The join as you go method takes a minute to get used to but is really fun once you get the hang of it. What you need to remember is:
• The first granny square will be made to completion. All the following ones will begin the same way but on the last round, will be joined to existing square(s).
• The squares are always joined with the right sides facing up so make sure both granny squares are facing the same direction when joining.
• For this pattern, I worked my joins from left to right. I completed one row before moving on to the next row.
• If the ch-2 corner space is on the edge, join it to the ch-2 corner space of the adjacent square.
• If the ch-2 corner space is NOT on the edge, join it to the ch-2 corner space of the diagonal square.

Joining the first row:
If you choose to use this method to join your squares, work the square pattern as instructed until you get to the first corner of the 3rd (and final) row.

Ch 1, pull a loop through the ch2 space of the square that is adjacent to the one you’re currently working on and ch 1

Work a dc in the corner space of your current square, remove the hook from the yarn and place it through the dc of the adjacent square. Place the yarn back on your hook and pull a loop through.
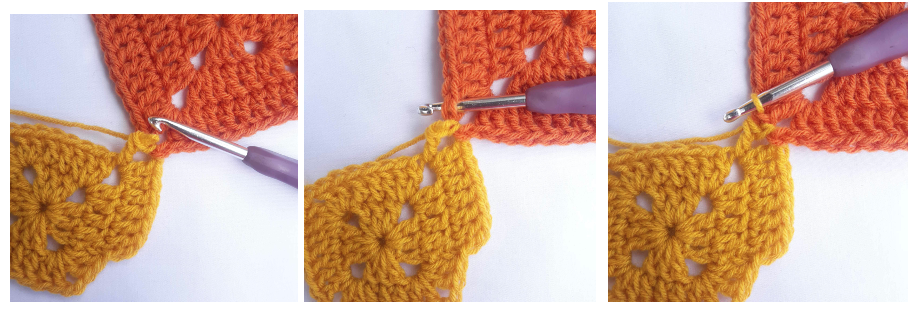
Work the next stitch, slide the yarn out of the hook, place it in the next adjacent stitch and pull through a loop.
Continue working this way until you get to the next corner.

Ch 2 and simply continue working the granny square as you normally would to completion.
Fasten off. Repeat these steps to join your entire row of squares.

Joining subsequent rows:
Pull through loop join-as-you-go method.
If you choose to use this method to join your squares, work the square pattern as instructed until you get to the first corner of the 3rd (and final) row.

Ch 1, pull a loop through the ch2 2 space of the square that is diagonal to the one you’re currently working on and ch 1.

Work a dc in the corner space of your current square, remove the hook from the yarn and place it through the dc of the adjacent square. Place the yarn back on your hook and pull a loop through.

Work the next stitch, slide the yarn out of the hook, pop it in the next stitch and pull through a loop.

Continue working this way until you get to the next corner. ch1, slide your yarn off the hook and place the hook through the bottom of the chain space of the square that is diagonally across.

Pop the yarn back on the hook, slide it through the space and ch1.

Continue working on the other side as with the first side making sure to line up your stitches.

NOTE:
When you’re working on the edges of your project, since there are no diagonal squares, you will attach these squares to the ones adjacent to them when you get to the ch 2 corner spaces.
Although this method does take a bit of time to get used to, the overall look of the throw is seamless with a neat finish and no gaps. Bonus, you don’t have to worry about joining when you’re done with your squares.
I joined my squares from the left to right moving this way on each row.
Border:
Working top down moving from left to right in each row:
The border is worked in a combination of different stitches which include the moss stitch and 3rd loop hdc.
- The moss stitch is the sequence of two stitches; the single crochet and the chain stitch repeated over a number of stitches. It is also known as the linen stitch or the granite stitch.
- Hdc in the 3rd loop. The 3rd loop is located behind and slightly below the back loop. It is very prominent when working hdc stitches.

Row 1: Join Color E yarn at any corner space of the throw, ch 1, (sc, ch 2, sc) in corner space, work sc in each stitch across making sure to work (sc, ch 2, sc) in the corner spaces, join to first sc.

Row 2: Continuing with Color E, ch 1, (sc, ch 2, sc) in corner space, *[ch 1, sk next sc, sc in next sc] across to corner work (sc, ch 2, sc) in the corner spaces, rep from * around, join to finish. Fasten off.
Row 3-4: Attach Color A yarn in corner ch2 sp, ch 1, (sc, ch 2, sc) in corner space, *[ch 1, sk next sc, sc in next ch-sp] across to corner, work (sc, ch 2, sc) in the corner spaces, rep from * around, join to finish. Fasten off.
Row 5: In Color E, rep Row 3.
Row 6: Continuing with Color E, Rep Row 1. Fasten off.
Row 7: Join Color C yarn at any corner space of the throw, ch 1, (hdc, ch 2, hdc) in corner space, work hdc in each stitch across making sure to work (hdc, ch 2, hdc) in the corner spaces, join to first hdc. Fasten off.
Row 8: Join Color D yarn at any corner space of the throw, ch 1, (hdc, ch 2, hdc) in corner space, work hdc in the third loop of each stitch across making sure to work (hdc, ch 2, hdc) in the corner spaces, join to first hdc. Fasten off.
Row 9: Join Color B yarn at any corner space of the throw, ch 1, (hdc, ch 2, hdc) in corner space, work hdc in the third loop of each stitch across making sure to work (hdc, ch 2, hdc) in the corner spaces, join to first hdc. Fasten off.
Row 10: Join Color E yarn at any corner space of the throw, ch 1, (sc, ch 2, sc) in corner space, work sc in the third loop of each stitch across making sure to work (sc, ch 2, sc) in the corner spaces, join to first sc. Fasten off.
And there you have it! An awesome crochet throw