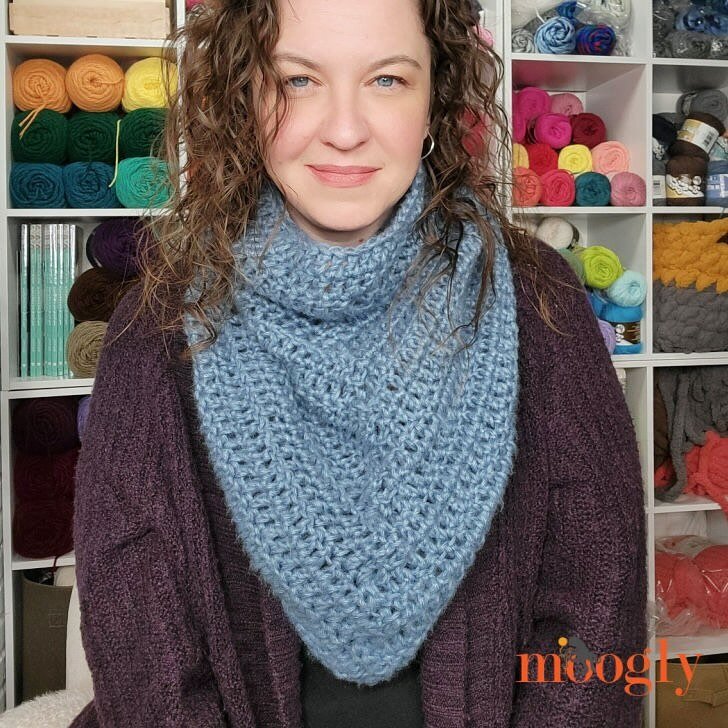
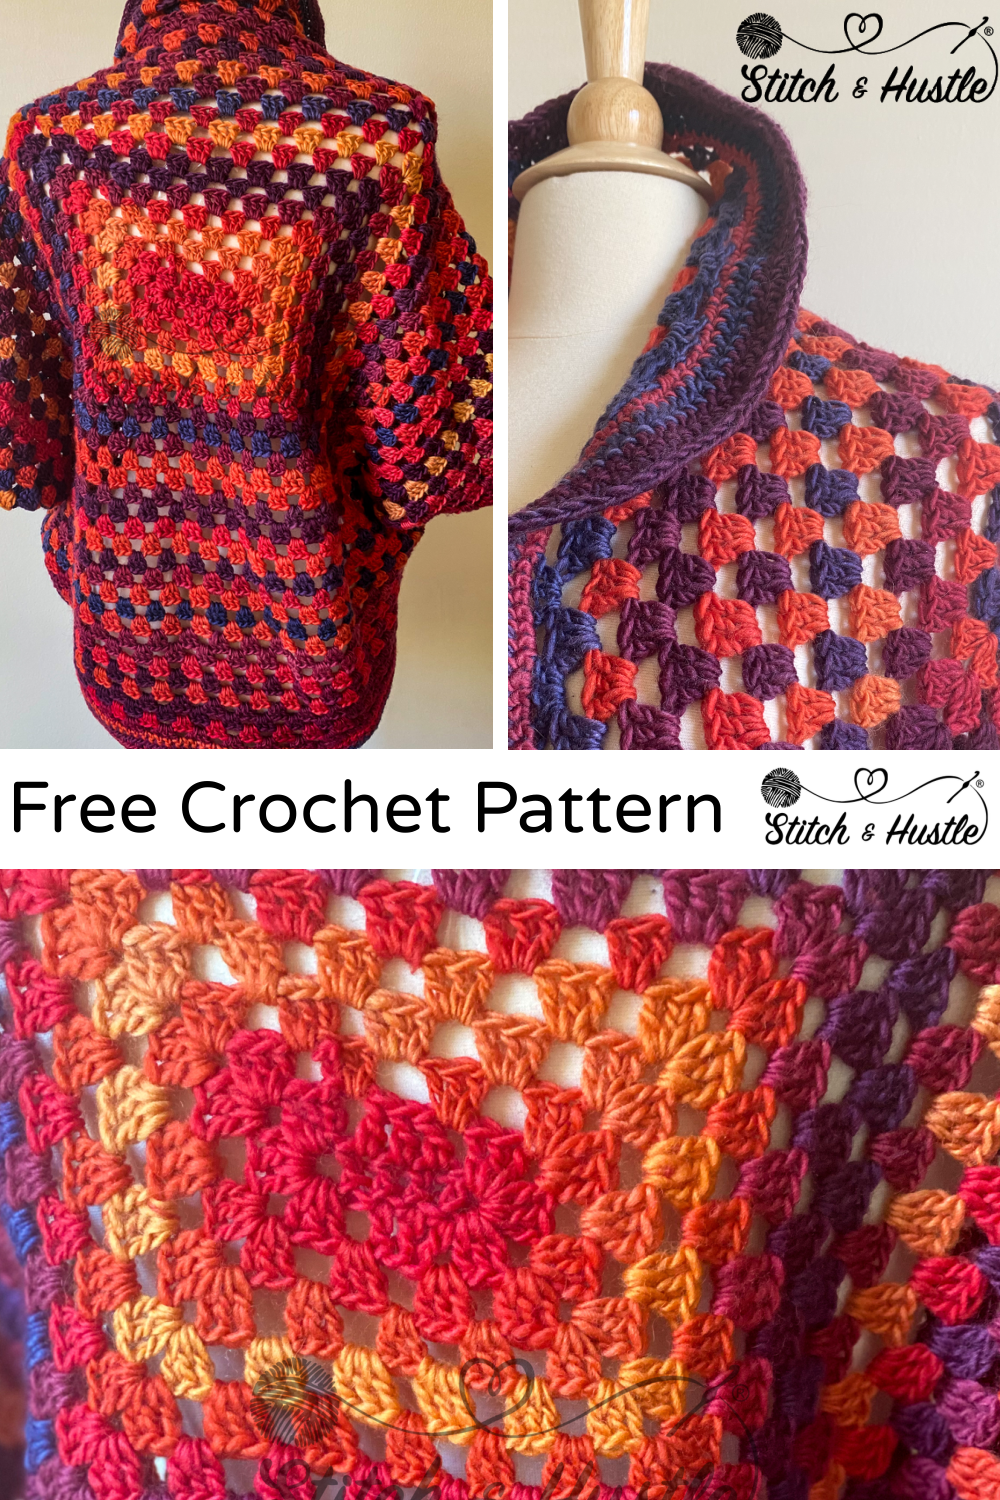
Wonderland Shrug Free Crochet Pattern
/I am so excited about sharing the Wonderland Shrug Free Crochet Pattern with you! It is the kind of pattern that has a granny style repeat, is beginner friendly and the yarn does the heavy lifting for you. Who could ask for more?
The great thing about the Wonderland Shrug Free Crochet Pattern is that you can easily size it for anyone from child to plus sized adult and you can make it in any weight yarn you like! It is like magic!

Supply List:
Category #4 Worsted Weight Yarn – 760 - 1200 yards total
2x Caron Cakes Yarn in Sample (blues)
WeCrochet Chroma Worsted, 760yd / 650m
Crochet Hook Size K / 6.5 mm
Tapestry needle to weave ends
Tape Measure
Fasteners or safety pins
Stitches Used / Abbreviations:
fsc- foundation half double crochet
ch - chain
sc - single crochet
hdc – half double crochet
dc - double crochet
hdc2tog – 2 hdc together

NOTES:
There is no gauge for this pattern.
SIZING: This pattern can be easily sized for any size from child to plus size adult. Just add pattern rows for a larger size. Measure your desired wingspan and that will be your base measurement to reach. Whatever yarn you use, be sure to make the rows to meet your desired base measurement.
YARN NOTE:
I used Blue Caron Cakes for sample to create the color scheme. If you use any “cake” or color changing yarn, it is imperative that the start and end of each ball match in color. Then use the ball that ends in that shade to begin the next and maintain color flow between balls of yarn.
The other sample is shown in WeCrochet Chroma Worsted and there is less planning involved when changing balls of yarn. You will want to buy enough for the whole shrug at once so that you can get the same dye lot.
ROW 1: fdc x6
Alternatively if you do not know fdc:
- ch 6,
then turn
- ch 2, 5x dc all the way across / Total for row is 6 dc (incl. ch 2)
ROW 2: ch 2 (acts as first dc), [2x dc, ch 1, 3x dc, ch 1, 3x dc] around last fdc of base row - (not INTO the stitch); this creates the first set of “corners”
Then: Ch 1, skip fdc, dc, dc, dc, Ch 1, skip fdc
[3x dc, ch 1, 3x dc, ch 1, 3x dc] around last fdc of base row - (not INTO the stitch); creates the second set of “corners”
Then: Ch 1, skip fdc, dc, dc, dc, Ch 1, skip fdc, then sl st to top of ch 2 that started row
ROW 3: Ch 4, then [3x dc ch 1, 3x dc] into next ch 1 sp for corner - then ch1, skip 3 dc, then [3x dc ch 1, 3x dc] into next ch 1 sp for corner
- ch1, skip 3 dc, then 3x dc into next ch 1 sp of previous row, ch1, skip 3 dc then 3x dc into next ch 1 sp of previous row
Then: ch1, [3x dc ch 1, 3x dc] into next ch 1 sp for corner, then ch 1, skip 3 dc, then [3x dc ch 1, 3x dc] into next ch 1 sp for corner
- ch 1, skip 3 dc, then 3x dc into next ch 1 sp of previous row, ch 1, skip 3 dc, 2x dc into next ch 1 sp of previous row
Then: sl st to top of ch 3 that started row

ROW 4: Ch 2, 2x dc in same, ch 1, skip 3 dc, then [3x dc ch 1, 3x dc] into next ch 1 sp for corner
- ch 1, skip 3 dc, then 3x dc into next ch 1 sp of previous row all the way around with [3x dc ch 1, 3x dc] at corners ending in ch 1 and sl st to top of ch 3 that started the row
ROWS 5 – 25: Repeat Rows 3 & 4 for pattern alternating starts of row
ROW 26: Ch 2, 2x hdc in same, ch 2, 3x hdc into same ch 1 sp for corner
- ch 1, skip 3 dc, then 3x hdc into next ch 1 sp of previous row all the way around with [3x hdc ch 2, 3x hdc] at corners ending in ch 1 and sl st to top of ch 2 that started the row
Your total rectangle will be 32” x 36”

ASSEMBLY:
Fold your work in half marrying the last hdc row – this will be inside out now
MUST FOLD INSIDE OUT
From the folded side: measure 7” or 8” and place pin (This will be your arm hole)
Begin working from where the folded corners of the hdc row meets and work sl st OR single crochet to marry the sides. Work up to your pin for the arm hole.
Fasten Off.
Repeat on the other side.
Turn right side out and Lay your piece out in a “diamond” with your arm holes on either side. This is the primary body and shape of your shrug.

CUFFS:
ROW 1: Ch 1, sc all way around to seam, do sc2tog x2 at seam where armhole was created, sl st to top of Ch 1
ROW 2: Ch 1, sc all way around, sl st to top of ch 1
Fasten Off.
Repeat on the other side.

TRIM COLLAR:
Begin at one end which will become the Neck
Place stitch marker on each side approx. 7” below sleeve seams
ROW 1: Ch 1, sc all way around to marker approx. 7” or 8” below the sleeve seam, then * 2sc, 2sc, 2sc,1sc *, repeat * to * to second marker approx. 7” or 8” below sleeve seam on other side, then sc all the way around to end and sl st to top of Ch 1
ROW 2: Ch 2 hdc all way around, sl st to top of ch 1
Fasten Off. Weave in all ends.