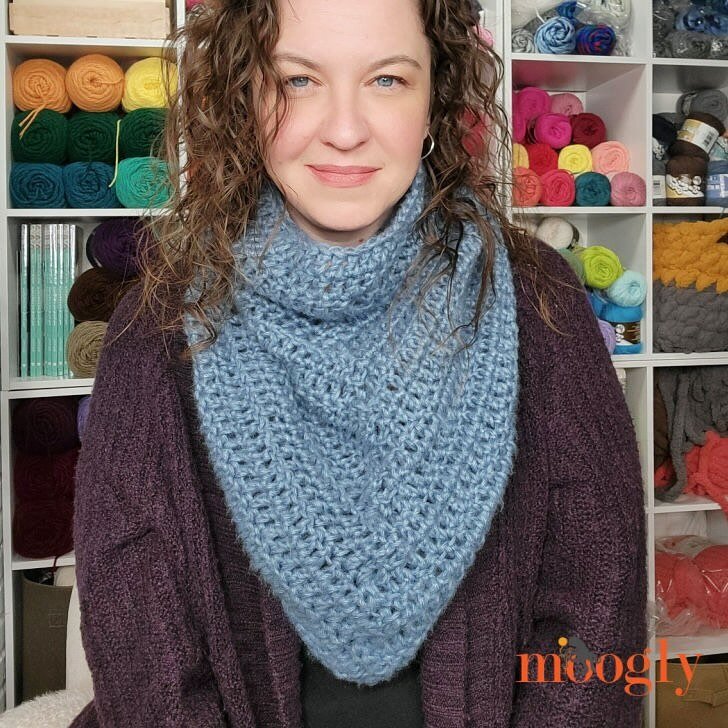
Montgomery Jumper Free Crochet Sweater Pattern
/I am madly in love with the Montgomery Jumper Free Crochet Pattern. And I just know you will be too!
The Montgomery Jumper Free Crochet Pattern works up in two identical panels and is great for beginner crocheters who are making their first garment. It is just as fun for experienced crocheters who want to explore texture. I used the wonderful Universal Yarn Cotton Batik which is a variegated yarn and contrasted it with a cotton solid. You can play around with how you change up the colors or add stripes throughout for a special twist of fun. The design allows for either cropped or full length giving you even more ways to customize as you go!
You can get the ad free pattern pdf with all the charts and schematics on Etsy here.

Supply List:
Cat #4 light worsted weight (Universal Yarn Cotton Batik & Universal Yarn Cotton Supreme used in design)
Main Color: Sea Glass 800 (900, 1010, 1120, 1240, 1360, 1480, 1610) yards
Contrast Color: Hosta Green 190 (210, 240, 270, 300, 320, 350, 380) yards
Crochet Hook Size I / 5.5 mm
Tapestry needle to weave ends
Tape Measure
Fasteners or safety pins

SIZES: Extra Small (Small, Medium, Large, 1X, 2X, 3X, 4X in parenthesis)
Finished Measurements Bust: 36.5 (40.5, 44.5, 48.5, 52.5, 56.5, 60.5, 64.5)”
GAUGE: 4 inch sq = 12 pattern sts x 12 rows in pattern stitch
Stitches Used / Abbreviations:
fsc- foundation single crochet
ch - chain
sc - single crochet
dc- double crochet
hdc – half double crochet
sts – stitches
RS – Right Side
WS – Wrong Side
PATTERN NOTES
This pattern is written for Adult Woman Extra Small (Sizes Small, Medium, Large, 1X, 2X, 3X, 4X in parenthesis)
This pattern is designed for a “crop” length sweater.
For a Full Length sweater you will need to add rows as noted on the front & back panels. This will require additional yarn
This pattern is made in two panels for front & back and two sleeves. 4 separate pieces.
Neck trim added as finishing touch after assembly.
BLOCK ALL PIECES BEFORE ASSEMBLY

BODY PIECES - MAKE TWO:
BEGIN WITH CONTRAST COLOR:
Band:
Row 1: Fsc x 10 (alternate: ch 10, turn, ch 1, 9 sc across), turn.
Row 2: Ch 1, 9 x sc in back loop only.
Rows 3- 55 (61, 67, 73, 79, 85, 91, 97): Repeat Row 2
Do not cut yarn – you will go directly to work the body.
Row 1: Ch 1 (acts as first sc), sc across placing 1 sc in the side of each row of band for a total of 55 (61, 67, 73, 79, 85, 91, 97) sc, turn.
CHANGE TO MAIN COLOR
Row 2: Ch 1 and turn, dc in last sc of previous row, *skip one sc and [1 sc, 1 dc] in next sc; * repeat * to * all the way across to end, 1 sc into last sc; ch 1 and turn.
Row 3: Dc in last sc of previous row, *skip next dc, [1 sc, 1 dc] in next sc; * repeat * to * all the way across to end, 1 sc into last sc; ch 1 and turn.
Rows 4-29 (29, 29, 30, 30, 30, 31, 31): Repeat Row 3.
*** NOTE:
This pattern is designed for a “crop” length sweater. For a Full Length sweater you will need to add rows here on front & back panels. This will require additional yarn.

Shape Armholes:
Row 1: Ch 1, *skip first sc and next dc, [1sc, 1 dc] in next sc *; repeat * to * all the way across to end, 1 sc in last sc, ch 1 and turn. 2 sts decreased, 53 (59, 65, 71, 77, 83, 89, 95) sts remain.
Rows 2-2 (4, 6, 8, 10, 12, 14, 16): Repeat Row 1. 2 sts decreased each row, 51 (53, 55, 57, 59, 61, 63, 65) sts remain.
Rows 3 (5, 7, 9, 11, 13, 15, 17) -16 (18, 19, 21, 22, 23, 24, 25): Repeat Row 3 from Body section, working even with no further decreases.
Separate Sides, Work Left Shoulder
Row 1: Dc in last sc of previous row, *skip next dc, [1 sc, 1 dc] in next sc; * repeat * to * 4 (5, 5, 5, 6, 6, 6, 7) more times, skip next dc, sc in next sc, ch 1, turn. 13 (15, 15, 15, 17, 17, 17, 19) shoulder sts.
Rows 2-4: Rep Row 3 from Body section. Fasten off.
Continue Shape Neck & Second Shoulder:
Skip 25 (23, 25, 27, 25, 27, 29, 27) center Neck sts, rejoin yarn to next st. Repeat Rows 1-4 for Right Shoulder.
SLEEVE – MAKE TWO
SLEEVE NOTES:
You will be working in the round after the cuff, with joined rounds AND turning your work
After Round 41 you will NOT join and begin to decrease and turn after each row.
BEGIN WITH CONTRAST COLOR:
Cuff
Row 1: Fsc x 10, turn.
Row 2: Ch 1, 9 x sc in back loop only.
Rows 3-28 (30, 30, 30, 32, 32, 32, 34): Repeat Row 2.
sl st to join to beginning row then 9 sc across to join cuff
Do not cut yarn – you will go directly to work the body.

Sleeve Body
Round 1: Ch 1 (acts as first sc), sc across placing 1 sc in the side of each row of band for a total of 28 (30, 30, 30, 32, 32, 32, 34) sc.
CHANGE TO MAIN COLOR:
Round 2 (RS): Ch 1, dc in same sc of previous row, *skip one sc ,[1 sc, 1 dc] in next sc *; repeat * to * all the way around to end leaving 1 sc left, skip last sc then sl st to ch 1 to complete round. Turn.
Round 3 (WS): Ch 1, dc in same, *skip next dc, [1 sc, 1 dc] in next sc *; repeat * to * all the way around, sc in same space as ch, sl st to ch 1 that started round to complete. Turn.
Round 4 (Increase Round): Ch 1, [dc, sc, dc] in same, *skip next dc, [1 sc, 1 dc] in next sc *; repeat * to * all the way around, sc in same space as ch, sl st to ch 1 that started round to complete. 2 sts increased, 30 (32, 32, 32, 34, 34, 34, 36) sts. Turn.
Repeat Increase Round every 10 (10, 8, 6, 6, 6, 4, 4) rounds, 3 (3, 4, 5, 5, 3, 9, 8) more times, then repeat Increase Round every 0 (0, 0, 4, 4, 4, 0, 2) rounds, 0 (0, 0, 1, 1, 4, 0, 2) time(s), for a total of 4 (4, 5, 7, 7, 8, 10, 11) Increase rounds and 8 (8, 10, 14, 14, 16, 20, 22) sts increased. After all Increase Rounds, there are 36 (38, 40, 44, 46, 48, 52, 56) sts. Work other rounds even in patt (round 3).
After all Increase Rounds are complete, work even in pattern until a total of 41 Sleeve Body rounds have been worked.
Shape Sleeve Cap
Row 1: Ch 1, *skip first sc and next dc, [1sc, 1 dc] in next sc *; repeat * to * all the way across to end, 1 sc in last sc, ch 1 and turn. 2 sts decreased, 34 (36, 38, 42, 44, 46, 50, 54) sts remain.
Rows 2-12 (13, 14, 15, 16, 17, 18, 20): Repeat Row 1. 2 sts decreased each row, 12 (12, 12, 14, 14, 14, 16, 16) sts remain. Fasten off.
BLOCK ALL OF YOUR PIECES BEFORE ASSEMBLY
ASSEMBLY: ***Same for ALL sizes***
BODY ASSEMBLY:
Marry Body pieces INSIDE OUT.
Using stitch marker or fastener, pin the panels together at Row 1 of Armhole Shaping
Beginning at bottom ribbing, seam pieces together with either mattress stitch or sc seams together.
When you get to fastener, fasten off.
Whip stitch shoulders together.
SLEEVES ASSEMBLY:
Using fasteners, attach sleeve on the RIGHT SIDE to the body.
Working on the inside of the garment, beginning at bottom center of armhole, attach sleeve by either whip stitch or sc around.
NECK EDGING AFTER ASSEMBLY USING CONTRAST COLOR:
Attach at center of back neck:
Round 1: Ch 1 (acts as sc), 73 (69, 73, 77, 73, 77, 81, 77) sc evenly around, working 1 sc for each center neck st, and 6 sc along each side of front and back neck, sl st to beginning ch 1 to join & complete round. 74 (70, 74, 78, 74, 78, 82, 78) sc.
Rounds 2-3: Ch 1 (does NOT act as stitch), hdc in each st around in back loop only, sl st to top of first hdc to join & complete round.
Fasten off.
Weave in all ends.