Get Your Craft Fair On: Setting Up The Perfect Display

So you've applied for the perfect Craft Fair and got accepted. Woo Hoo! Now time to prep your display. Say What? It can be a daunting task to visualize and then realize your first craft fair set up. Have no stress. We got you!

First let's talk about your overall set up. The design and layout of your booth or display is more important than many realize.  It is not as easy as popping open a few folding tables, spreading out your wares and waiting for the masses to come rolling in to buy. I have learned that the design of your display is as much a factor of a successful show and sales as the products themselves.

Before you can even think about your display, first you need to think about WHAT you will be selling.  I have a variety of inventory but don’t bring all to all events. Now sure, some say “well, if you don’t bring it you can’t sell it”. But that’s not true. You can take orders, ship to customers if you don’t have something on site or any other ways to sell.  You want your booth to have a cohesive look and feel. Not everything you carry will work. Think about the audience and customer base who will be attending the event and what will work.

Now that you know WHAT you are selling, it is time to focus on the display. Think inviting. Think clean. Think cozy. If you sell touchy feely products you need to make sure they are accessible. Think about how a customer will experience you, your brand and your booth. Then get to work on your display.

A word of caution before you start buying things: it may be worth it to find out if the event is supplying or renting tables to vendors. While renting may seem wasteful when you can OWN and continue to use something, you run the risk of ending up with lots of "stuff" that didn't exactly work out. You may be able to rent a table and chair from them for a small fee and use the rest of your budget on display set up. This allows you to play around until you find what works best for you. Test then buy is my motto.  And before you buy, see what you have around the house that can help with your set up. Maybe you have baskets or stands. You can decorate shoe boxes. Get creative.

Build your booth in advance so you can truly see what will work. I cleared out our dining room, tape marked the floor to the exact size of my booth and did a few test runs. No matter how good things look on paper I cannot tell you how valuable this was. I was able to truly see what worked and what didn’t and it also helped things go smoothly on actual set up day.

Keri from Izy & Oly did a great job of maximizing space and displaying product. Customers can get a clear view of all fabric options and the variety of products. She really maximizes space by going up and down and her use of baskets keeps things organized and clean.


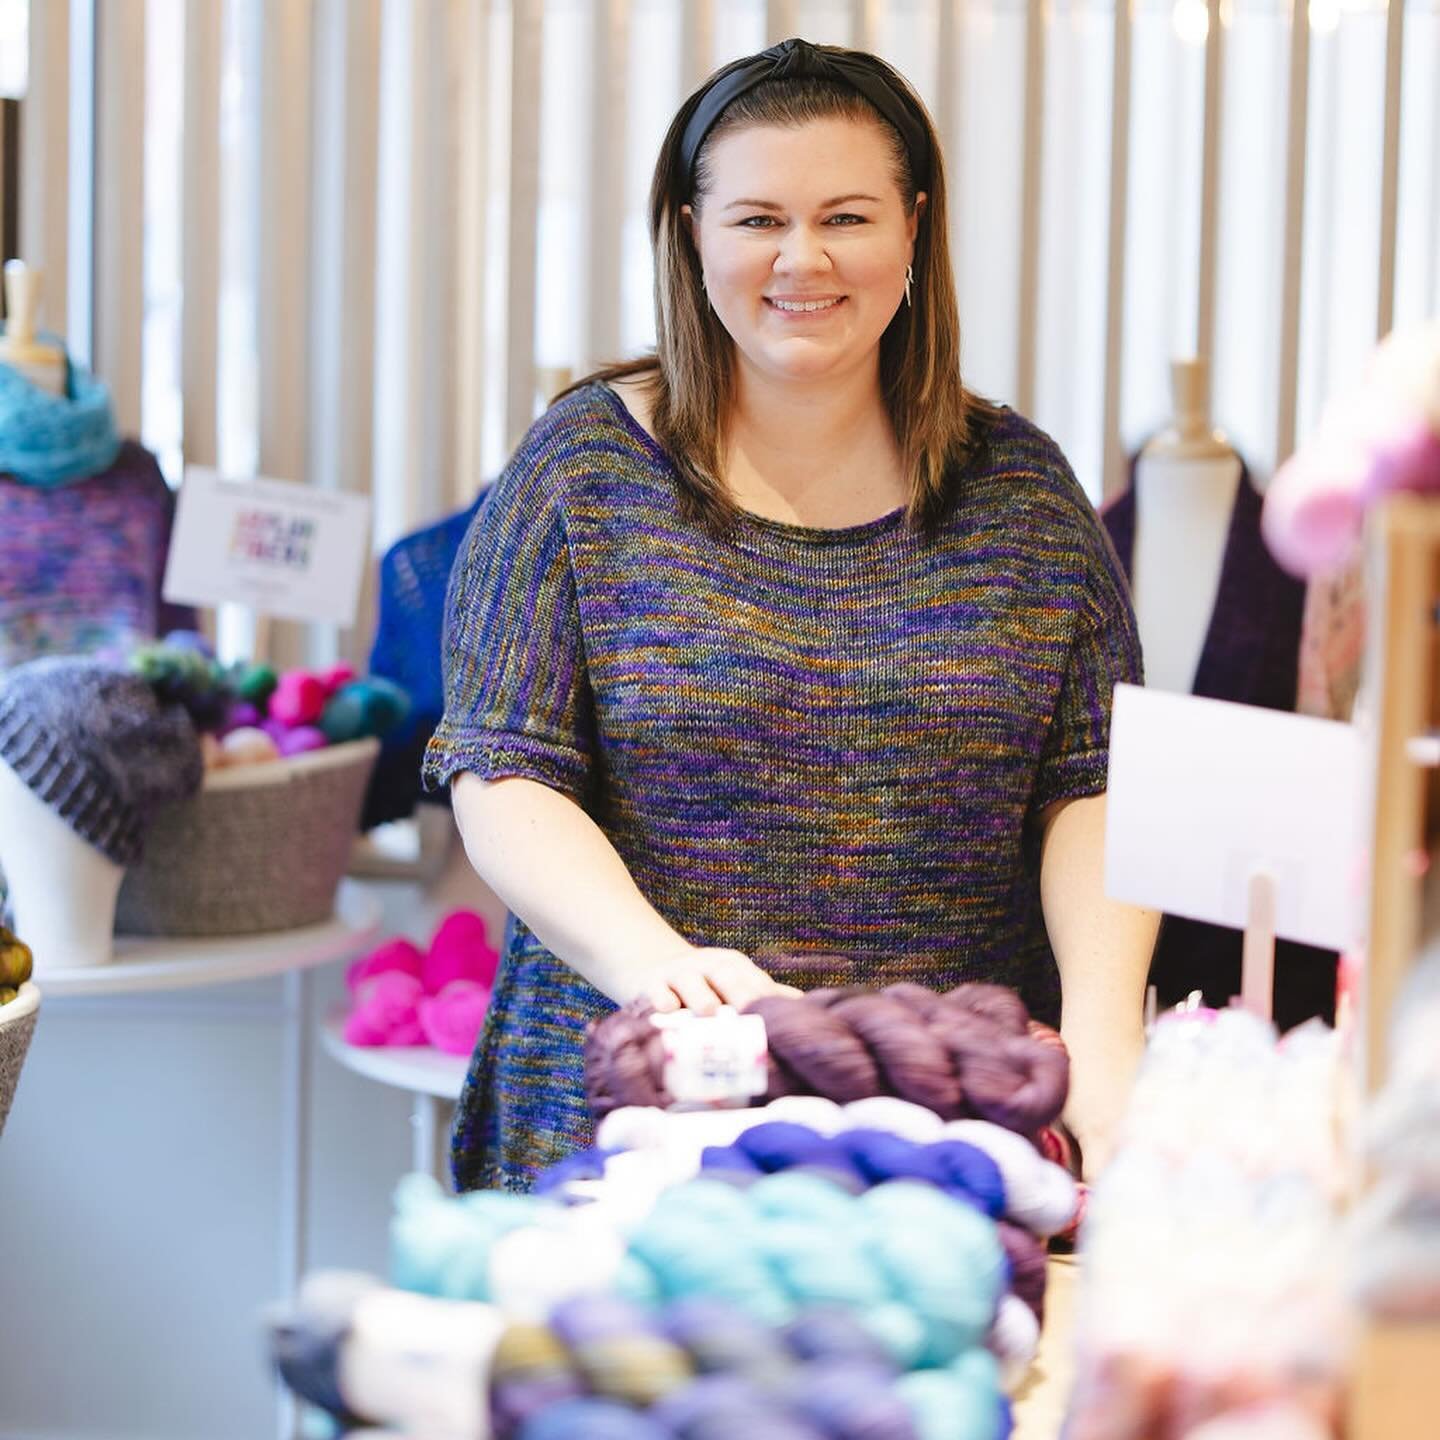
I love the look that Janet from Flowerchick Designs uses. You can clearly see her products and the variety as well as her branding. At a glance people are able to seethe colors and array of items. Her prices are clearly marked which is a big thing in display set-ups. You want to be able to answer customer questions, but also have the information available. By covering the tables with long table linens she can keep her extra inventory handy but still keep her display looking clean.


When I did my first event, I was given a 5x5 space to show my work and be ready to sell for four days in one of Chicago's biggest markets. No stress (are you kidding? I think I cried more than once).  I had to maximize space but seem inviting and show my offerings. I decided to go up and down much like Keri did.

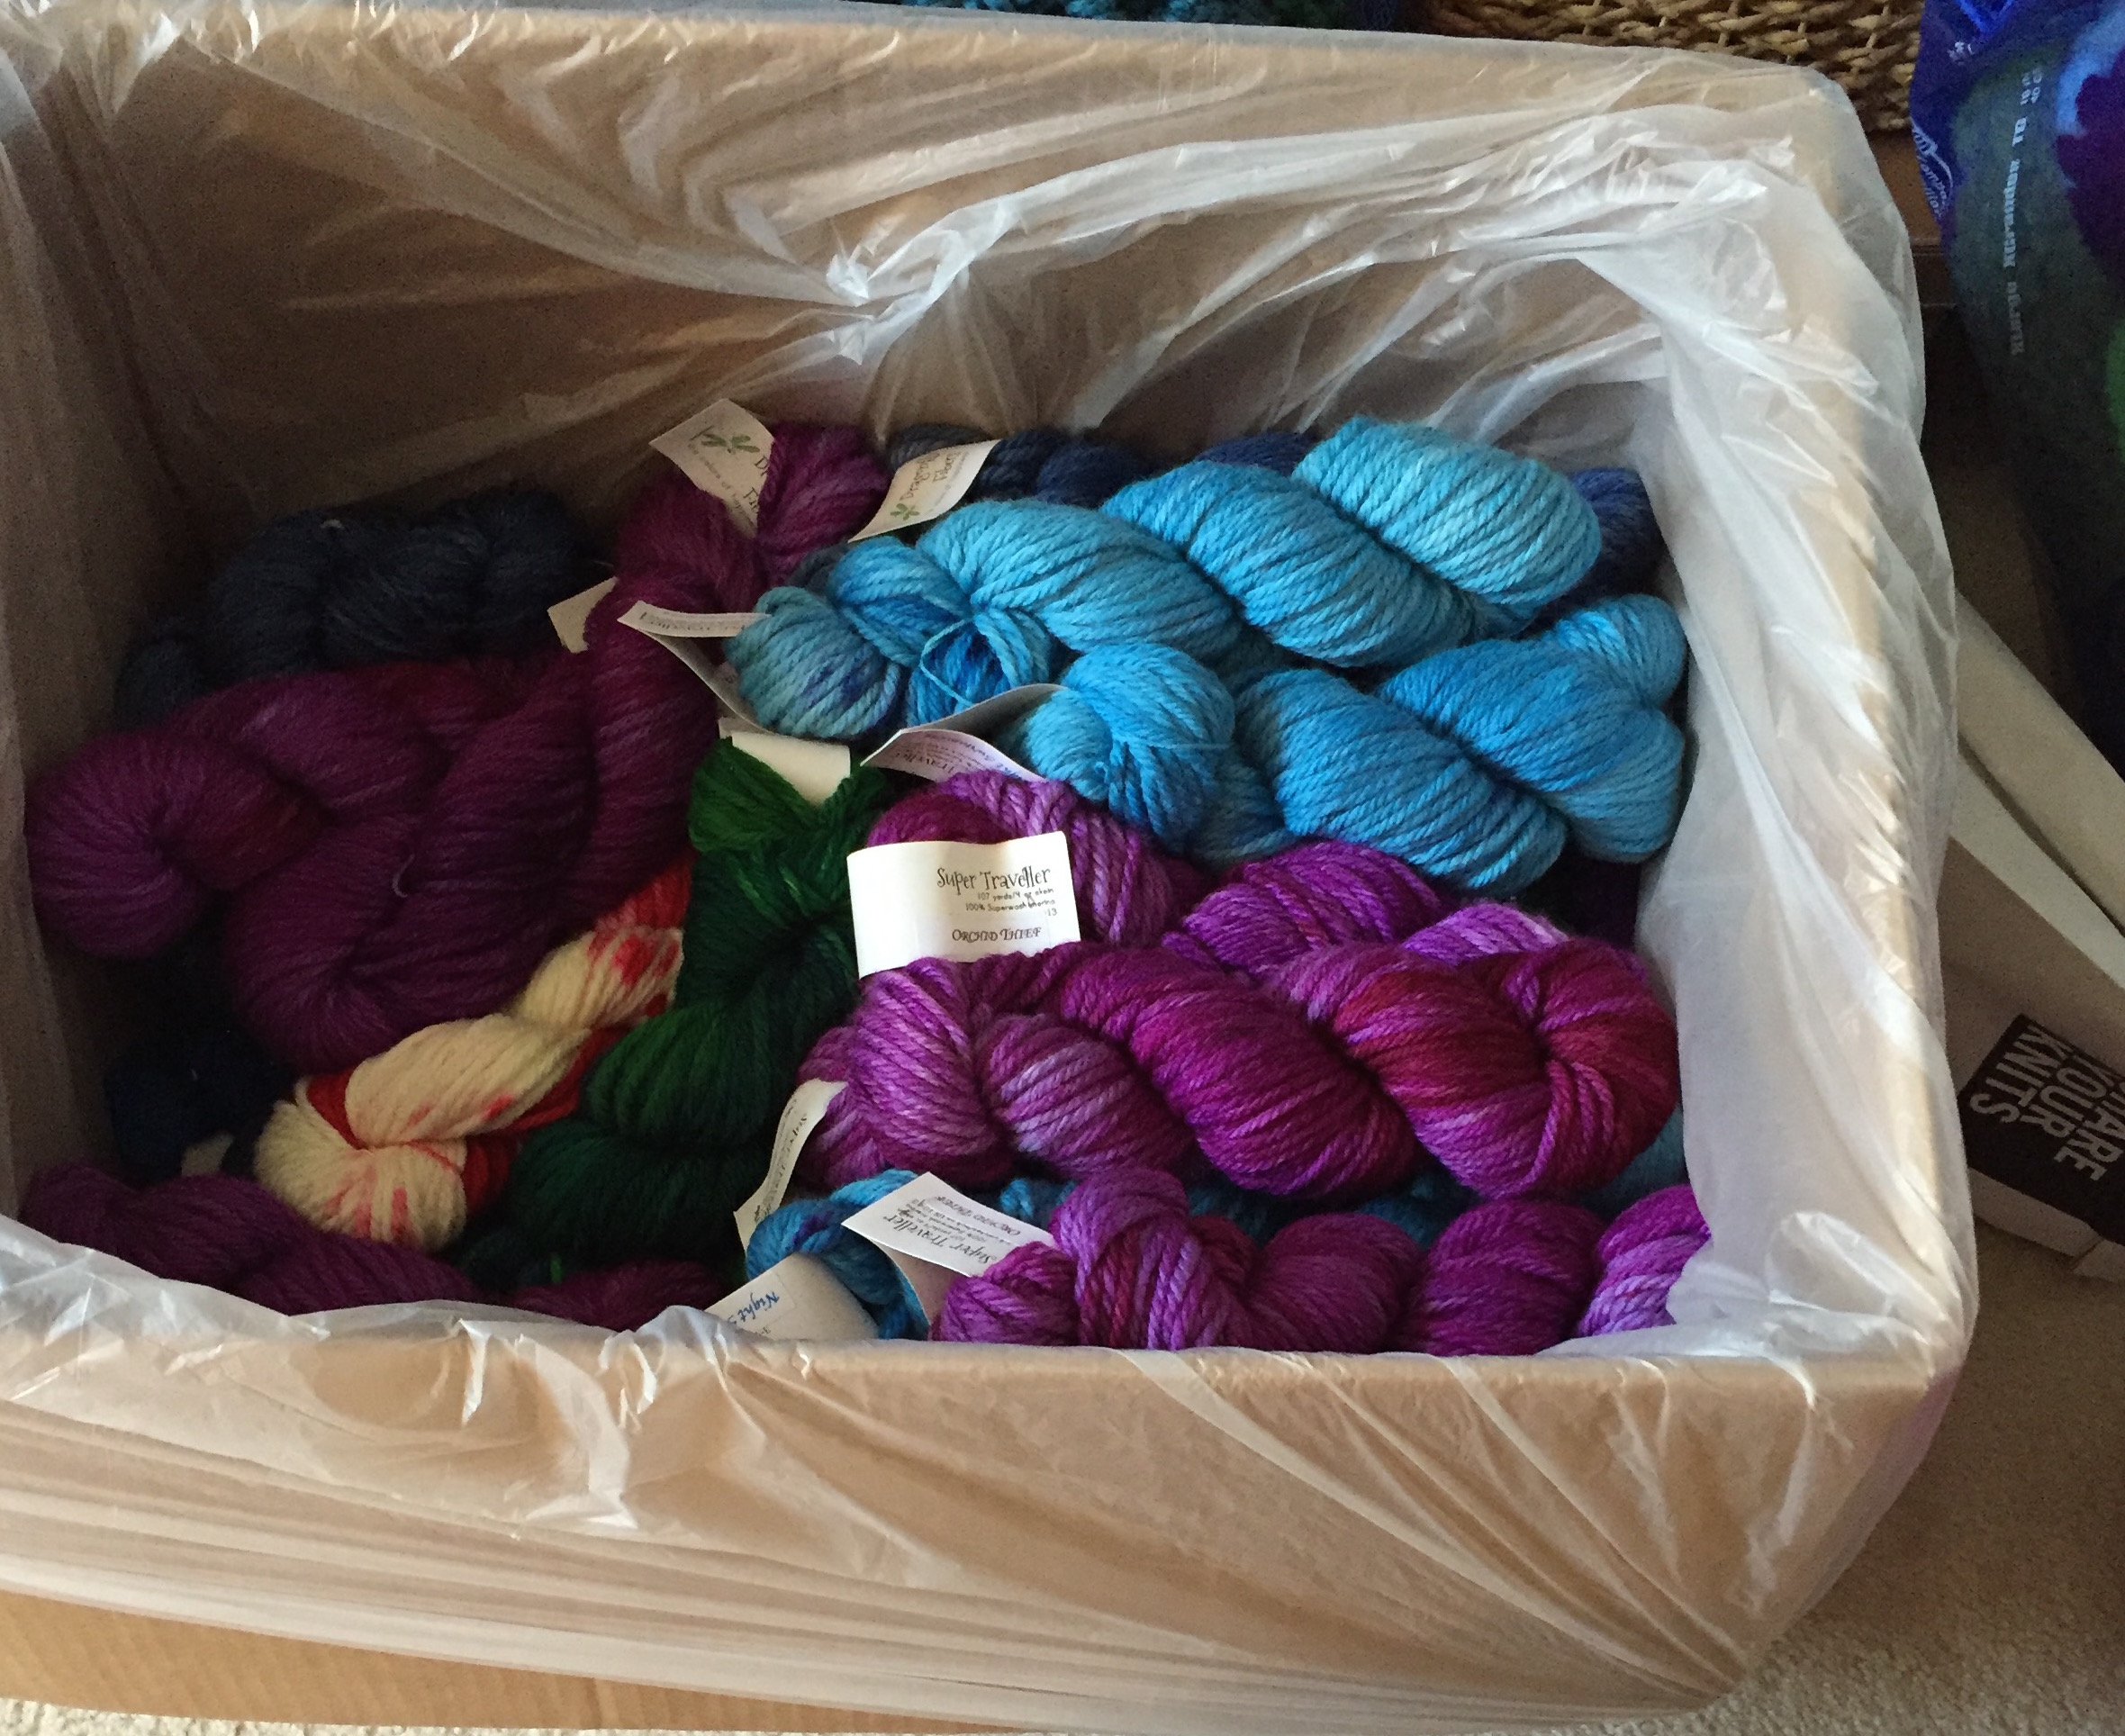
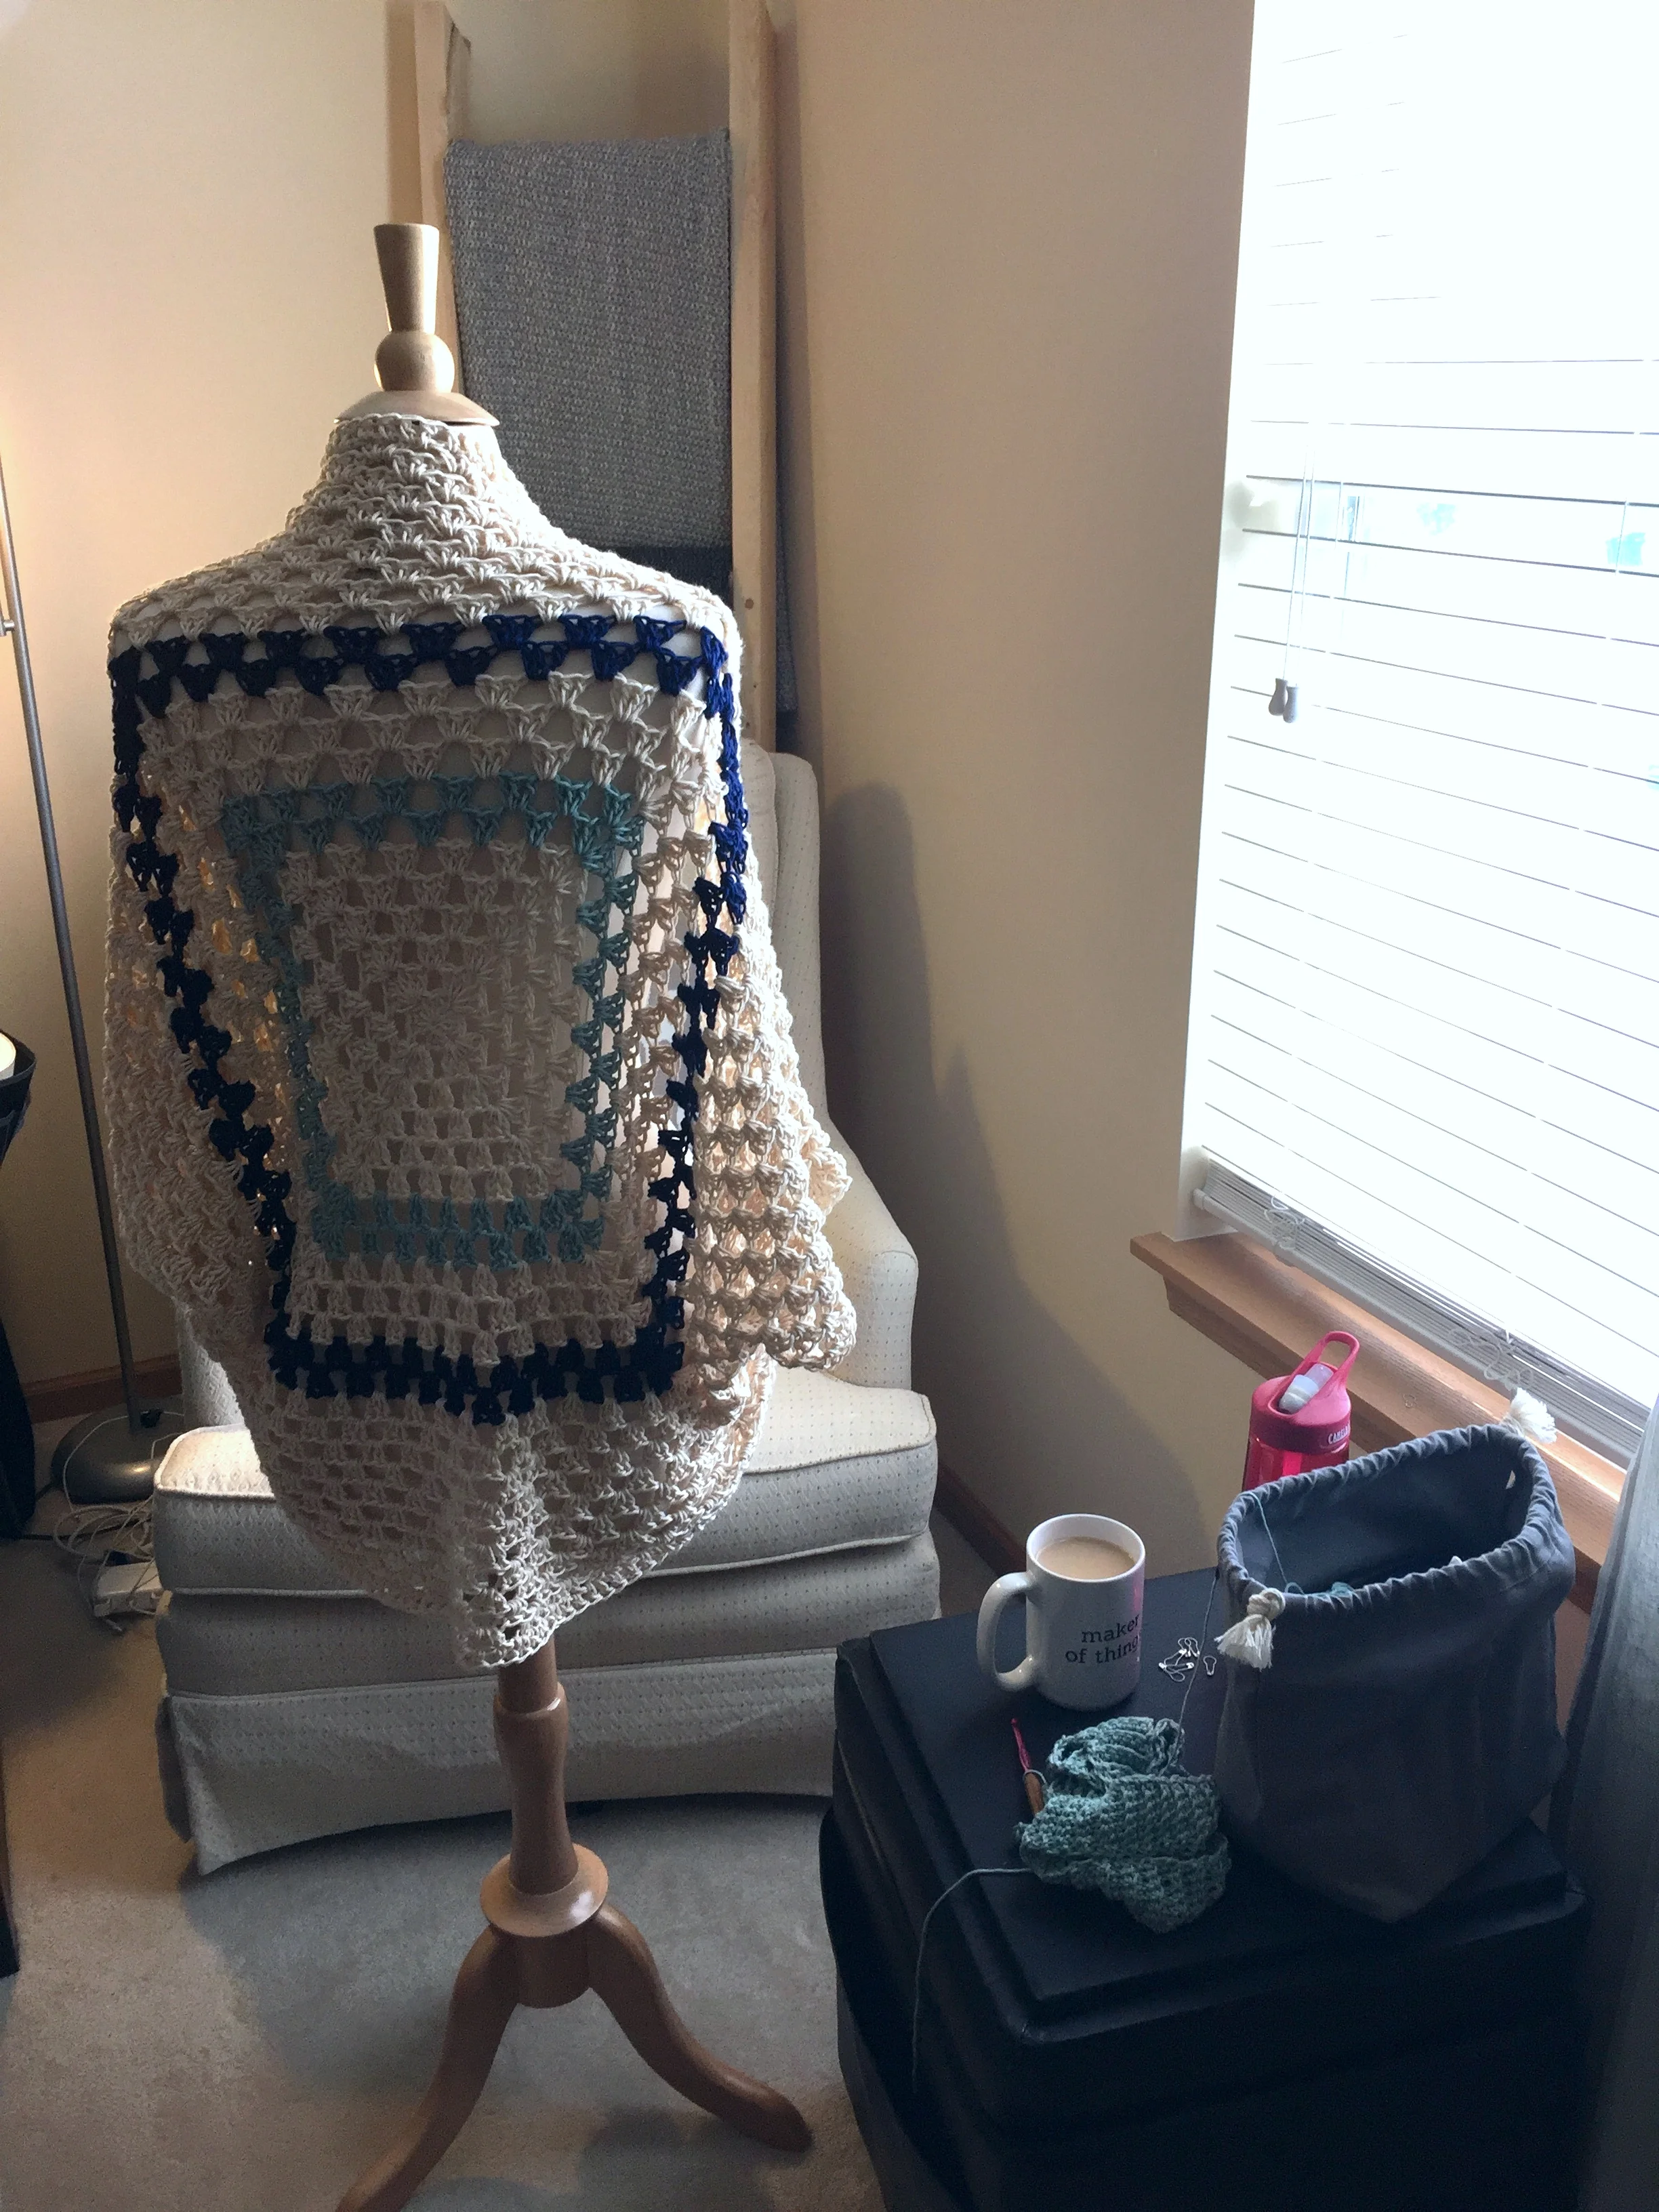
My total booth set up cost under $200 (which was $50 more than I budgeted so there's that). I used the dress forms I already had for my product photography and bought an additional set of Styrofoam heads to display multiple hat styles. I bought a variety of "Laundry" baskets at discount and filled them with lots of colorful product. This allowed me to utilize the floor space in front of my display table and also invited people to touch and feel. I actually became known as "the touchy feely booth" by the end of the event and it worked out perfectly because there was always that "crowd" vibe and fun at my booth.

Instead of "tables" I bought stackable plastic drawer totes and covered them with a solid black sheet. This allowed me to keep my inventory restock out of site to keep my both looking clean. It also allowed me to keep my restock accessible and handy as things sold.

When I moved up the following year to a full 10 x 10 booth in the Fashion District of the show I had to step my game up. But I knew it would be a long term investment as well. I brought the storage units from my studio to create a Wall Of Color. I also visited stores that were going out of business to see what I could get on the cheap. I got a $1500 wall rack full unit for $125! And at a closing JC Penny I got a full set of mannequins for $50! Kinda cool.

I have since made additional changes to my set up to better invite and serve customers. I also tailor my set up to the type of event. I always start with what will I be selling and where is the event. Then make necessary tweaks to my set up as needed. But it all starts with a base set up.

Whatever your set up - it is essential to be able to keep your display well stocked. When you make sales re-stock quickly. While empty tables and shelves might be a good feeling of accomplishment, customers like to shop and browse and have choices. It is a shopping mentality. So keep your re-stock handy.

Do you sell things that need to be tried on? If yes, don't forget to have a mirror AND a place where people can see themselves in that mirror. I once saw a booth hang the mirror so far in the back corner it defeated the purpose of having one because no one could use it.

Another thing that is so important is your signage. You want to be able to have brand recognition and let customers know where they are shopping.

Last, but certainly not least, be wary of overstocking and of excess. You don't want things to seem cluttered. It is a fine balance, but an essential one. Clutter turns customers off and excess (things like extra chairs, waters, etc) make it look more like a hangout than a booth.

It is a lot but do not be overwhelmed. Take a step back and vision your booth. When thinking of your display here is a list of things to consider. Answer these questions and use this checklist to get started to building a successful display. Share your pics with the community on Instagram tagging #stitchandhustle


Hot Off The Hook: The Riley Scarf (with Giveaway)

I have been on a roll with new designs this summer. I started the summer with some travel and a road trip and have been experimenting with new fibers. So much inspiration flowing I just love it. When I got my yarn delivery from We Are Knitters, it spoke to me and I was in squishy yarn heaven. Creativity was FLOWING! One new design is the Riley Scarf. If you follow me on Instagram you have seen some of this process. It has not all been pretty but it is my favorite part of what I do: bring an idea to life.

Sometimes designs take shape in an instant and my vision springs into life right away. And when I say sometimes, I mean rarely. Most of the time, there is a bit more work involved. I have an idea and start working with yarn on the design. Simultaneously I grab some graph paper and start mapping out my stitch work. As it takes shape I go back and forth - yarn & paper and until it is just right I keep tweaking and designing. Occasionally (read: often) I will pull apart or frog the project and start over a few times. That is how we end up with what is known as Yarn Ramen.

Once I have waded my way through a pile or two or Yarn Ramen, I can usually see the garment taking shape and coming to life. I always get so excited at this stage of the process because not only am I seeing the work pay off, it is the realization of an idea that was simply in my mind only hours (or days) before. Something so magical about that.

Once the garment is complete it is time for blocking. Ah - blocking... the love hate of so many fiber artists. I will freely admit, I do not block everything. But new designs? Garments? Things I will cultivate into collections? You bet! Block party all the way. But I don't mind. Pull out the steamer (or bucket in some cases) a packet of Soak and get to it.  All that work is worth in the end. Always so worth it.

Because then, after all that work, when I see my creation and idea come fully to realization, it is a feeling that is hard to describe. Then add to that, when people buy the pattern to make their own or when they buy the completed garment to keep cozy it only adds to the magic.  I am IN LOVE with this new Riley Scarf and I think you will love it too. And since I know I have both customers who wear my work as well as customers who make their own from my designs, I am launching the Riley with a VERY special giveaway: Enter below to win either the completed scarf or a kit to make your own. WHAT? Yup - that is right. Select your preference and enter below before the pattern or scarf are even released!

Both the pattern & scarf will be available after the contest for purchase here.

Insta Updates: Tips & What's New

Wow Instagram has come on strong with the latest round of updates. Let's take a look at a few of them and how you can use them to up your social media game. 

First Up: Stories. Now, I'm going to skip over how much this is like Snapchat because that topic is covered all over the web. I want to focus on why I think it's awesome and you should too. 

Instagram Stories goes out right into the bar of all your current followers. So it is enhancing and growing that relationship. That's awesome!  Isn't the whole point of connection on social to actually BE social and grow relationships? Heck yeah!

If you don't want to scroll through the whole bar of stories and end up in a never ending time suck of social media eye candy, you can simply go to someone's profile directly. If the circle around their avi is lit up with color, then you know they have shared a new story. To see it, simply hold down their avi. This keeps you free from all the stories of people you follow rolling into the next like a slide show and you just see that person's story.

I also love the message option. When viewing your story, people have the option to message you in response to your story just as you can message those whose stories you view. This is such a great opportunity to connect and develop relationships. In the few days since Stories launched on Instagram, I've both sent and received messages and already made new connections! That's a social media WIN!

The privacy options are basic but good.. Separate from your feed, you can decide who sees your stories and who can respond. That's a great option for those with personal accounts who may want to limit interactions as opposed to those with a business or brand account. 

Another great feature is the option to see how many views your stories have gotten and who is viewing them. This is helpful to know what your audience is connecting with and who you can reach out and connect with as well.

Next Up: I want to talk about the option to make your account a "Business Account". This is cool because it allows you to add a "contact" button which also frees up space in the limited Profile area where many business accounts put contact detail. It allows for a very clean professional look.

Another awesome feature of switching to a business account is it gives you native Instagram analytics. Best times to post, how your posts are doing and a starting point to build an effective campaign. This is essentially all you need to know to grow your account.

Even so, I'm still not 100% sold on this new option and here's why: Instagram is owned by Facebook. Yes, it's an entirely separate platform but we cannot ignore this relationship. I have to wonder if by siphoning out which accounts are business versus personal, if this isn't paving the way for a long term objective of Pay To Play for those businesses like Facebook has become for Pages. 

Another cool little update is Drafts.  This is awesome because I hate it when I've done some "edits" getting ready to post and then for whatever reason step away but don't want to lose all that work. Now, when I back out it allows me to create a draft. This is also helpful if I've got some down time (it happens like twice a month, but hey) because I can create some posts and keep them as a "draft". This way when I'm super busy but want to post I can pull up a draft and keep my presence while not taking up too much time.

I am pretty excited for these updates and think they are a great opportunity to grow on Social! What do you think about the updates?

Get Your Craft Fair On! Finding The Right Event

The year is just flying by! I cannot believe summer is almost over. So it is definitely time to kick it in high gear. It's August and you know what that means... September is just around the corner! That means cooler weather, Harvest Festivals, Cool Craft Fairs and Holiday Markets are just around the corner too. NOW is the time to prep. Actually - June is when I personally start prep but August works too :-)

Are you ready to get your Craft Fair & Festival on? Throughout August, we will have a series of posts to help you get Craft Fair Ready. I am by no means an "expert" but can share from my own experiences to help you elevate your Craft Fair game. We will feature posts on:

How To Pick The Right Craft Fair For You (this post)

Which Payment Service Is Best For You?

Setting Up Your Display For Success

Prep & Pack For A Successful Event

Check List Central Because We Love Lists!

I love attending Fairs & Festivals as much as having a booth. As an online store owner, it is a rare and special opportunity to get out and meet customers face to face. It is a chance to talk to other artists and vendors and grow in community. It is an opportunity to introduce new people to my work in a way that you can't online: by showing them the value of cozy handmade up close. But my love of all things Festivals doesn't transcend to just any festival! It is essential to be part of the right one.

So let's start at the beginning with the biggest, and seemingly most daunting, question: how to find and pick the "right" event. If you do not already have some Fairs & Festivals you know you want to apply to, here are some great links to find out about Fairs in your area:

Arts & Crafts Show Yellow Pages
Festival Net

Stitch & Hustle Market Season Tips

Research. Research. Then research some more. It can be such a sucker punch to have a "bad show" when it was all avoidable by doing just a bit of research as to what show you should apply to. Just because a Fair or Festival has tons of traffic and your target market, there are other factors to consider, such as weather and time of year. I sell cozy handmade accessories, mostly chunky heavy knitwear. So while I love a couple of local Chicago Summer Festivals, I know I have to love them as an attendee. Do people want to think about heavy knitwear in 90 degree temps outdoors? Nope.

Besides seeing if your work will be a good fit for the event, also consider is the Fair a good fit for your brand! Some things to consider and ask:
Do they only sell handmade or will you be up against a variety of small home based businesses (ie Scentsy, Chloe & Isabelle, etc.)? 
It is always good to know who will also be there. You can check previous year's events and vendors to get a feel if you will be a good fit. If your work will fit in well, but also if who already is at the market attracts the same type of customer as you.

What is the typical traffic at the show? What is the last 3 year attendance?
Again -do your research. Event track records speak for themselves. While "First Annual" has lots of hype and fun, it is a much bigger risk. I like to see an event that has grown in attendance. It tells me that they keep adding value and not only do people go back but they also attract new people. Also check the vendors - do they go back? This will tell you if they found it a success or not. I mean, would you go back to a Fair you lost money at and did not sell well at?

Does the event have a strong web presence? Website? Facebook page?
This will be a huge factor when it comes to advertising. It will tell you if they do a lot of the legwork or expect the vendors to do it all. There should be a good balance, but more importantly when you drive your customers to the event site you want them to get excited to go support you there and bring friends.

Be mindful of deadlines. Be ready to get your application filled out the minute you know you want to apply. Here are a few quick tips for the application process:
1. Keep your bio short but lively. Let your personality come through but maintain professionalism. It is a tough balance so write your bio and have it saved and handy to go when you need it. Describe you, your work and what inspires you. And check your spelling! For real tho!

2. Send only high quality clean product photos. This is not your Instagram feed. You want to show your products, and especially if it is a juried show, show the quality of your work. Over stylized photos can take away from your product.

3. Read the full application directions thoroughly. Follow all of the steps, provide all of the requested materials on time, and completed. 

Most shows, fairs & festivals have fees. Fees range from application fees, to booth / stand fees, to tables and chair rental fees. It is essential to look at not just the application and booth fee, but all of your related costs when deciding on a show.  Here is a small checklist of things to consider about fees to get you started when considering if an event is right for you.

Factor in all of your related costs then determine what is your true break even number. Know it. Then ask yourself; Is the fee worth it? Can you make it back? Can you lose it if you don't make it back? Those are hard questions and I cannot stress enough how important they are.

Let me also take a moment to say this: No matter how much you research and prep and plan, sometimes events go wrong or people don't buy. So I suggest to have the mindset of a weekend in Vegas. Have fun. Consider the fees and costs that go into setting up to sell your wares a donation (that is what I call a Vegas gambling allowance). It is an investment into your business. While you hope to make it back, and then some, at the event, I believe the key is to not stress about it so having budgeted and the mindset that it is an investment will set you free from that stress. Because if you are not stressed, you will have fun. And if you have fun, you will likely have sales. And Sales is the ball game!

So with that I say: Happy Craft Fair season everyone.

Get Organized: Hooks & Needles

As a new knitter, I've quickly started collecting a variety of knitting needles and supplies. I've been trying my best to keep organized and shop smart so as not to amass a pile of things I won't use for the long run. But I know I needed a better way to store it all than using a vase on my yarn shelf. Especially since I travel so much. The vase won't travel well 😉

Since I have two crochet hook cases that I love from Atelier de Soyun on Etsy,  I decided to go back and see if she could make me a knitting needle case. She had some in her shop but I wanted something that would hold all my gak in one case. I sent Soyun a description of the supplies I had and some of my needles are F-A-T, some others are loooooong and I explained that I wanted to make sure they would all fit into a single case. I was so excited when she said it could easily be done. YES!

Well, I could not be more thrilled with this purchase.

My knitting needle case is perfect!  Yup... She nailed it. Every needle fits, even my F-A-T ones and long ones. She even added pockets for my shorter hat making needle sets as well as pockets for my circular needles. Every needle has its place and that makes my heart happy. I've got my needles all organized and ready for when I need them or when I travel.

While I was browsing her shop I noticed her lovely project bags so I also got myself one for my on the go days.  The project bag is so amazingly well crafted and has inside pockets for organizing my supplies and notions. It's the exact size I needed and holds enough yarn and supplies for projects on the go. I am particularly happy with the drawstring close for when I toss that bag in the backseat (come on, we've all done it then cried when the yarn spilled out). I am now ready for travel!

This is my third case from Soyun and I cannot recommend this shop high enough. How do you stay organized with your hooks, needles & notions? Share in the comments below.

July Project Pack Giveaway

Who loves summer projects? I know I do!

One of my favorite things to do in summer is pack up my project tote, grab a blanket and picnic on the front lawn with the dogs. Something about being at home and outside is the best of both worlds. With that in mind, we have put together quite the fabulous July Project Giveaway.

Check this out. You win ALL this:

Pattern & Yarn: One of my most popular designs is my Molly Four Way. It is perfect for transition from season to season. Wear it as a shawl, a scarf, a sarong or a wrap. Now you can make your own because you get the pattern AND the yarn to make it!

Mug: Of course you need fuel for your project so why not enjoy your coffee or tea in this awesome mug?  I start every day with a fresh cup (or pot) of coffee in one of my favorite fiber arts inspired mugs. Now you can have your own from Cluck Cluck Boots!

Project Tote: Well you are gonna need to carry your project around right? This AWESOME tote from That Darn Yarn Co. is so cool. It is bigger than most totes and what I love the most about mine is the long straps. That is a super cool feature.

Hook: We all have our favorite hooks and notions. Some of mine are from Clay Bean Co. Kelli even made me an awesome set of donuts stitch markers which I am madly in love with. You will get this ergonomic hook in the appropriate size to work up your new Molly Four Way.

Now THAT is a project pack! So enter below

POS Credit Card Readers: Which Is Best For You

Woo Hoo it is summer festival & craft fair season. That means we get to get outside, set up our pop-up shops & tables to show off our wares. Since I sell warm weather cozy wear, Summer festival season is something I enjoy only as a spectator and customer. But I do love the vibes.   

One question many handmade artisans have is about payment processing, especially since not many people carry cash anymore. I did some research when I was starting to sell at the One Of A Kind Show in Chicago and found that I am a fan of Square. Here is a link to sign up and get a free reader and get your first $1000 free processing.  (Yes I get credit for this link but no that is not a factor in my analysis)

For me, it is just easy and the fee is not too bad. I like the fact that I can get unlimited free card readers so when the booth is busy more than one of us can process sales. I like the reporting analysis because it is easy to read and lets me know what my best selling items are.

The inventory management system was a bit labor intensive to set up but they all are so this isn't a deterrent to me. I would have to set it up anywhere. It is extremely helpful to go through this step to know what really sells and what trends are happening with my products. It also gives me a good overview of traffic patterns in my booth which is extremely helpful.

I have a friend who uses the Etsy reader because it helps her presence on Etsy by increasing sales in her shop. For me, that is not a factor. Plus, I do not like the fact that it makes me subject to Etsy TOU which means I cannot directly market to those customers unless they explicitly sign up for my emails. Similar to why I don't like Pattern by Etsy, it means I am doing work for the Etsy brand instead of my own.

Whatever card reader & POS system you choose, be sure it is right for you and your needs. Below is a breakdown of the three I researched. I know that Intuit also has a card reader / POS system, but I am not familiar with it so you may want to explore that as well.

Happy Market Day season everyone


Wind 'Em Up! My Yarn Winding DIY Swift

As I started to work with more high end fibers I started to need a better yarn management system. Mostly because they come in hanks not skeins and without winding them I would end up with a mess. I realized very quickly I would need a yarn winder and a yarn swift. But Yarn Swifts are not cheap!

I had always loved the look of wooden Swifts for yarn but couldn't afford one nor did I have the space for one to be mounted. I mean $40-$120 is pretty steep when you are starting out. It also isn't efficient for me space wise. My studio is small. A magnificent swift would have to remain a "someday" not a solution to the current need.

As I started to look around I didn't find anything that fit my studio needs. My studio is lined with cubby shelves (more on that later when we talk storage and workspace efficiency) and since I also use these shelves for my booth at the One Of A Kind Show in Chicago, I couldn't permanently mount a swift to them.

So we took a ride to home Depot and about $12 later I had my very own perfect yarn winder. As time went on and my business grew I upgraded the hand crank to an electric winder I purchased online. But my $12 makeshift swift is still in place and works like a charm. Photos below in case you want to build your own.

If you want to splurge and get a yarn swift, this one from Knit Picks gets rave reviews but I have not personally used it.

Summer Kick Off Giveaway

Hope you guys are all having an amazing start to your summer (for those in AU - bundle up - it's getting cold!). Stitch & Hustle will be ramping up our content calendar but are having a slow peaceful start to summer on the beach.

But that's no reason we can't kick your summer off with a killer giveaway right? I've put together some of my favorite things for kicking off Summer Project Season just for you guys. Enter below. Up to TEN entries per person! Good Luck.

What will you win? ALL THIS:

Crochet Bible: Lucy and the gang at The Stationary Geek know what crocheter's need and have come up with an amazing project book: The Crochet Bible. I love it. Great for notes as I work up new ideas and designs.

Yarn Mug: Anyone who knows me (or follows me on Social Media) knows that I start every day with a fresh cup (or pot) of coffee in one of my favorite fiber arts inspired mugs. Krista from is serving up the super popular "yarn" mug which is def among my faves.

DIY Shirt: You may recognize Angel from Mad Love Shop from my shop or Instagram feed. She is an awesome graphic artist and hand screen prints her shirts. My latest fave is her DIY or die trying and perfect for summer project season. She will send you one in your size!

Pattern & Bonus: I am in love with We Are Knitters Pima Cotton fiber and so is anyone who touches it. It is perfect for spring, summer into fall. Jessica from The Hook Nook has designed this lovely Shawl for their pima cotton and you get the pattern free. But that is not all! Stitch & Hustle & We Are Knitters will send you the yarn to make it in the color of your choice. YES!
Hello Next summer project.

A Creative Friendship Story

This is a cool story:

I've known Sabina at Crochet Gallery for many years - since she started her shop I believe. I was looking for a triangle scarf for myself on Etsy and that is how I discovered her shop. I hate making things for myself, so I am more than happy to support another artisan to make something for me.  Since then, I have commissioned work for myself, and occasionally for my customers as well, and over the years we've enjoyed chatting about yarn and growing our businesses. Over time we have become friends; but we've never "met" in person.

Last week, Sabina posted about having s'mores on Instagram. I commented: "I want crochet & s'mores" and then she replied "come on down".

I thought about it and ...  it is slow season, I can crochet anywhere, I mean... why not! Since I was about to take a road trip anyway, I decided to change my plans and leave the next day. Once I reached her general area, I sent an email: "want to have s'mores tomorrow?" The reply was funny because even though we'd never "met" I could imagine her as she typed it. It read: "Seriously?"

I said sure... and a few emails later, just like that, the next day we were two old (and new friends) hanging out bonding over s'mores, crochet and yarn. If you follow me on Instagram you saw the awesome fire pit .

Sabina welcomed me and it was instant connection. We laughed, traded stories and she even made home cooked curry and a Bosnian bread for us to enjoy. (The woman is a dynamo and does it ALL). Oh, and yes, s'mores did indeed happen for dessert!

The next morning we enjoyed coffee, more laughs and she even taught me how to knit - which I've been wanting to work on and learn for so long. That was a huge bonus!

It was probably one of the best ideas I have ever had and so much fun in a short time. The time visiting flew by in fact. It was as if we'd always been friends, which we kind of have. Sabina is amazing and it was a blast hanging out.

I will always be grateful for the way we connected so many years ago and love the way this craft world really brings people together.   💖🌺🌷

Shrug It Off With We Are Knitters

I am so incredibly excited to share this with you guys. If you follow my personal Instagram, you know I have been on a weight loss journey and am down 34 lbs so far. While this is awesome, it creates some fashion challenges. See, I have an oversized shrug from Anthropologie  that I LOVE but it is just huge now. I swim in it. It is my Go-To spring and summer item so I am having a hard time parting with it without replacement. Then I looked at it and thought... Wait! I can make that.

Right about the same time, I had just frogged my 4th version of a baby blanket pattern I was developing in partnership with We Are Knitters (don't you just love them?). I was sitting there, staring at a pile of amazing Cotton Wool and it hit me... scrap the blankie and make a shrug. I let my WAK contact know my plan and they were also excited. Because... who doesn't love a shrug? Brilliant!

It came together perfectly. And we all know that rarely happens so I just know it was meant to be. Like my friend Amy says, "sometimes the yarn just speaks to you and tells you what it wants to be". She is so right!

I wanted to create a shrug that would be both fashionable and functional. Perfect for cooler evenings, over a swimsuit or as just a cozy accessory. An all season go-to staple item for my closet. I also wanted a pattern that would work for any size or shape, because we woman come in all shapes and sizes right :-)

It has been a blast designing this and I shared some of the process and progress on Instagram. This pattern is so much fun and I could not be happier with the outcome.

And now just for our community get this: The amazing team at We Are Knitters are sponsoring a giveaway. Enter below to win EVERYTHING you need to make this Shrug yourself. Seriously! All the happiness of a shrug in a WAK Kit. YEAH!!!!

That's not all, if you don't want to wait, you can now buy the pattern here and get 20% off your Cotton Wool from We Are Knitters with code WAK144Stitches. I mean, COME ON!!! If you were looking for your amazing next summer project, this is it.

BIG THANK YOU to We Are Knitters. This has been an amazing collaboration experience. And Enter blow to win the Kit!

Do What You Love, Love What You Do

Sunday Reflections:

my happy place: on location

Sunday morning. I'm up early, coffee in hand and sitting here working on my Lookbook and Marketing materials for the 2016-17 season. I couldn't be happier. 

Last year at this time I was stressed. Stretched thin. Trying to squeeze hours into already packed days. I was sad that my time to create and crochet was limited to but a few hours a day and I wasn't finding much joy in it at all because my mind was filled with all the things I needed to do. I was canceling and juggling plans and meetings and always running behind.

I had several projects in play at the time: Prepping for the launch of this blog (which is my passion project for a community that I deeply love); launching an extension of the blog: a consulting agency to assist other artisans become successful in their marketing & social media efforts; development of my tech start up (which was my brainchild and baby); designing new projects AND prepping to go back on location for a new show for several months. Not to mention family and home responsibilities.

Then I had the light-bulb moment.

While meeting with the seed money investor for my tech start up, he said something that changed everything. I do not think he anticipated the answer he got, but it was the right one.

my happy place: cozy crochet corner

He said: Michele, something has to give. To move forward you need to be 100% in this. You are spread too thin and before we invest further I need you 100% in this. Skin in the game beyond finance, this has to be your sole focus.

In that single moment, without even needing to think about it I had total clarity. He was right. While my idea and this project was amazing, it wasn't what I wanted to pursue 100% of my time. I wasn't willing to give up my other loves. Other loves which, oddly as it may be, compliment each other and give my life balance.

Look, walking away from my incredibly needed, viable start-up with seed money on the table was not easy. Especially since it fed my inner geek and I truly love the tech & start up community. But it was easier than I imagined and that's how I know it was right and why I've never looked back with regret. The same with walking away from the consulting agency.

I'm a creative. I'm a small business owner. I am not an entrepreneur. And because I know the difference I'm able to invest my time and resources into the places they are needed and the places that will grow. This clarity allows me to have focus which is essential when it is time for the tough decisions. By walking away from those 2 projects I brought the balance and joy back to my life and as a result, my business and this blog are thriving.

This doesn't mean I won't have other ideas and be part of new projects. This just means I have clarity and focus and both of those things feed my passion which leads me to success. But more importantly, it leads me to happiness. I am truly doing what I love and loving what I do!

Are you spreading yourself too thin?  Do you need to cut some projects loose? I encourage you to take a deep honest personal inventory this week. It will change your life like it did for me.

Taking A Trip With Super Traveller

Me & Kate in the Dragonfly Fibers booth

I attended my first Stitches Midwest event in 2013.  I had no idea what I was in for though. I arrived early the first day to check out the market place before my class. It was instant sensory overload of the most magnificent kind. Yarn, tools, supplies, more yarn and so many wonderful people. It was fabulous.

Though a bit overwhelmed, one Fiber Artist's booth stood out. I was drawn to the amazing vibrant colorways of Dragonfly Fibers. And once I started touching and felt the texture of the merino... well, thankfully I was in my element or I would have gotten strange looks I bet.

Kate Chiocchio, the artist is a wonderful woman and I knew I had to start working with her in an instant. Within a week I placed my first order and have been placing more orders since.

The items I create with Dragonfly Fibers are always well received in my shop and everyone loves the colors. They are some of my biggest sellers at the Chicago One Of A kind Show each year.

Bags Of Yarn Make Me Smile

In 2014, when I visited Kate again at Stitches Midwest to pick up my most recent order, I got the idea to design patterns for the Super Traveller which is my favorite of her offerings.  I just cannot get enough of it. It is a super wash merino bulky fiber that works up so wonderfully. The rich colors come alive with each stitch. I wanted to bring the personality of the color of the fiber to life through a collection. 

Of course, you know how it goes, add an idea to the To Do list and get back to work on other projects and eventually try to get to that idea on the list of many.

Rockin' The First of The New Roma Traveller Puff Stitch Hats


Then, about 8 weeks ago I got my latest shipment of Dragonfly Fibers Super Traveller and it spoke to me. The colors, the texture... So inspired, it stopped me in my tracks and I got to work on some new patterns right away. No more delay!

I had been working with the Puff Stitch (one of my favorites) when my yarn arrived and I knew it would lend itself so well to the bulky texture of the Dragonfly Super Traveller.

I started with a new beanie. It is actually an update on an old pattern of mine that I never really loved. It worked up so quickly and so perfectly it was like magic. Now, it is my fave hat instantly!

And, that magical combination led me to design the Puff The Magic Stitch Collection. It is divinely cozy, works up so well and takes you on a trip through the rainbow of color with variations on a stitch.

So, pick a pattern, get some Dragonfly Fibers Super Traveller and you too will fall in love. They are available on Ravelry, my site and Etsy pattern shop.


Five Product Photography Hacks For A Homemade Studio

Whether it is for your website, promotional materials or to post on social media, product photography is crucial for success.

But what if you are not a pro photographer with full light kit and studio? Here are five tips, tricks and hacks to help you DIY yourself into better product shots.


Tip 1: Change Your Scene
You can order very inexpensive backdrops from Amazon. I got the Elle Bella Paper Backdrops shown here for $10 each! Then just tape it to the wall that gets the best light and boom: you have a studio.

Or, if you are so inclined you can go the extra mile and order a set of stands to hang the backdrop from. I got this Limo Studio set shown here for $35 on Amazon.

Tip 2: Clean Light Box DIY
If you have smaller products and want that clean white lightbox look, hit up your local craft shop and get 2 pieces of poster board. I got the pieces here for a total of $3 at my local Hobby Lobby.


Tip 3: Steady As You Go
Even if you are using your phone, as I personally do about 50% of the time, invest in a tripod. I got the one here for $25 from Amazon and spent another $10 on the Jelly Fish Spring Mount for when I use my iPhone.

Tip 4:  DIY Floor & Backdrop Board
The truth is, sometimes it is just better to go with the classics and drop your product on the floor in a well lit room and shoot overhead. But what if your home rocks a 1970's avocado shag carpet? No prob!

Get yourself one of the $10 paper backdrops I mentioned in tip #1, grab a $2 piece of foam board and glue the paper to the foam board. Instant flat board backdrop. Ideal for almost any product and portable to go wherever you have the light!

If the light hits that one impossible sweet spot - no worries! Just get creative. I often use drawers to prop up my backdrop board in the bedroom that has the best afternoon light.  


Tip 5: Use Props
I realize it may sound counter intuitive because you want to keep focus and showcase your product, but the truth is that your image tells a story about your product. So use props to help tell that story and maintain your brand message. I love this mini chalk board I got on clearance for $2.50 but you can also use whatever props are in your home and fit your  brand message and vibe.
 

Hope these tips help you get started to better product photography. Feel free to also share your own tips and hacks below in comments. Happy shooting :-)

Stitch_And_Hustle_Tips For Better Fiber Photography-2.png

Win A Free Craftsy Class!

I am so excited to announce that Stitch & Hustle has teamed up with Craftsy to give away a free online class from their huge library of courses.

Craftsy has classes on everything to starting a new craft like quilting or crocheting or more advanced classes for those more experienced. There are even photography classes if you want to up your game presenting your products.

Each class is taught by an expert instructor and the best part (my favorite part) is there are NO class times! That’s right, you heard me: NO CLASS TIMES! Simply sign on at your convenience. No DVD’s or data to download and take up gig space on your device. If you have an internet connection you can sign on and attend your class from anywhere.

Your class will not expire as long as you have your Craftsy account. You can retake, or refresh yourself with your class at any time.

I mean come on! That’s a pretty sweet way to learn something new or keep progressing in the craft you already love.  Read more about Craftsy Classes here or check out all the classes they offer here.

Enter below.

Don’t Just Be Busy: Be Productive! A Simple Tool for Increasing Daily Productivity

Guest post By Alissa M. Trumbull

Sometimes I have these mornings where I’m paralyzed in bed. I can’t move. I won’t move. I’ve spent the night mulling over what seems like 100 things that need to get done the second my feet hit the floor. Instead of getting up and running, my head feels busy and not productive, and I spend the day running circles around myself like a dog chasing its tail.

I know that I, like many others, continually look for ways to increase productivity. Some days are hard: I might have writing to do, errands to run, a vast number of emails to read and reply higher than a preschooler can count, and a job or two outside the house that require me to be dark on social.

A few weeks ago as a guest on #H2HChat, Brian Moran shared what he does to be more productive every day. Brian broke it down for us and showed how tasks on packed days – and the easy ones, too – can be grouped into four categories:

Urgent – It has to get done today. Don’t go to sleep until it’s finished.

Important – It really needs to get done today. Don’t get in trouble for not doing it.

Everyday – The daily routine. Muscle memory items.

Nonessential – If it doesn’t get done today, it can happen tomorrow. It’s okay to sleep on it.

This blew my mind. Such a simple categorization would allow me to provide better structure and more meaningful organization to my day. As a big fan of post-its, I’ve taken to laying out each day since then in these quadrants.

In the same chat, Brian noted, “Today is for execution; planning happens the night before.” So, now I wake up in the morning with today laid out from the previous evening. As my day goes on, I am able to remove items from my digital list. Ideally, I’ve done everything in the first three categories by the end of each day (and god forbid I forget to feed the cats!).

It’s amazing how my overall stress level has decreased and my productivity has increased during the past few weeks as I’ve utilized this new system. I no longer wake up fearing a lengthy to-do list. Instead, the visual division positively impacts my day, allowing me to be more organized, less busy, and more fruitful in my day-to-day activities.

I feel better. My relationships are better. My work is better. My life is better.

ABOUT Alissa:
Alissa is a Community Gardener for BTC Revolutions. Her purpose in life is to help people find their aha moments. She lives in Denver with her husband and their two cats, and gets to see the mountains every day.

Got ‘Gram-Game? An Instagram Primer For Artisans & Small Biz

Let’s take a deep dive into Instagram as part of the Stitch & Hustle Social Media Series. If you are not using Instagram yet, I implore you to see if it is a good platform for your brand. I have a feeling it will be.

I love Instagram – in fact it is my favorite of all the platforms.  It is an incredible tool to grow you business, connect with other businesses and customers.  I break it down here into 3 segments: Posts, Community, and Metrics.

Since it all starts with what you post, let’s talk about that first.

I think of Instagram as the advanced Social Media version of the pre-school game Show & Tell. You have two opportunities to tell your brand story when you post on Instagram: in the photo and in the text.  A great Instagram post is more than just a pretty picture. It connects and tells a story.

You can also think of Instagram posts as mini blog posts. That way you are always trying to connect with every post and share with intent & purpose. And remember – every post is a representation of your brand.

First up: The Photo

Knitwear designer Ozetta Takes Us Into Her Cozy Studio On Her Instagram

Knitwear designer Ozetta Takes Us Into Her Cozy Studio On Her Instagram

The photo is the draw. It is the eye candy. It is what makes Instagram Instagram. Your images should give a cohesive theme and brand message. You can focus on reflecting the brand lifestyle, inspirations,  as well as just the product itself.  Give a glimpse to your behind the scenes or process. SHOW your brand message.

If you are starting out or have a personal small brand this still matters. For example a friend of mine was asking how to up her IG game for her home chef account. I say – go beyond the finished meal and glossy pics.  As a healthy home chef show ingredients in their natural setting. Show markets and shopping carts. Show the process. Show the meal prep. Instagram allows video: show us your knife skills and dice something! There are so many ways to mix things up in a single image that reflects your brand and community.

Building your Instagram brand profile for personal account or your business requires a cohesive and consistent message in all your posts.

On a technical side; You can use almost any camera really. There are so many apps and filters that sometimes your phone is your best option. Plus, it’s always handy. For specific product display or branding purposes, you may want to consider a DSLR or even hiring or collaborating with a photographer. But again, getting started with your phone is all you need.

If you want to take a quick course on turning your phone into your camera, I suggest one on Craftsy or this one on CraftU. But nothing beats playing around with it and learning hands on, learning when the best time of day gives you the best lighting for your product, etc. No matter what filters or tools you use, nothing can “fix” a badly lit photo so these are important things to know.

Mud and Yarn Takes Us behind the Scenes on Her Instagram to See her Process and Even Inside her Kiln

Mud and Yarn Takes Us behind the Scenes on Her Instagram to See her Process and Even Inside her Kiln

A couple of apps I personally love are Camera+, VSCO, & PicStitch. Each has various features that allow me to manipulate the photo to tell the story I want. Be careful with filters though. They are not all right for your brand image even though they work for others. You can also control the intensity of the filter with a simple click. So play around with filters and apps to find what works best for you.

Stay away from collages. While you want to show all the awesome uses and variations of your product, the truth is that they are distracting and do not convey a clear story or brand message.

One photo. One story. Minus the rare exception, that is my Instagram rule of thumb.

And have fun! It’s true this is work and you have a marketing purpose but having fun is just as important. It comes through in the image (I firmly believe this). So be creative. Play around with various angles of your product and in various locations and settings for your product. It is a social media platform not a catalogue shoot!

Next up: The Text

While yes, the photo should tell a story – your text should enhance that story. Go deeper to connect with your community. Maybe talk about your process. Or share personal detail about the day. Whatever you choose to share it should be with intent to connect with your community and stay within your brand message.

The text is a great place to offer something to your community. As we have talked about is the intent of this blog, our hustle should be to help others succeed and to be of service. No reason not to do that with your Instagram. Offer a tip. Offer insight to a design. 

Whatever your brand message, this is a great opportunity to start a conversation with your community. I try to leave my posts with a question, invitation to comment or call to action. Invite the community to engage.

Back to the home chef example; this could be where she talks about the difference between one ingredient over another.  Or offer the community a quick time saving tip to be more efficient. Maybe ask the community what their favorite herb or ingredient is then in the next post refer back to that favorite. Talk about the recipe and why you love it (which gives a glimpse to you). Make it about more than just the picture.

I am strongly against lengthy text every time. Mix it up. Keep the audience interested. Again, this is another opportunity to connect. Don’t miss out.

Another important aspect of text is hashtags. I could do a whole spiel on hashtag etiquette but I will refrain. Just know that within the main post 2-5 relevant hashtags should be the max. If you want to add another round of relevant hashtags you can do so in a comment. Use tags that your audience will seek out so they can find you.  Think like a customer!

So now you have a great image and interesting post. Posting it is only the first step. Now we get into your community.

Crochet & Knitwear Artisan Crochet Gallery Lets Us Experience Her beautiful Surroundings and Inspiration on Her Instagram Account

Crochet & Knitwear Artisan Crochet Gallery Lets Us Experience Her beautiful Surroundings and Inspiration on Her Instagram Account

Social Media platforms call them “followers” or “fans” but I call people part of your community. Interaction & engagement goes both ways and, as you know from the purpose of this blog, I am a firm believer in giving more than you take.

When new people follow you, check out their page. If it is interesting or appealing to you, follow back. Read their posts. Comment and start a conversation. Make that effort to reach out. It could be as simple as a “like” or happy face. Whatever your method, connect. Find accounts that are aligned with your brand. Interact and comment.  Don’t wait for people to come to you. Go to them!

When people comment on your post thank them. An unanswered comment is akin to saying “I don’t care what you say” and WE DO CARE what our community says. So BE social. Respond. Interact. Too often we think Social Media is about putting it out there. It’s not. It is SOCIAL Media. Read my detailed post on that topic here.

Which takes me to my next point on community: Listen!!!  The importance of listening to what your community is talking about cannot be understated . What interests them? What problems can you help them solve? What are they talking about matters because it is your opportunity to connect.

So now you’ve posted and listened and built community. But how do you know if it’s working?

Like any Social Media or Marketing effort, you need to have an intentional plan & strategy going in. You want to grow. You want to increase followers and ultimately generate brand loyalty and sales.  Develop a plan that works for you to achieve those goals. Then Track. Track more. Track, shift and grow.

Obviously if you see an uptick in likes, comments and “followers” you will know you are on to something. But I suggest you develop KPI’s that will help you meet your goals and know where to spend your time and resources and get an overview of what posts are hitting the mark. I personally use Iconosquare and you can try it free for 30 days.

Over the course of your first 30 days of posting with purpose as described above, you should be able to clearly see what resonates with your community and attracts new followers. That is what you build on to grow and ultimately generate sales.

Instagram should be fun but it is also work. So get to work and have some fun!
And don't forget to follow Stitch & Hustle on Instagram & join the community!


Pattern by Etsy: Is It Really Your Own Website?

photo from Etsy blog

photo from Etsy blog

You may have heard, either by news article, blog or an email from Etsy, that Etsy has launched a new Web Service: Pattern By Etsy and are rolling it out this week. Here is a link to the Etsy blog launching the service and the Entrepreneur post.

I can't say I am a fan of this but to serve you best, I will be objective...

On second thought, nah.. let me just lay it out for you. I am finding more bad than good here.

Let's start with the name: Pattern by Etsy. Who thought of this malarkey? I mean really?

In my first 24 hours using the service and reaching out to their customer support there was instant confusion, more than once. You see, I (like many many others) sell my original patterns on Etsy. So their support thought I was having an issue with a Pattern transaction. You can imagine how frustrating it gets spending the first group of emails trying to get them to understand I am talking about their feature not my patterns. Even when my email to support said "I am having trouble with the new website program Pattern by Etsy"... they still came back with instructions on how to download a digital pattern. No kidding.

It blows my mind that they would name it Pattern by Etsy. But moving on...

Pattern by Etsy is slick. It is glossy and pretty and easy to use. The set up process is a matter of a few clicks. Because it is a mask of all the data Etsy already has in your Etsy shop, there is no import. The items are linked on the back end.

You can select from a few Theme Templates and each allows a bit of customization. The customization is quite limited though. You cannot "add pages" or really customize the type of content on your site too far away from what is already in your Etsy shop. The initial content from your Etsy shop comes over and you can edit as needed but again, within the parameters of what Etsy already allows. But it is easy to use and setting up the entire website took a matter of minutes.

At first glance, Pattern by Etsy has all the trappings to entice crafters, hobbyist and small business owners already using Etsy. But hold on... it also has limitations and constraints that make me tilt my eyes,  smirk and shake my head.

Going beyond the fact that Etsy takes 48-72 hours for your site to go live (which baffles me being that they are in fact a tech company) let's talk about the nitty gritty.

Pattern by Etsy is designed to keep you within the Etsy vortex. Similar to how Etsy itself works, Pattern by Etsy will not let you link to an outside site. For example, on the “About” page, I wanted to link to my standalone site www.144stitches.com. The link would not go live forcing customers or site visitors to see the text but not have a clickable link. They would have to “copy & paste” the text into their browser to get to my site. But If I put the link to my other Etsy shop, www.144stitches.etsy.com then the link is live. So you see, it is not actually "my website" as I am still playing by Etsy rules keeping the consumer and me, the vendor and in this case site owner within the Etsy vortex.

Additionally, Checkout is still run through the Etsy check out system.  So customers are still not buying from “you” but are re-routed back to Etsy. This means if they do not have an Etsy account, they will be required to create one.

You work hard, marketing your shop and promoting your work. You spend lots of man hours developing your brand and driving traffic to your new website. In fact, you spend the extra $16 per year Pattern by Etsy charges for your very own domain so you are not using the “patternbyetsy.com” extension to further drive traffic directly to your site and create brand name recognition.

But, in compliance with Etsy TOU, you are NOT allowed to collect emails of your customers or market to them once they have made a purchase. You see Etsy views them as "their" customers and only Etsy is allowed to use their email for marketing purposes.

So now you have your stand alone site doing Etsy’s legwork… not your own. Your brand is now linked to Etsy on a deeper level and all the work you do to get traffic and customers to your site is wasted as you cannot grow them into returning customers. Yes, you are paying for the privelege of doing Etsy's marketing.

Pattern by Etsy promotes Unlimited listings and that you do not have to pay a “listing fee” to add items. But you have to pay $15 per month and still have the listing fees due Etsy any time you add an item. And since you can ONLY add items by adding them to your Etsy shop there is no way around that fee even if you plan to drive traffic only to your new Pattern by Etsy website.

So now you are paying the $15 monthly fee, $16 annual fee for your domain and your Etsy listing fees of $0.20 per item and Etsy takes a 3.5% transaction fee per sale. These fees add up quick. Seriously do the math. and you have to still follow the Etsy TOU though you technically have your "own" website.

One last nail in the Pattern by Etsy coffin is the fact that if you have multiple Etsy shops (as I do) then you must create multiple Pattern by Etsy websites. Yup... they STILL will not allow a single account to operate multiple shops. So in my case, where I have 3 Etsy shops, take all those fees I just mentioned above and multiply it by three. Not to mention I would need 3 separate domains, 3 separate marketing plans, etc. I mean what a confusing headache!

Look, I love (and hate) Etsy. It is how I got my start and has opened so many doors for me. But Etsy today is very different than the Etsy of old and I really can't help but feel like Etsy is scrambling to create new revenue streams by making features that entice users but are just to keep investors happy now that the curtain has been pulled back. To me this feels haphazard and without much forethought for the user, which is the Etsy customer. And I am not talking about the consumer. I am talking about small businesses who use Etsy to sell their wares. Those are the Etsy customer. The money makers for Etsy through fees upon fees. Yet here we are again...

So what do you do?

You are not helpless and if you want your own website and domain go get it! But be responsible and check all the options. If you have big Etsy inventory and are attracted to the fact that Pattern by Etsy integrates your Etsy inventory, maybe you will consider IndieMade or SupaDupa or SquareSpace.  Each allows you to import your Etsy products and I know IndieMade syncs as you sell. And if you have multiple Etsy shops as mentioned above, you can import from multiple shops. Come on... no brainer!

I am a huge fan of these platforms and if you do the math you get way more bang for your buck and have true site ownership and control of your brand!

IndieMade, Supadupa & SquareSpace allow you to add pages and truly control your content as well as customize any of the free templates they provide. You can create a blog to share news and updates if you want. Pattern by Etsy simply allows you to link to an offsite blog, as long as you don't sell anything there because that would technically violate Etsy TOU.

Personally I use Squarespace, though I have used both IndieMade & SupaDupa in the past. For my needs, Squarespace is working great. On my current standalone sites (I have 2) I can list whatever I want (or not). My monthly fee includes listings, data storage, email and whatnot. 

Another option is to get a domain from GoDaddy or a similar service for a few bucks a year then have it direct to your Etsy shop. For as little as $5 a year you can have your very own domain to begin your branding and still it takes customers to your Etsy shop. There - I just saved you over $180 a year :-)

Bottom line is that there are tons of options if you are ready to take the leap, have your own website and begin building your brand beyond having an Etsy shop. I just think anyone considering Pattern by Etsy should take a beat and do the math and decide if it is really right for them. And I think that Etsy needs to find a way to reconnect with the Artisans who helped get it where it is.

Are you using Pattern by Etsy? Are you considering it? I am interested in your thoughts so please join the conversation in comments below.

UPDATE:

When I contacted Etsy to cancel my "free trial" within the 30 day period, I was informed that it would take SIXTY (60) days for me to get "ownership" of my domain, that I purchased through the sign up for Pattern by Etsy so not to use the "patternbyetsy" extension. I was baffled because didn't I "own" it when I paid for it? Nope. Etsy does. And because of ICANN restrictions, they cannot transfer for 60 days. With only a 30 day free trial, that forces me to at least pay for a month to be able to use the domain I purchased and is unacceptable.

I then asked, well could they at least forward the domain to my Etsy shop while I wait out the 60 days? Nope, they said they cannot because of the same ICANN rule. This is odd - especially since on GoDaddy, or anywhere else, I can pretty much forward a domain straight away.

In the end, their support apologized and extended my "free trial" to the full 60 day period. The problem is that for those 60 days, they are killing my google rankings because it appears as duplicate content as mentioned above. Thankfully I did not test Pattern by Etsy with either of my two main shops. But I will still feel the pinch.


Another Wood Shop Adventure: Business Card Holders

While I was looking around Pinterest for product display ideas, I also noticed some other interesting ideas to display  my business cards. Previously, I had them just stacked on the table near my products.

I would often have to neaten up the pile and point to where they were. Well not anymore!

With some left over wood from another project, and another afternoon in the wood shop with my husband I present my new business card displays.

We cut the approx 2 inch blocks off of a scrap wood slat. Then used the router to create slanted spaces. You want to be sure to slant so that your business cards display with your information showing.

Quite easy to make and I just love them.