Tips For Better Maker Photography - Getting The Right Angle
/
I am so excited you guys because it is Friday and that means it is Photo Finish Friday!!!! HECK YEAH! And that means one of my favorite humans Katiusca of Between These Stitches is back to share her photo brilliance with us.
Today we are talking about getting the right angle and man this is a challenge for me so I am ready to LEARN!
Feel free to share in comments your photo tips, experiences or any questions you may have!
Today we're going to talk about angles, from a yarn perspective. In learning to take better photographs one of the things I realized is that the angle from which you take a photograph can make a difference to the look of your picture. I love experimenting with different angles and today I will show you how photographing yarn from the same position but different angles can give each of your images a new look.

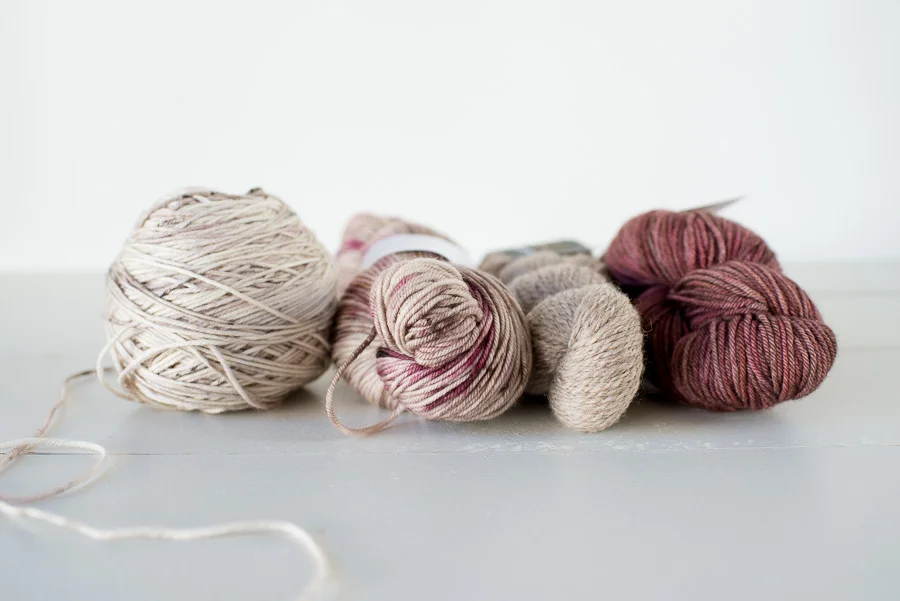
In the first image you see above I took a picture of some yarn that I am going to use for a sweater from a low angle and directly on. I usually like taking images like this because this look provides the perfect angle to see the texture and colors of my yarns, not to mention I believe that this angle is best for close ups. In the second image, I took a picture of the same yarn but from a slightly elevated angle than the first. You can see that the image doesn't necessarily change much but it does provide a different look. In the next image you can see that moving up (in terms of the direction of my angle or 45 degrees) really helped change the look and feel of my image.

I love this particular look because this angle creates a really pretty bokeh as well as give you a better look at all of the yarns and how they can work together. It also has a more rule of thirds feel, a term we will discuss in a different post.

This next image is not so much different than the previous image but the slightly elevated look may be more appealing to your eye. The thing about angling your photos is deciding which angle appeals most to you.

Once again, to capture this image I simply kept moving the angle of my camera up to see whether or not I liked the view of yarn. In this particular image I like that the yarn dyers or makers names are more visible. Also, the yarn on the left provides a place to draw the eye in.

This image is a direct overhead shot of the yarn. This shot is perfect to not only show off the name of the yarn but also to see a full side by side comparison of the yarn. It also is the clearest in terms of the yarn because the yarn is all on the same plane and that allows all of the yarn to be in focus together. With this look, there is less bokeh but its still a great way to display a fiber art item. I see many of these bird's eye view photos on instagram and its a really great way to show something from the perspective of an outsider looking in.
The point of angles in photography is to provide the viewer with some interest. That interest can range based on your tastes and what you are tying to achieve with the image you are creating. I love to play around with angles and some of my favorites usually are directly in front, at a 45 degree angle or from overhead at a 90 degree angle. This week take the time to play with some of the tings you have learned so far (how to play with light and manipulate it, using different angles and backgrounds).
What's your favorite angle?
-Katiusca