How To Create Custom Crochet Picot Edges For Your Crochet Shawl
/One of my favorite things about picot edges is that it can truly add that special finishing touch to any project. Especially shawls. Using these tips on How To Create Custom Crochet Picot Edges For Your Crochet Shawl you will be able to make your shawl projects shine with custom finishing that suits your style. With just a few tricks of your stitches, you can create dramatically different picot edging for each of your projects.

Picot edging takes some extra yarn so keep that in mind as you add this finishing touch to your projects. You will want to make sure to have additional yarn for your project. Depending on the size and style you select the amount you need will vary so it is hard for me to give you an estimate. I suggest being generous in your yarn allotment for adding Picot Edges.
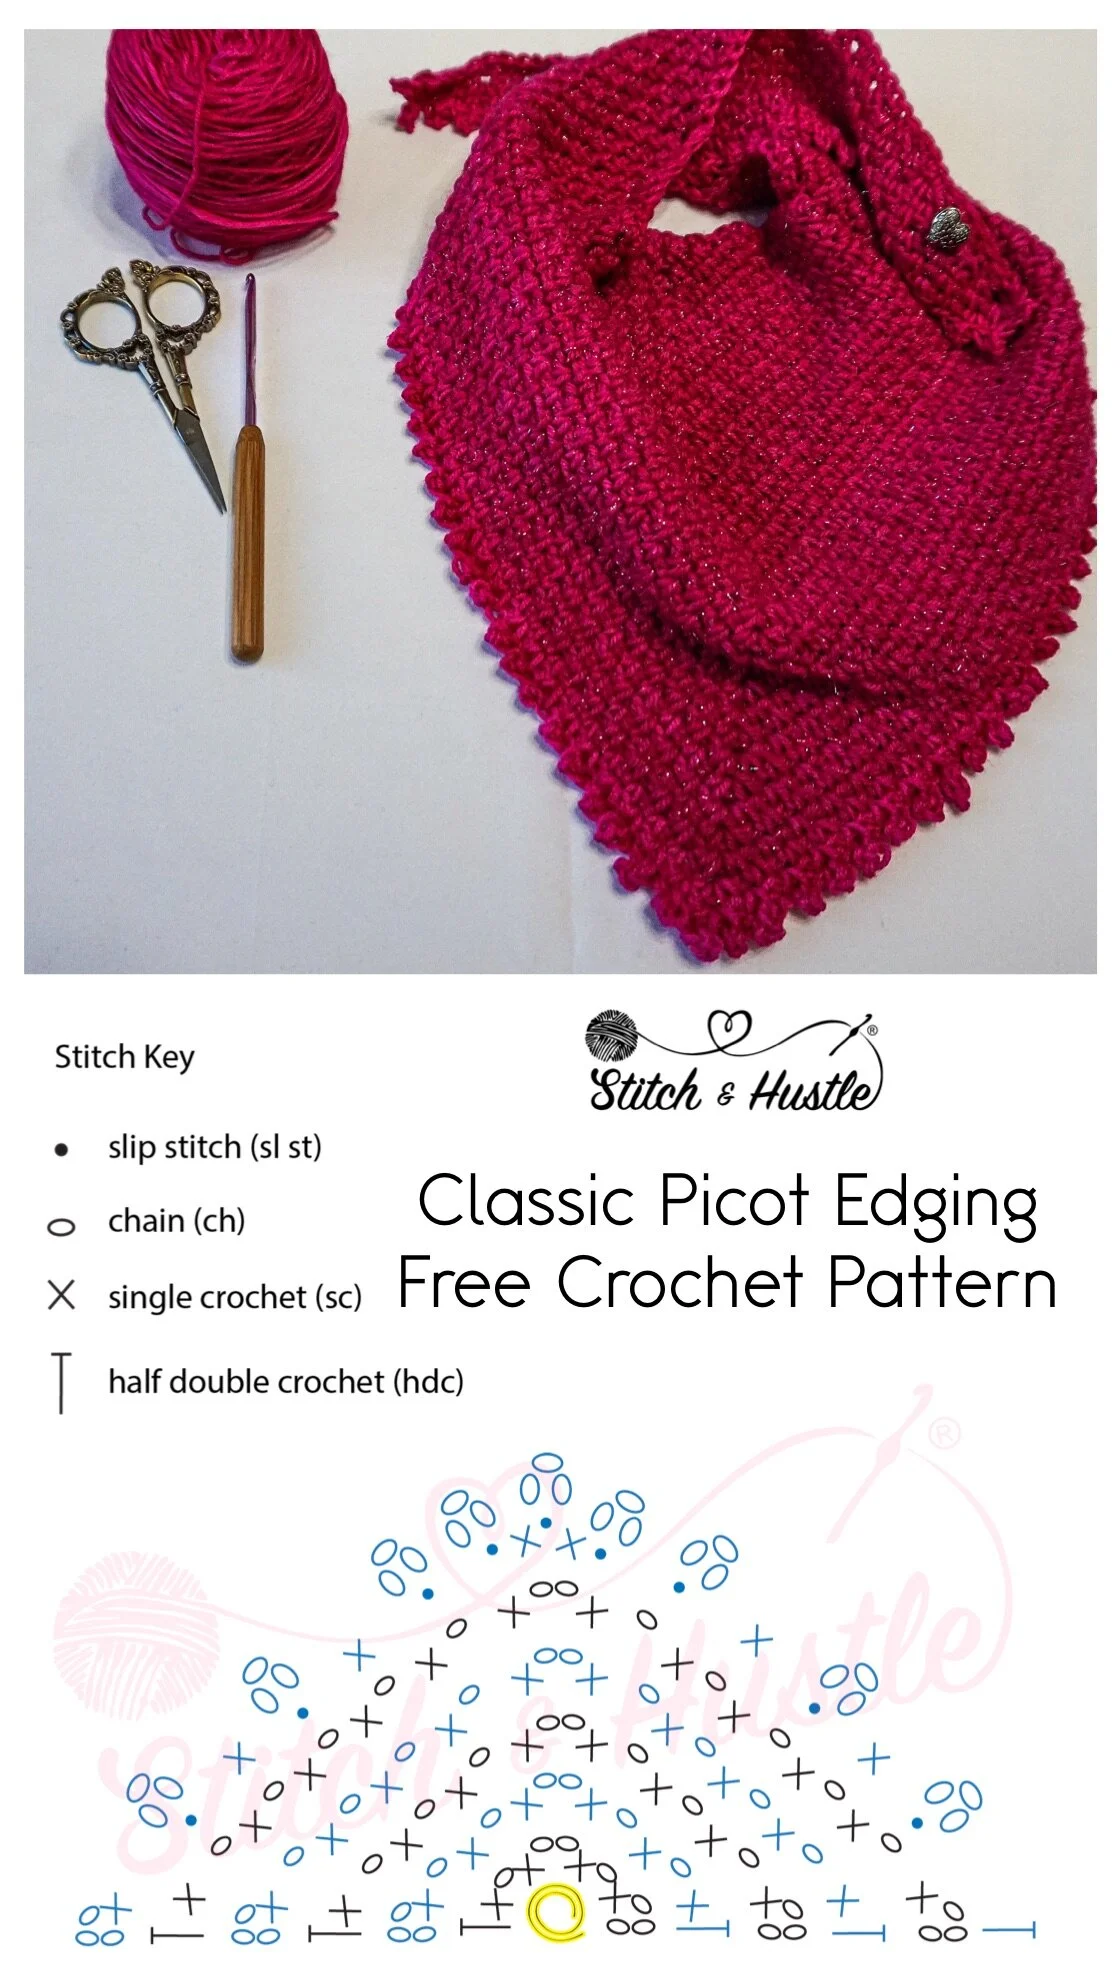
The first style I want to show you is How To Make Classic Picot Edging for your shawl which I used in my Montgomery Street Shawl Pattern. This is the most traditional of the Picot Crochet Edging styles and what you might be most familiar with seeing.
To create the classic picot edges, once your shawl is complete you will follow these steps:
Classic Picot:Ch 3, sc in first st, *ch 3, sl st into 1 ch, skip sc, sc in next ch sp*, repeat * to * to corner,
Corner: [ch 3, sl st into 1st ch, sc into ch 2 sp, ch 3, sl st into 1st ch, sc into ch 2 sp, ch 3, sl st into 1st ch,] in ch 2 sp, at corner,
* ch 3, sl st into 1st ch, skip sc, sc in next ch sp*, repeat * to * to end, hdc in last st.

Next is the Fancy Picot Edging like I used in the Oversized Montgomery Shawl here. Using the same shawl pattern, but this time I made the larger version so I decided I wanted a little bit of a different look. This Fancy Picot style gives the picot edging a bit more of a “stacked” style making them look like little curly pops at the end for a fancy ruffle effect. I really love how this came out.
To create the Fancy Picot Edge for your shawl you will follow these steps after you completed the last row of your project:
Fancy Picot:
Ch 3, sc in first st, *ch 3, sl st into 1st ch, skip sc, sl st in next ch sp*, repeat * to * to corner,
Corner: [ch 3, sl st into 1st ch, sc into ch 2 sp, ch 3, sl st into 1st ch, sc into ch 2 sp, ch 3, sl st into 1st ch,] in ch 2 sp, at corner,
* ch 3, sl st into 1st ch, skip sc, sc in next ch sp*, repeat * to * to end, hdc in last st.
Note that In the classic Picot you were placing a single crochet between each Picot. In this Fancy Picot you will be placing a slip stitch into the stitch in between each Picot to create a more stacked look .

And last is the Dramatic Picot Edging like I used in the crochet version of the Inspiration Wharf Shawl. This is a great way to create some drama with more spaced out pops to your picot edges. You can really have some fun with this style of Picot Edging.
To create the Dramatic Picot Edge you will follow these steps after completing the last row of your shawl project:
Dramatric Picot:
Ch 3, sc in first st, *ch 3, sl st into 1st ch, skip sc, sl st in next TWO stitches*, repeat * to * to corner,
Corner: [ch 3, sl st into 1st ch sc into ch 2 sp, ch 3, sl st into 1st ch, sc into ch 2 sp, ch 3, sl st into 1st ch,] in ch 2 sp, at corner,
* ch 3, sl st into 1st ch, skip sc, sc in next ch sp*, repeat * to * to end, hdc in last st.
Not that in the Fancy Picot you were placing a slip stitch between each Picot. In this Dramatic Picot you will be placing TWO slip stitches between each Picot to create a more dramatic look and your Picot’s will pop. You can also use a sc if you want more “stretch”.